
Your 10-step plan for making an heirloom-worthy family cookbook
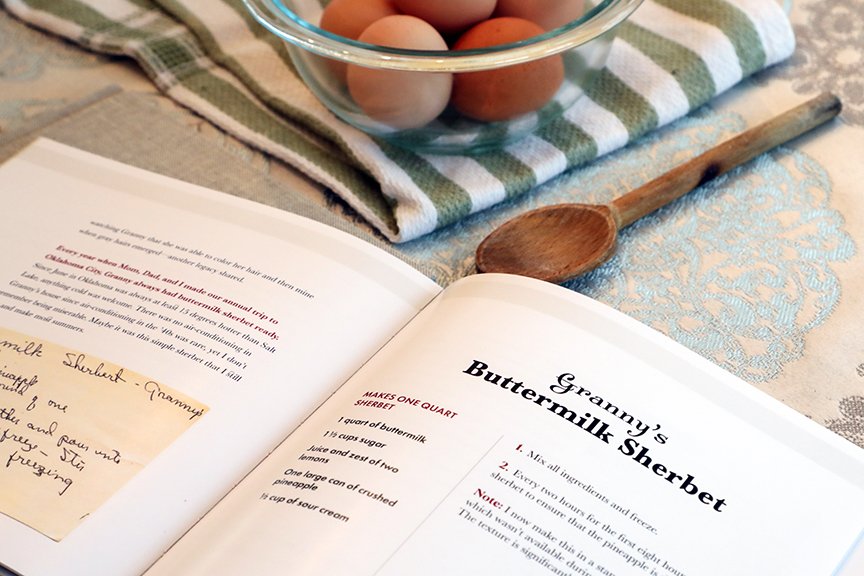
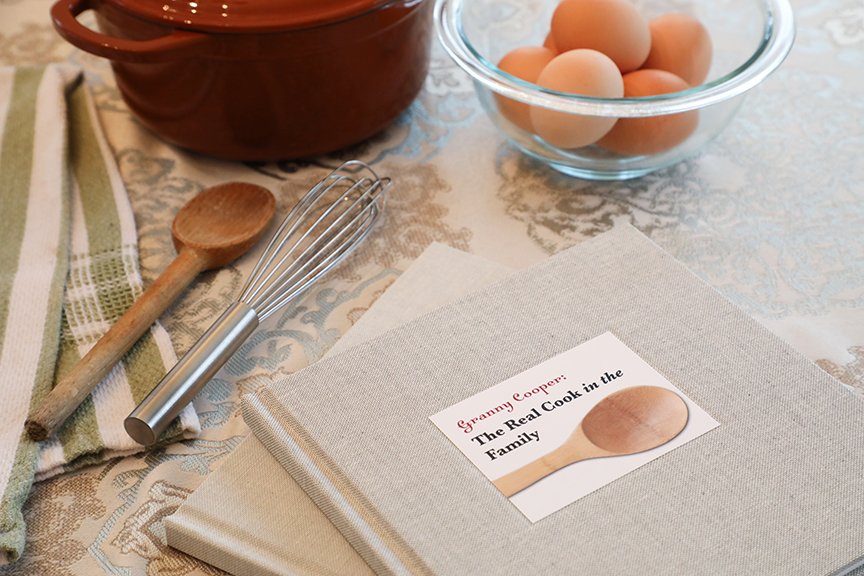
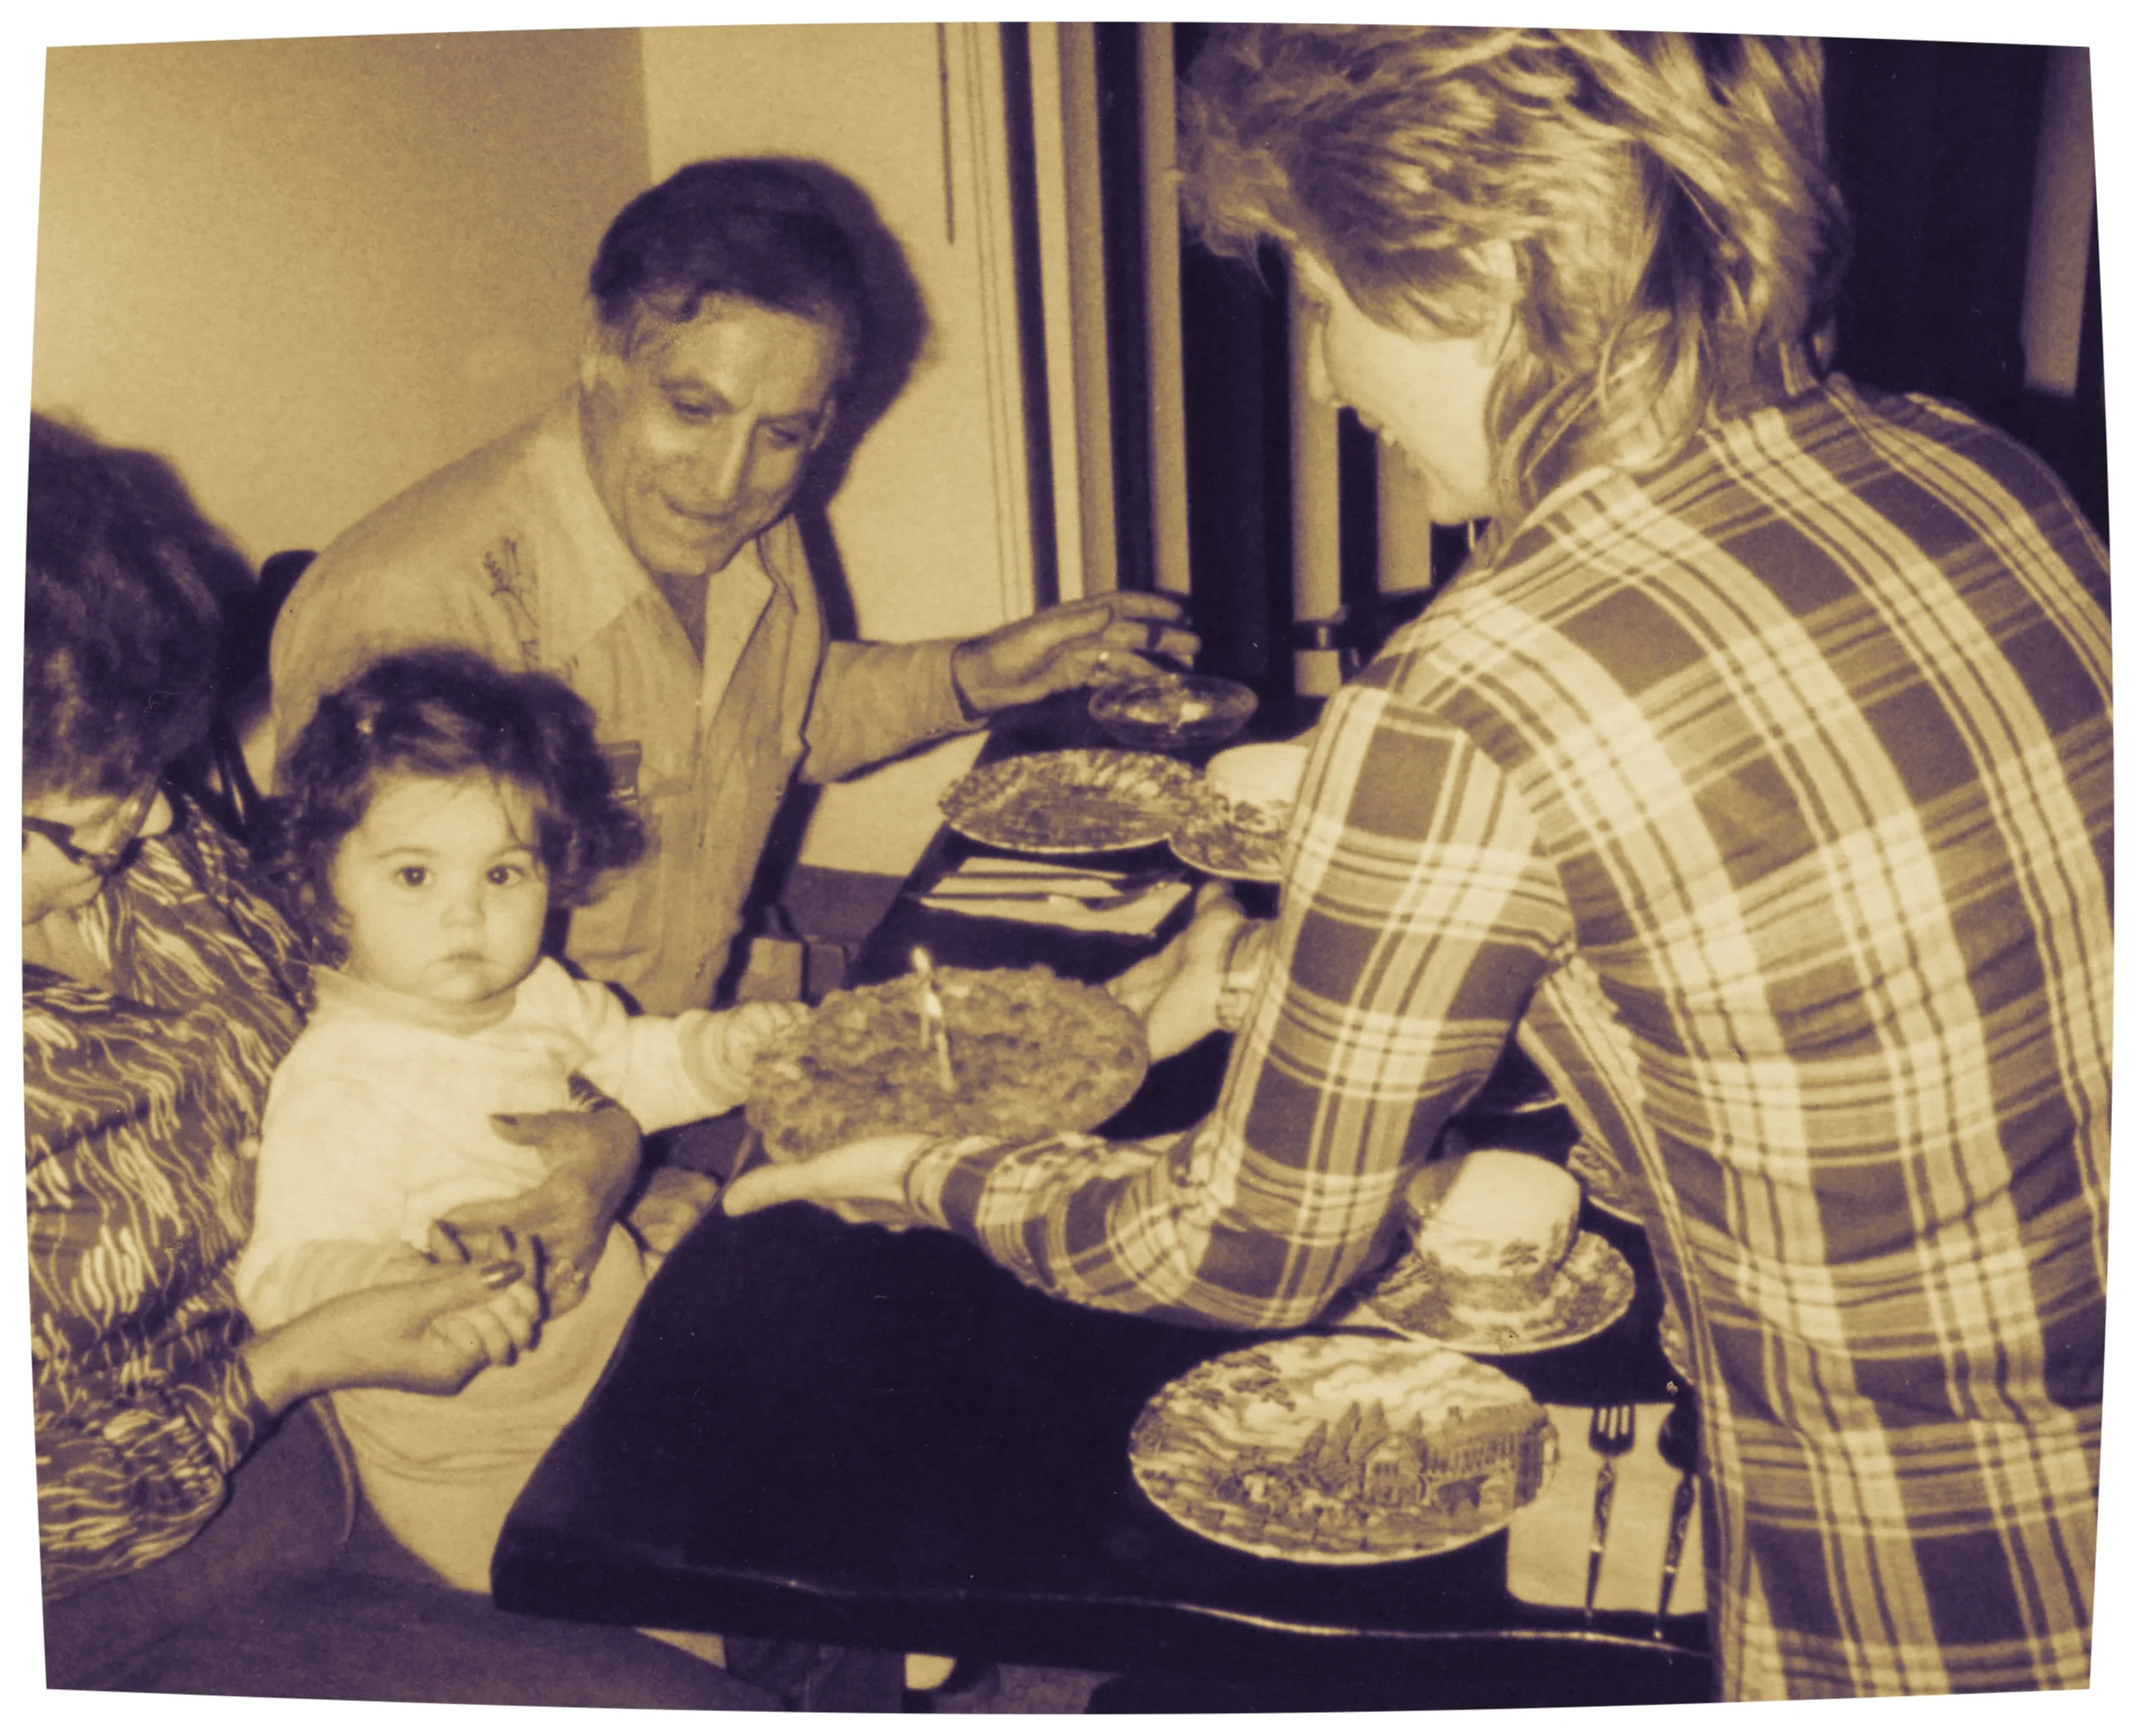
This family cookbook hones in on the recipes of one family member known for her prowess in the kitchen, Granny Cooper.
Want to put all your family recipes into a printed cookbook? Doing so will not only ensure that generations’ worth of foods get passed on, it will also give you the opportunity to indulge in some nostalgia and revisit childhood memories (ah, the smell of my mom’s roast chicken! the texture of Nanny’s potato pancakes!!).
Creating a thoughtful, heirloom-worthy family heritage cookbook takes planning and a fairly serious time commitment, but don’t let that stop you. This 10-step plan—with details on how to execute each step with flair and accuracy—will take the stress out of making your family history cookbook (heck, you might even find the process fun).
1. Decide on a theme.
Sure, your theme can be as broad as “our family recipes,” but I encourage you to go a little deeper; a tighter focus invites more meaningful storytelling and will ultimately help you curate which recipes to include. Some ideas for family cookbook themes:
Cooking with Nana
Holiday Dishes of the Ruggierio Family
The Tastes of Our Childhood
Mama Nash’s Birthday Celebration Secrets
Three Generations’ of Schwartz Recipes
Grandpa Lou’s Barbecue Bible
Categorize your recipes any way you wish—and remember, you can always make a companion volume down the road.
2. Gather recipes.
Here are some key places to look to ensure you get all the recipes you’d like to include (you don’t want to be hunting them down midway through the design process, so focus on finishing this before moving to the next step):
recipe boxes
file folders
magazines and cookbooks (even handwritten faves can be stuffed inside)
your computer
other family members’ homes
in someone’s head (if Bubbe is the only one who knows how to make the matzoh ball soup you love, best get the details out of her head and onto the page!)
I suggest brainstorming a list of recipes you’d like to include with a family member. Having a partner can help not only with accountability but also with discovery.
And don’t discount simple favorites such as the easy vinaigrette your mom made on every school night—you might be surprised by how the simplest of “recipes” can escape us years later.
3. Get cooking.
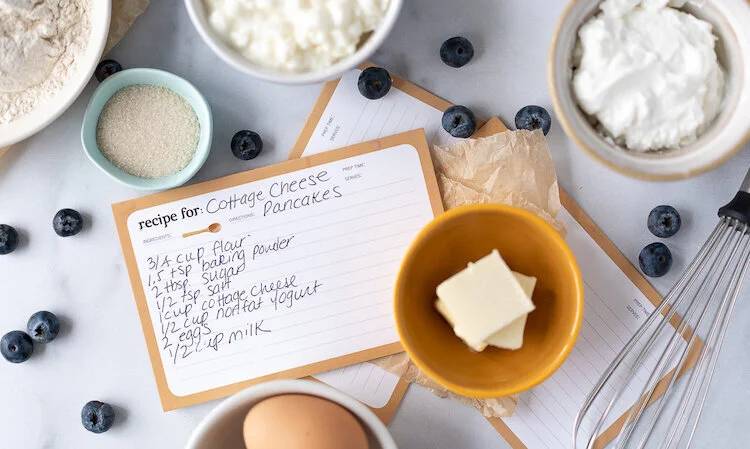
You didn’t think you’d get away with writing a cookbook without a little recipe testing, did you? If you want the recipes you include to be truly useful, cooking them with someone who has never done so before is a great opportunity to learn what steps may not be clear enough. Include specific tips whenever questions arise—for instance, “a cast iron pan works best” or “letting the meat get to room temperature before roasting will ensure even cooking.” Make sure that all ingredients have measurements; all recipes have cooking times and temps; and, when possible, indicate how many servings a recipe yields. Take notes as you cook and edit your written recipe accordingly later.
A useful approach: Test recipes over the course of a few months so you don’t feel rushed (and can truly enjoy the results over multiple meal seatings). When you’ve worked out all the kinks, then schedule a few consecutive days to cook many of them again, this time with photography in mind. I recommend taking some photographs during prep (you could do a still-life of some key ingredients, or take shots of a sauce simmering on the stove, or of a family member stirring the pot) as well as taking well-lit pictures of the finished dishes, either styled on your counter or at the table with family members included. A cookbook with gorgeous photos is sure to inspire!
4. Determine how you will record everything.
If you are working towards a printed cookbook, at some point all your recipes and stories will need to be typewritten and placed in one document—but that doesn’t mean you have to start that way. In fact, taking handwritten notes in a dedicated notebook while preparing your foods (see previous step) is an efficient way to get everything down accurately. Having a partner will also expedite your process: One person cooks and preps while the other takes notes (and later, takes photos).
If you are including stories alongside your recipes (please do!!), you may want to dictate your memories and record them with an app on your phone—there are plenty of AI-powered transcription services now that make converting your audio files to type easier than ever (check out rev.com or otter.ai). Remember that handwritten recipes will need to be typed up, as well, so they can be imported into layout software and designed after editing.
5. Edit the contents of your book.
Now that you’ve got all of your heritage cookbook content in one file, it’s time to edit. First, focus on structure: Sort your recipes into categories according to the theme you selected at the outset, and place them in an order that makes sense. Add subheadings for each section, as well as any stories that will accompany your recipes.
Next, edit for readability: Cut extraneous things, add explanation where it seems necessary, inject personality into your writing (this is your family cookbook, not a college thesis), and generally make sure everything makes sense and reads well. (A great tip for any kid of writing: Read along out loud and see where you get tripped up—chances are you need to fix your phrasing or shorten a sentence.)
Finally, it’s time for copyediting. If your grammar and spelling skills aren’t stellar, I suggest asking someone else to take on this step. This is where you fine-tune language and ensure consistency of everything from punctuation to fraction styles to ingredient amounts.
P.S. I can hear your groaning about this step—yes, it’s tedious, but impeccable editing will elevate your cookbook from a homespun craft to a real family heirloom.
6. Find a printer.
Yes, I advise you to decide upon a printer before you begin designing your book. Why? Because knowing their specs—available trim sizes, importantly!—and pricing options will help you decide upon a format that best suits your needs. If you know you are printing 10 or more books, you’ll be able to find a printer that discounts bulk orders; and if you just need one or two copies of your cookbook, then print-on-demand is the way to go. Some publishers may have their own proprietary software that makes designing a book with them easier; while others will expect you to prepare press-ready digital files in professional software such as InDesign (not something you want to be learning from scratch for this project, I assure you). This step and the next (design and production) are by far the ones most people need help with, but if you’re fairly tech-savvy and willing to devote some time to this project, you can create something special.
7. Design your cookbook.
If you are not a designer, this can be one of the most challenging steps, especially if you’d like your book to look professional. I recommend finding a few favorite cookbooks to emulate—you may find those on your bookshelf, or a trip to the local library may be in order. Here are a few basic tips to get your cookbook design going:
Create a design template according to the specs from the printer you selected.
Limit your typeface usage to two basic font families: one serif and one sans-serif. Set all stories and accompanying text in a classic serif font such as Times New Roman or Baskerville, then set the actual recipes in a sans serif typeface that has multiple weights such as Futura or Helvetica.
Be consistent with image placement—perhaps a horizontal image of the finished dish at the top of each recipe or a full-page image on the page across from your recipe. The stronger your photography at the outset, the stronger your finished family cookbook will be!
Choose a fairly neutral color palette so your design complements the photographs rather than competing with them. That doesn’t mean no color at all, but rather colors that will work alongside your images. Did you use bright pottery in the images for your Mexican-food cookbook? Then bold colors such as orange and blue may work. If your book includes mostly muted tones (images of bread baking and lots of flour and dough, for instance) then perhaps a combination of a subdued blue and a shade of taupe will work. Whatever combination of colors you choose, use those few tones consistently throughout the design for a cohesive look.
Include page numbers and foot lines throughout the book.
Create a table of contents listing all the recipes and their corresponding page numbers—and if you’re ambitious, also include an index so readers can locate recipes by ingredient.
8. Proofread your book, please!!
You’ve worked so hard to produce this special legacy cookbook—it’s worth your time to read it two, three, even four times to ensure there are no mistakes after it is designed. Ideally you will also ask another individual to give it a read, as your own closeness to the project can make it hard to spot some errors. Copyeditor pro tip: Don’t forget to read the largest type on the page; too often our eyes will skim right over headlines and titles, and that’s the last place you want to see a typo!
9. Print your book.
Hopefully you already settled on a printing service in step number six above. At this point you will need to export your pages in whatever format your printer designates—generally either high-resolution jpegs or PDF files. Check to see if you need to account for bleed (photographs or colors that run off the edges of the page), and pay attention to any warnings for low-resolution images—you’ll want to replace those so your book prints beautifully. After uploading your book files, do a final check to make sure everything looks good before hitting “send.”
10. Share your heirloom cookbook with your family.
Why not host a party with some of the dishes featured in the cookbook? Take some pictures and keep the memory-making—and legacy—going. If you’re gifting the cookbooks to family members, handwrite a dedication on the title page to personalize the books for each recipient.

Free Guide: Preserving Your Food Memories
Download this free printable guide with family history questions designed to elicit food memories.


Want to organize your family history archive? This cheap, convenient solution is a great way to record your stories until you’re ready to move them into a book.