
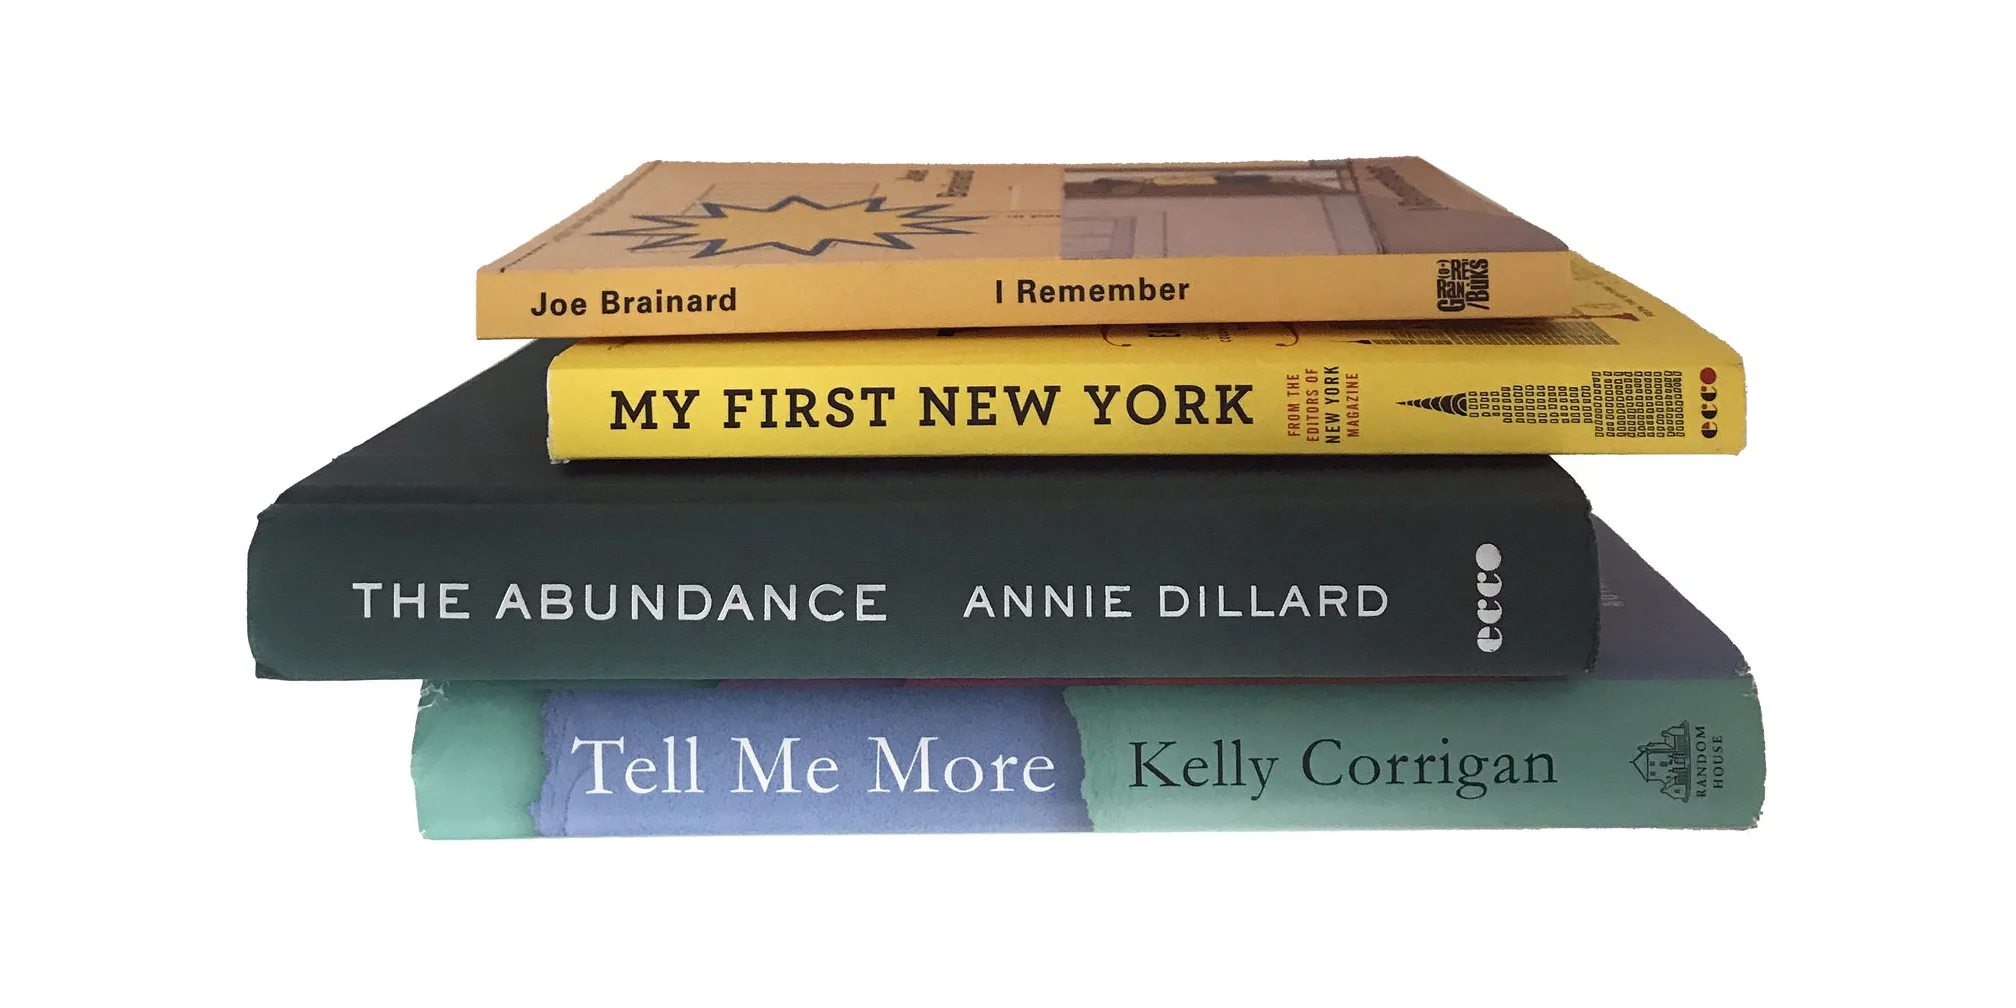
Memories Matter
Featured blog Posts

READ THE LATEST POSTS

The case for classic design
A book that captures your legacy should be designed with longevity in mind, so it remains engaging and accessible for generations. It should be beautiful, too.
Black leather and a debossed title elevate this book cover from boring to elegant, signaling the timeless page design inside.
I have a pair of Adidas Spezial sneakers that I purchased in the 1980s and still wear today. Adidas debuted the style in 1979, and it’s sold in an array of colorways as part of the Originals line on their website in 2025.
I have an Armani tailored black blazer that I bought in the late 1990s that I still wear today. Its materials and craftsmanship were worth the hundreds of dollars I invested in the piece when I worked at Vogue, and no one would guess it wasn’t brand new now.
My fashion sense has always tended towards fine classics (often embellished with bolder accessories that I can swap out as the times change). “Classic,” in the way I view it, is a synonym for “timeless.”
And “classic, timeless style” is an aesthetic I also apply to the heirloom books I create for my clients.
You won’t find trendy design approaches or typeface choices that broadcast a specific decade (unless that’s befitting the stories within, of course!) at Modern Heirloom Books. Instead, we’ll work together to find a design that feels right to the client and their stories, while also respecting tradition and legibility—so your book feels fresh and of its time, no matter when your descendants are reading it.
Why I opt for classic book design
Have you ever picked up a book and known it was old despite its pristine condition? Your grandparents’ wedding album, perhaps (pillowy white leather with gold italic imprinting, say)? Or a softcover book that’s been sitting on your shelf for decades (Are You There God? It’s Me, Margaret comes to mind for me, with its instantly recognizable cover treatments across different editions)?
Design, like fashion, can date itself. This isn’t necessarily a bad thing—retro aesthetics have their place; but for life story books, I aim for something more enduring. A book that captures your legacy should not feel like a product of a fleeting trend. It should be designed with longevity in mind, so it remains engaging and accessible for future generations.
“Designers choose typefaces by considering the history of type, the combinations of form, the balance between readability and surprise, the content and themes at hand, and the designer’s own desires and interests,” Ellen Lupton explains in Thinking with Type.
The two variables sandwiched in the middle of that sentence are of the utmost importance to me when designing an heirloom book:
Finding “the balance between readability and surprise.”
Serving “the content and themes at hand.”

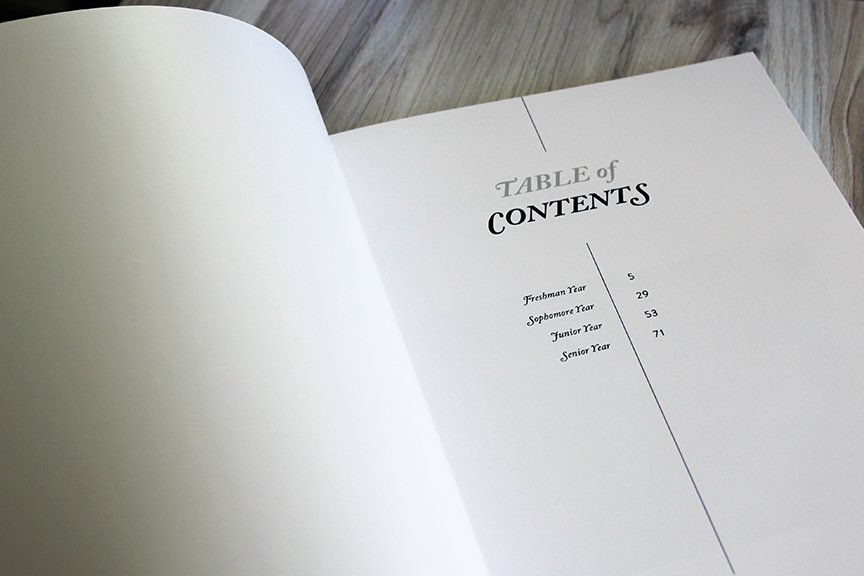
Ample white space gives a life story book breathing room.
The Balance Between Readability and Surprise
Readability should always take precedence in book design, particularly for long-form personal narratives. A typeface that prioritizes elegance over clarity—one with too much flair, too little contrast, or an overly condensed structure—becomes a distraction rather than an enhancement.
This is why many classic books use time-honored typefaces such as Garamond, Baskerville, or Times New Roman. These fonts have endured for centuries because they provide that perfect harmony: sophisticated yet unintrusive, distinctive yet universally readable.
Surprise, however, is where personality comes in. This might be through subtle flourishes—a well-placed drop cap, a unique yet restrained display font for chapter titles, a slightly unexpected but still harmonious color palette. These are touches that make a book feel special without overpowering the narrative itself.
Serving the Content and Themes at Hand
A book about a family’s multigenerational journey deserves a design that reflects continuity. A memoir detailing a life of adventure may benefit from visual storytelling elements like maps or archival-style captions. The key is ensuring that every design choice serves the story rather than pulling attention away from it.
Elements such as generous margins, high-quality paper, and a well-proportioned layout all contribute to a book’s readability and aesthetic longevity. White space, for example, isn’t just about making a page look elegant—it allows the reader’s eyes to rest, giving weight to the words and photographs that matter most.
This book of correspondence between a father and his daughter during her time at Georgetown University used Adobe Caslon, the same font in the Georgetown logo, for display type; Caslon was originally designed in 1722, and its modern iterations are still revered for its readability and elegance.
What makes a timeless book design?
There are a few fundamental principles that contribute to classic, enduring book design:
Typography with integrity: Typefaces that have stood the test of time, with an emphasis on readability and subtle beauty.
Thoughtful layouts: Balanced margins, considered line spacing, and harmonious text hierarchy to create an effortless reading experience.
Understated elegance: A design that enhances the story without distracting from it, avoiding overly trendy or gimmicky elements.
Quality materials: A book’s physical form is part of its longevity—fine archival paper, durable binding, and careful printing methods ensure that it lasts as an heirloom.
When you commission a personal history book, you are investing in something that will outlive you—a physical manifestation of your legacy. The stories within are timeless, and the design should reflect that. A well-designed book will not only be read; it will become a treasured heirloom, passed down and revisited for generations.
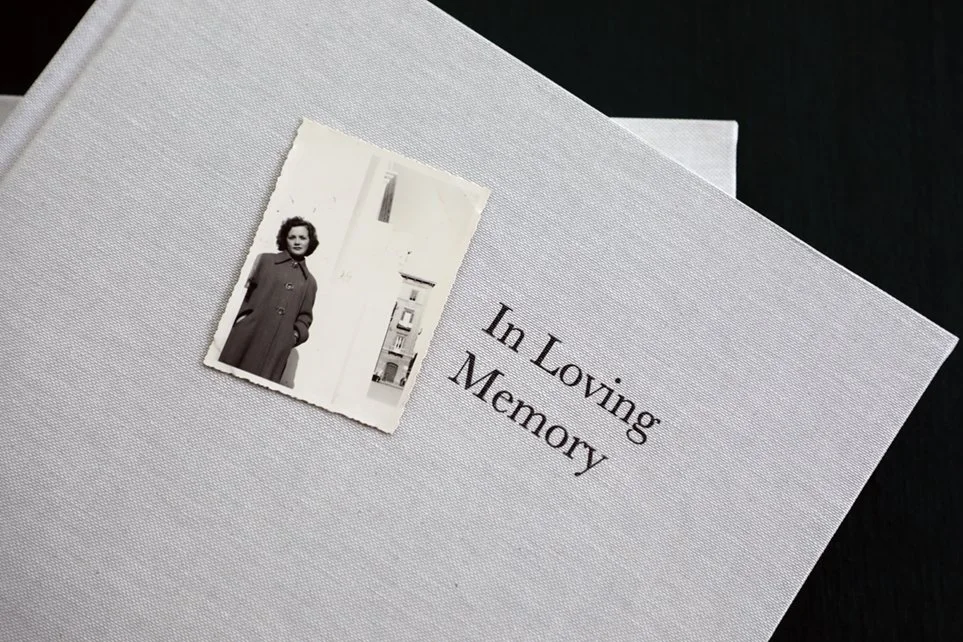


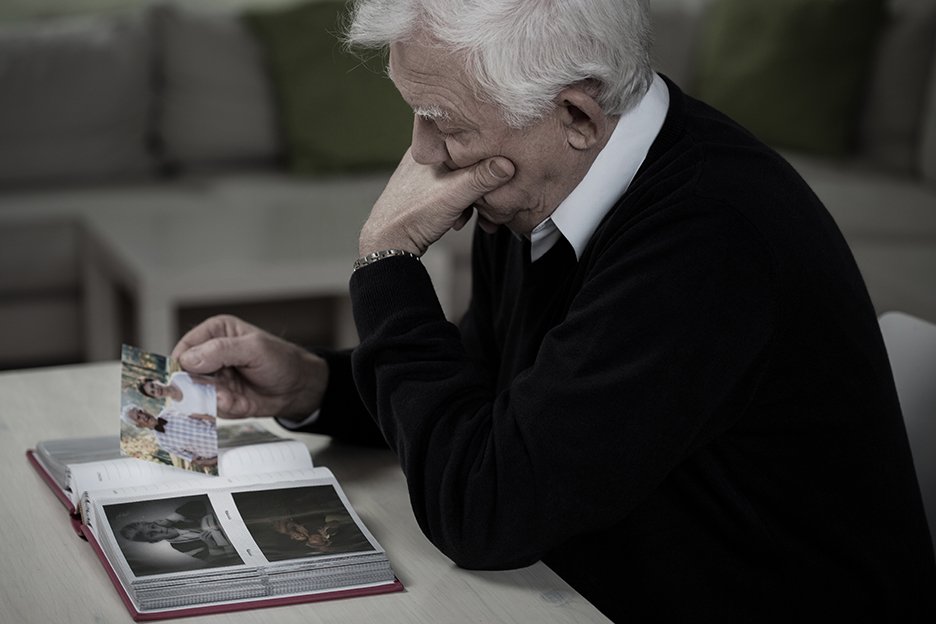


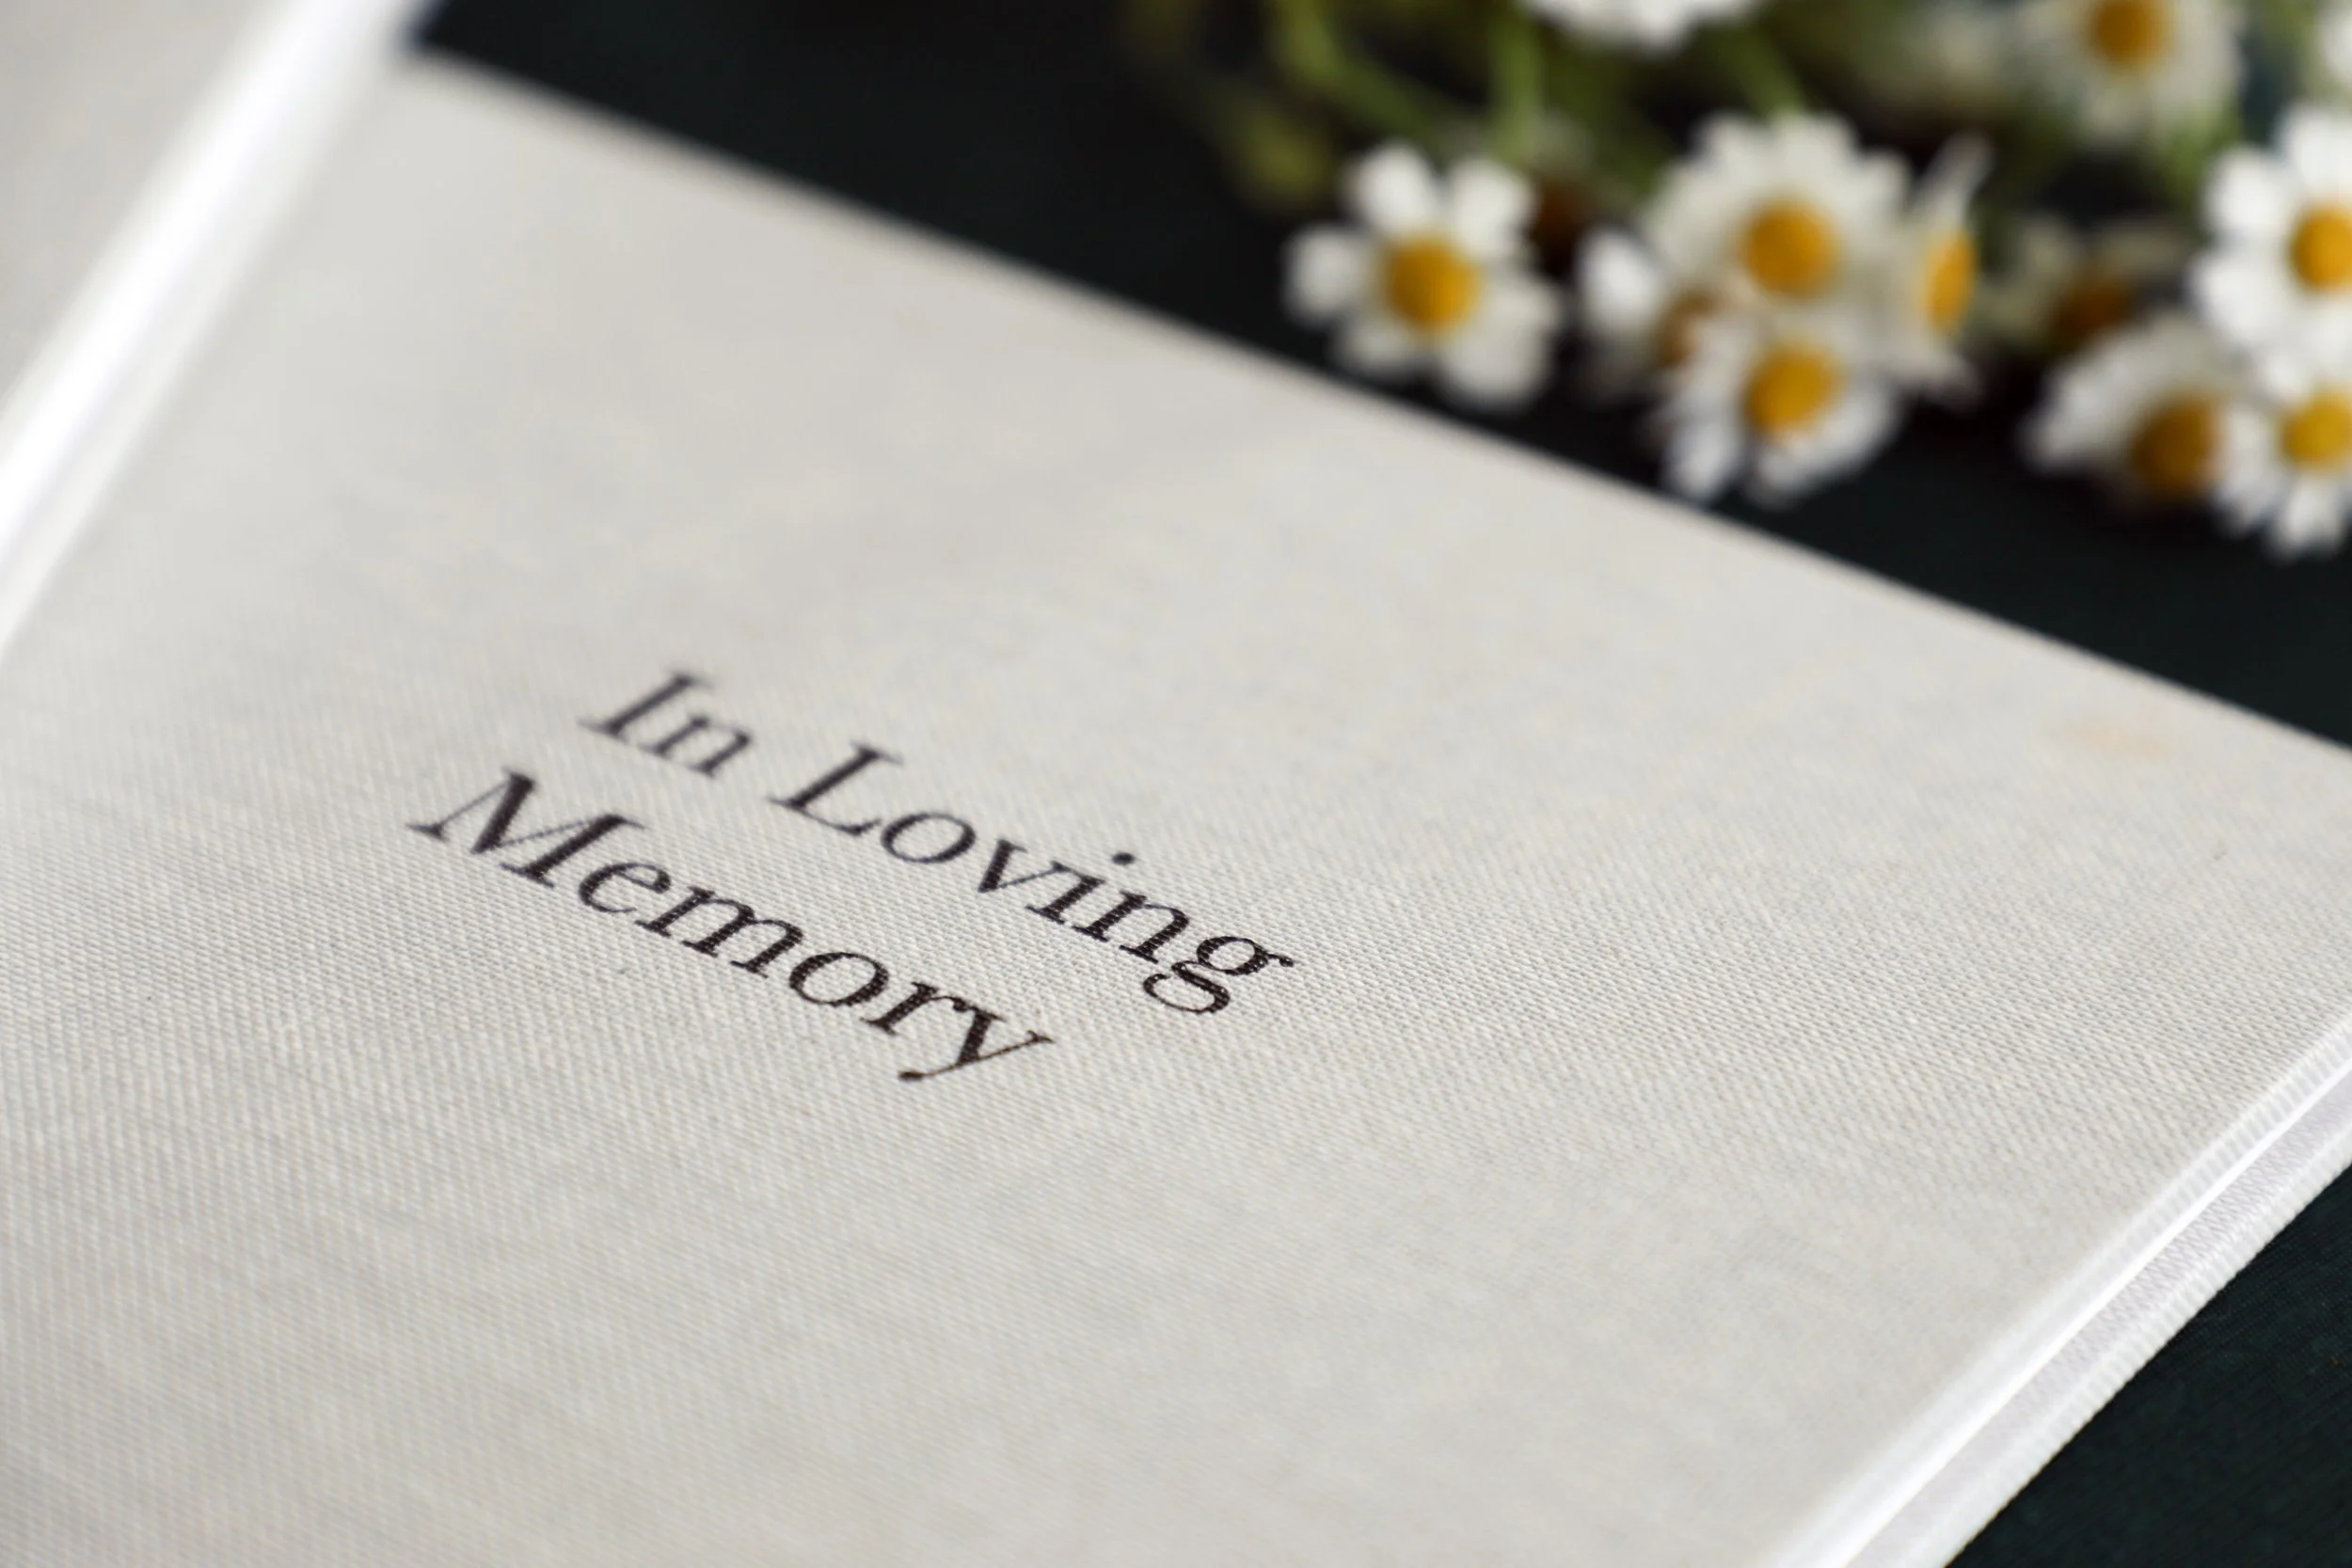
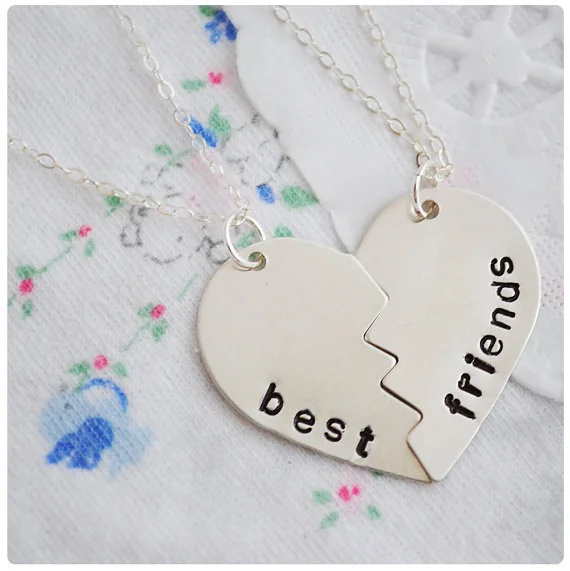
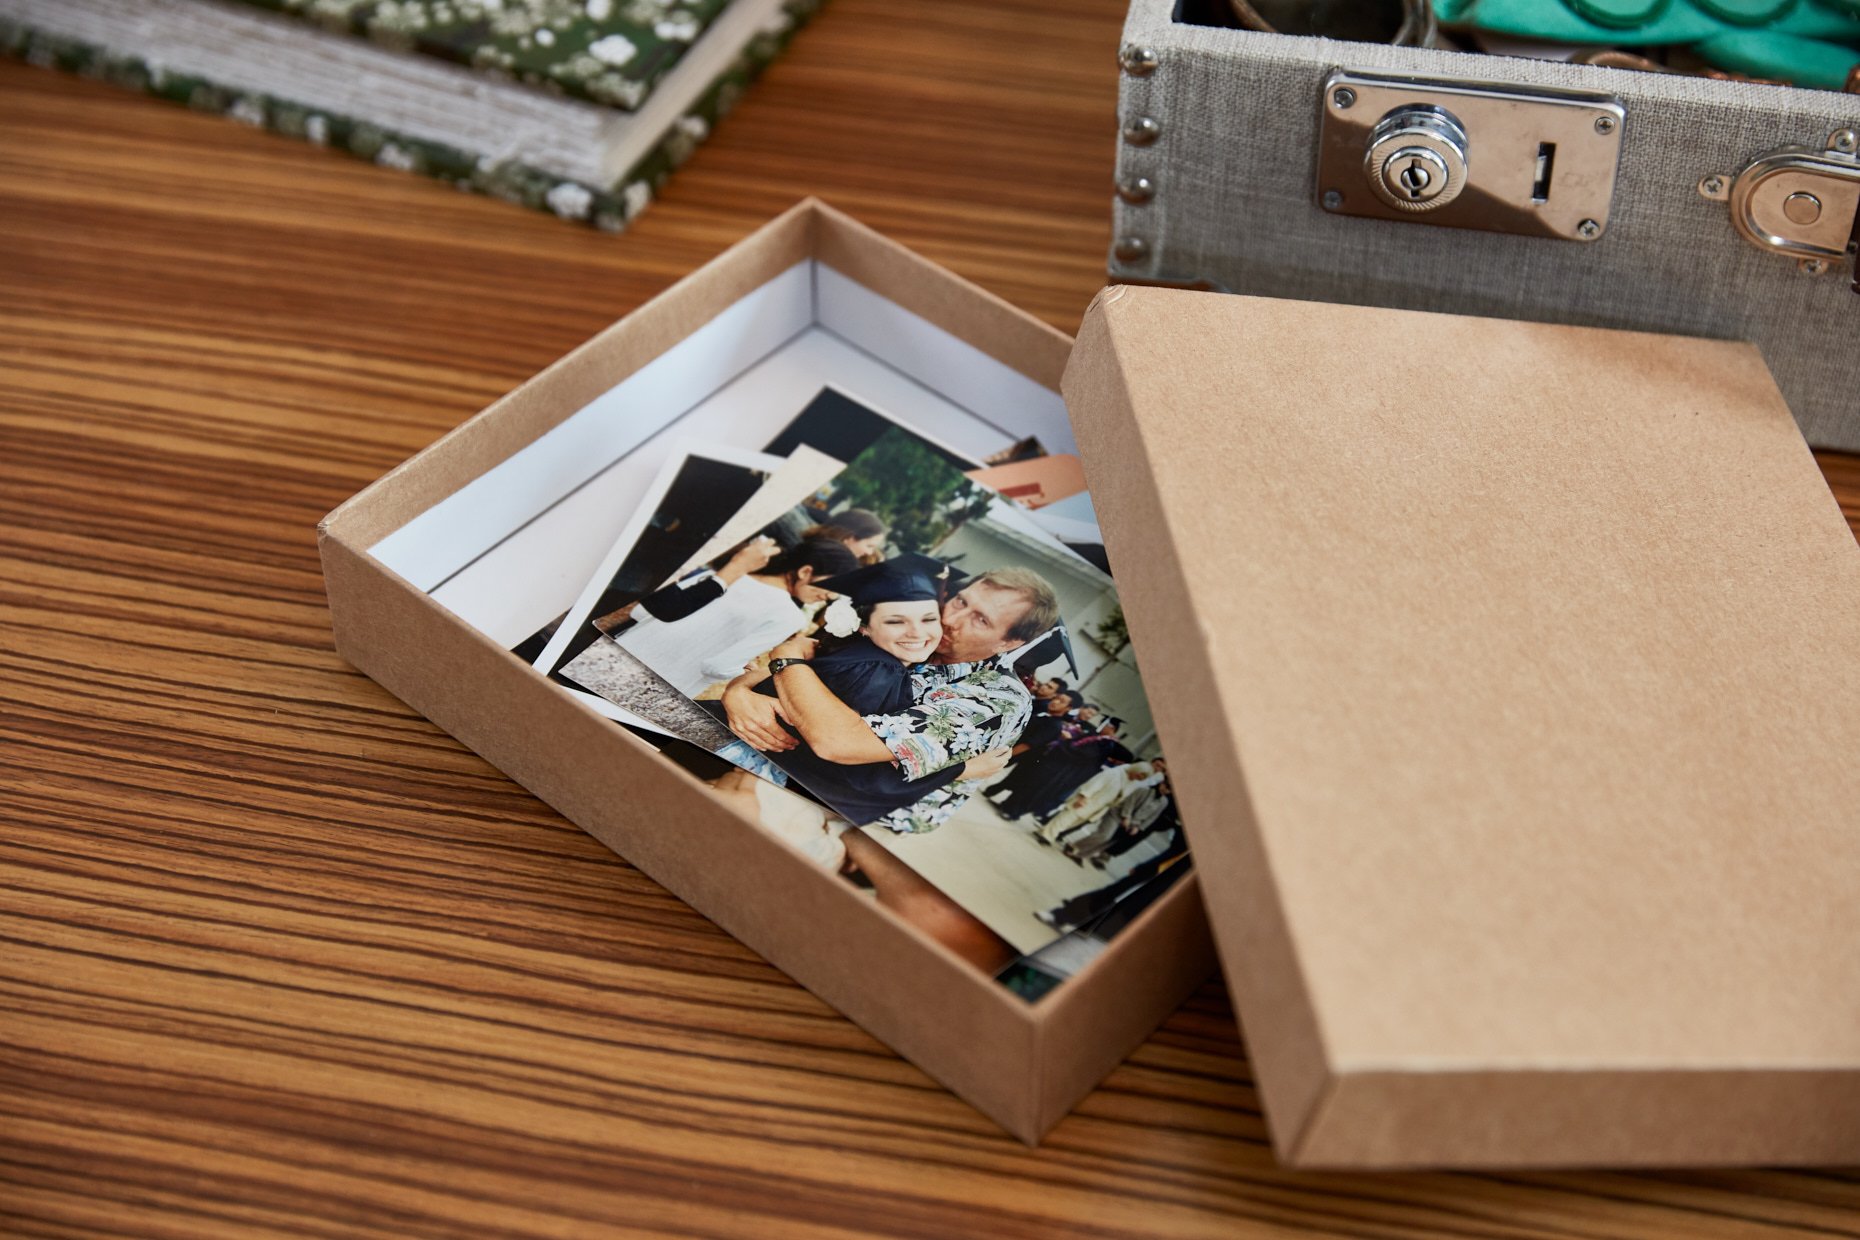
3 Tribute book ideas that honor lost loved ones
Go beyond a memorial slideshow and honor your lost loved one in a more permanent way. These three ideas for tribute memory books are easier than you think.

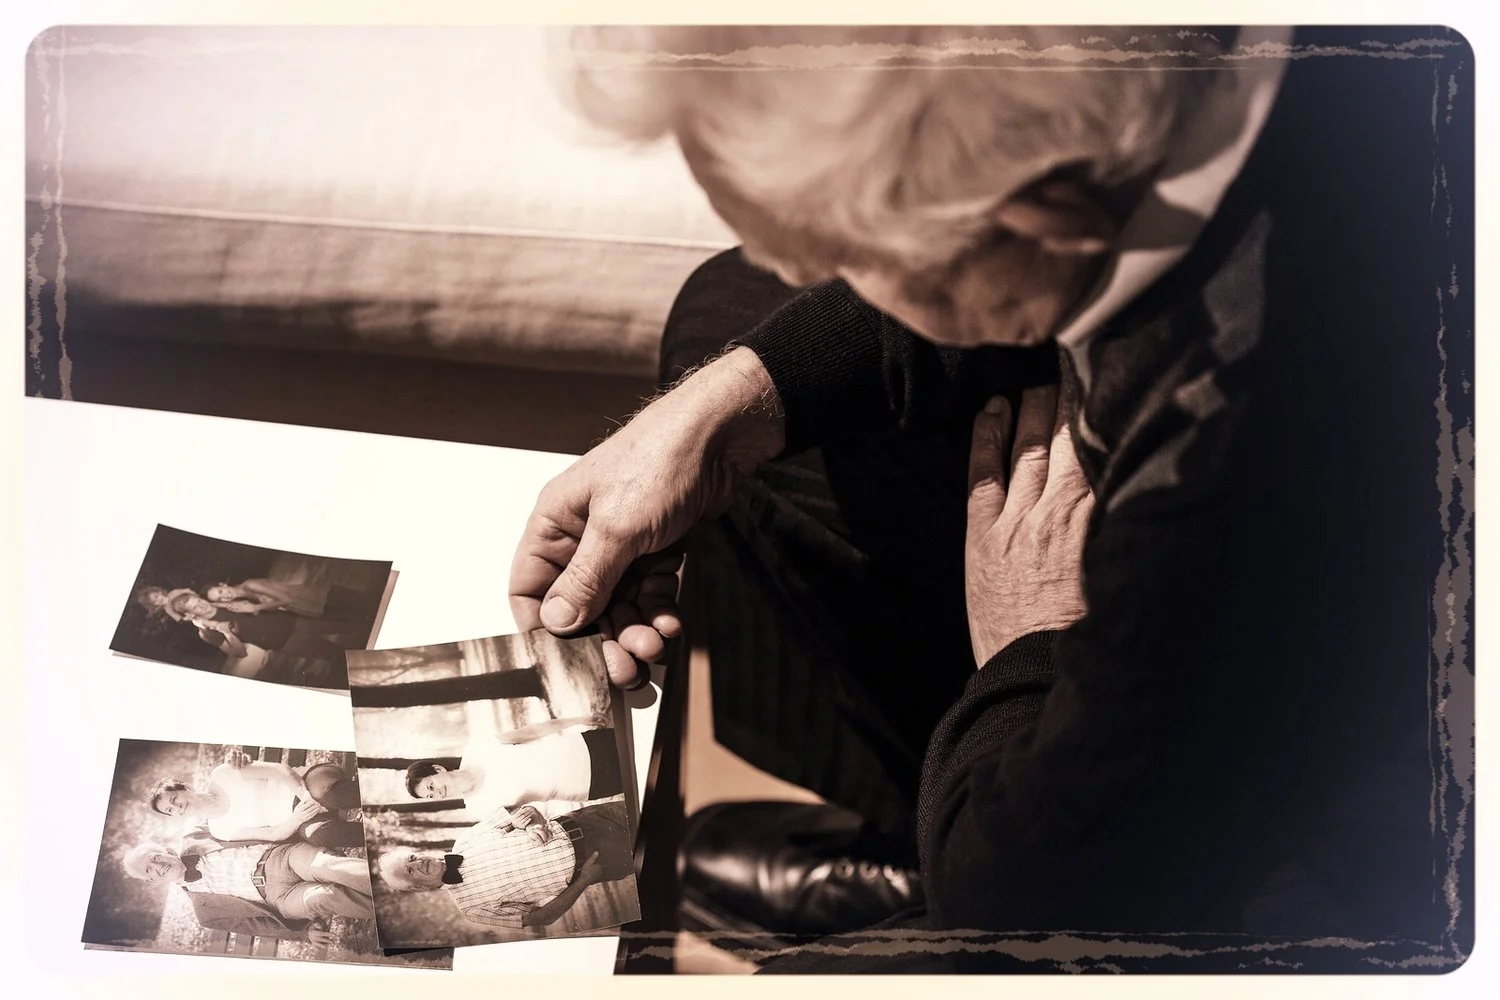
When someone we love dies, it can feel imperative to memorialize them in some way—to honor their memories, their accomplishments, and their stories, and to do so in a way that feels special. That helps preserve their legacy of love.
But the urgency, accompanied by feelings of grief, can also feel paralyzing. Where to begin? How to proceed?
Often we compile photographs into a slide show for a memorial service, or frame some favorite images for a celebration of life. Beyond that, though, I suggest preserving your loved one’s personal history into a more permanent heirloom—a book that you can leave on your coffee table so you can visit with them any time…
Easy ways to memorialize your lost loved one
Here are three tribute book themes to consider that honor your lost loved one and keep their memory alive beautifully:
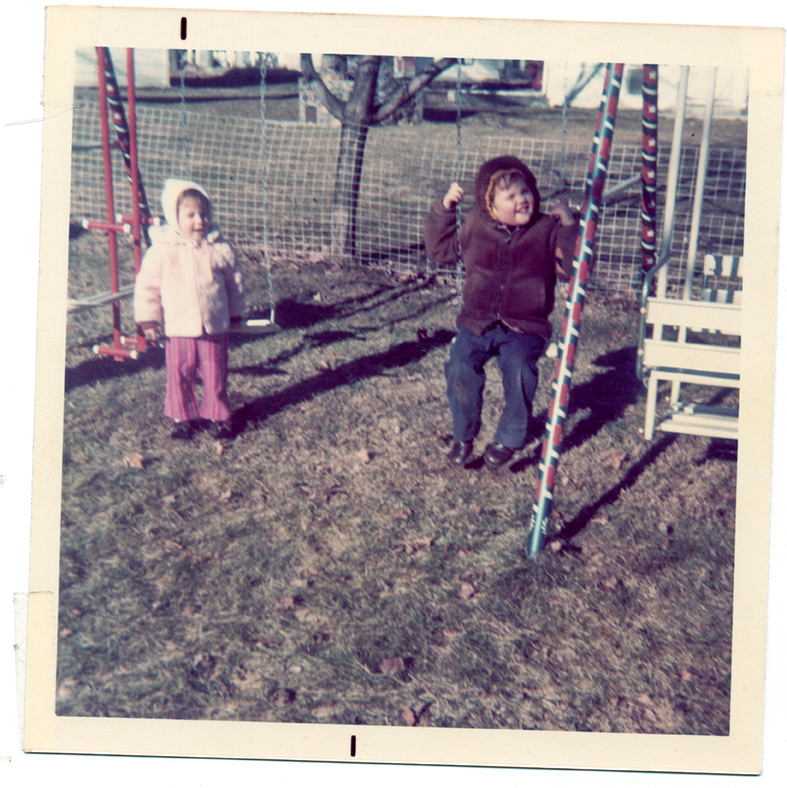
1. Photo memory book
Don’t overcomplicate things: Choose your favorite images of your deceased family member (or friend) and design a timeless photo book to capture their spirit. Less is more, so follow these tips for curating a tightly edited collection:
Know that you are not dishonoring them by not including every photo you have of them. Quite the contrary, thoughtfully choosing pictures that capture their spirit is an act of celebration.
Choose photos from different periods of their life—ideally from the time they were a baby through present day. For older print photos, scan them at a high-resolution, and consider keeping the old-fashioned photo frames in tact for a vintage feel.
Highlight the most special photos by including them on full pages. Those can be balanced out by grids of smaller pictures or pages with a few thematically linked images.
The idea is to curate a book of photos that commemorate your loved one meaningfully—so you can remember them in years to come—but know this: The process of creating such a book can be healing and even joyful, too.
2. Collected tributes
A particularly fitting project as you near the one-year mark after your loved one’s passing: an heirloom book that gathers short tributes from those who knew them.
Invite family members, friends, and colleagues to write brief remembrances of the deceased and send you 1-3 photos of them with your loved one. Give them a deadline (even if you don’t need the book by a certain date, a deadline is just the prompt many people need to finish!), then compile everything into a narrative book.
My best advice for writing compelling tributes? Be specific (tell a story, include a quote), be funny (yes, that’s more than okay!), and speak from the heart.
And as far as designing the book? I suggest typesetting tributes in a program such as InDesign or Canva, then importing those words into your book publishing platform as images (be sure to place them at 100 percent so all text appears the same size on every page). If assembling the book is your big challenge, consider hiring a professional designer to prepare it for you—the results will be worth it, especially for a book that holds so much meaning.
3. Legacy list: Remembering _______ in 10 ________
Would you like to bring your loved one’s spirit to life beyond photos but feel intimidated by the notion of writing more than a few words? Consider creating a legacy list—a list of something that mattered to them and that embodies their values and personality.
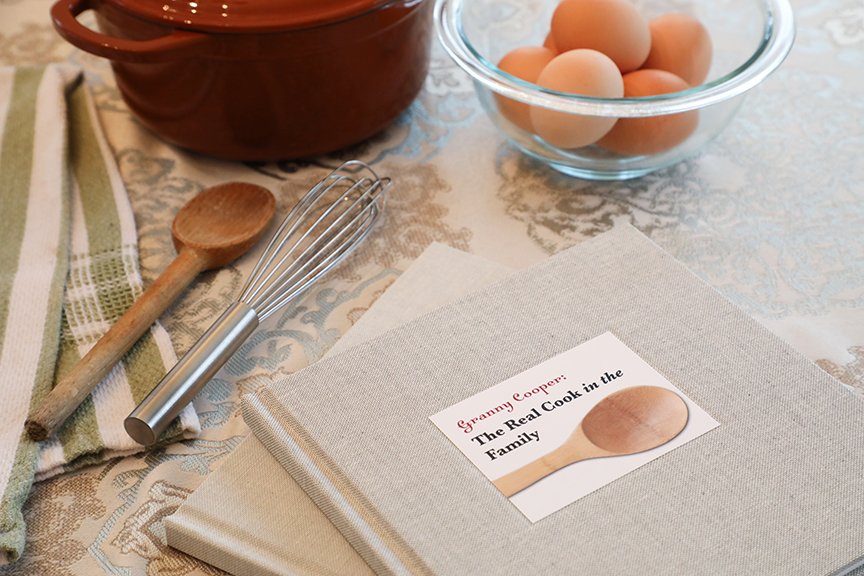
Perhaps they were a fabulous cook, or the frequent host of family gatherings? Put together a book of their 12 favorite recipes accompanied by photos of them entertaining or in the kitchen.
Maybe they were a font of wisdom. Compile the 10 best lessons they passed on. And don’t worry—not every one has to be life-changing (things like “start saving your pennies young” and “never go to bed angry” hold great value!). Typeset each lesson on its own page, and flesh out your tribute book with photos of your loved one throughout their life (no need for the images to correspond to the lessons).
What if you can’t think of a theme for a legacy list that honors them appropriately? Simply choose ten words that describe your loved one. Like above, design each word on its own page followed by a few spreads of photos—in this case, matching the images to the words holds power (if they were “funny,” choose goofy shots or ones that show them and others laughing; if they were “ambitious,” pick images of them at graduation, at work, running a marathon, etc.).
No matter how you choose to celebrate your loved one after their passing, being intentional and keeping your project manageable are the best ways to get it done!
Related reading:


How to write a loving tribute to your spouse or partner
A love letter (or book!) overflowing with memories makes a thoughtful anniversary gift. Here, 14 writing prompts to help you honor—and surprise—your partner.
Whether you want to write a personal love letter for Valentine’s Day or an extended tribute to your spouse for a milestone anniversary, the writing prompts below will give you ideas for sharing your love on the page.
Read through the list of prompts and mark the ones that resonate the most—then start there with your writing. Some of the prompts may yield long stories while others might only spark a phrase or sentence; that’s okay. Our relationships are as unique as our signatures—honor what makes yours special!
One tip before you begin: Don’t put pressure on yourself to sound like anything other than you. Think of your writing as an extended letter to the one you love and let your voice come through.
14 thematic memory prompts to help write about your love
THE SETUP
How, when, and where did you meet? Tell the story of your first meeting, your courtship, and your favorite memories from the early days of your relationship.
CUTE QUIRKS
Share some of your partner’s quirks that make them them. Does she twist her hair around her finger when deep in thought? Does he put post-it notes all over the house to remind him of mundane things? Hone in on their character traits that are unique and lovable and…specific.
ADVENTURES OF A LIFETIME
Take this prompt in any direction you wish: Perhaps your biggest (ongoing?!) adventure has been parenthood—write about that. What other adventures have you been on together? Think travel destinations, new skills you endeavored to learn together, and passions you’ve developed over the years.
SAYINGS & PET NAMES
Do you have a special way of saying “I love you”? What about terms of endearment for one another? If there’s a fun story here, then of course tell it; otherwise simply weave your sayings and pet names throughout your writing.
HEARTH & HOME
How do you define home? Is it a more ephemeral notion of being together, or have you built spaces to live that embody your family philosophy? Describe the first place you lived together, the most challenging place you called home, and the home where you find yourselves now.
LOVING LIST
This one’s fun and invites creativity and playfulness: Write a list of “50 Things I Love About You” that includes everything you can think of, from seemingly obvious-yet-true things such as the color of their hair or the feel of them in bed beside you to more personal-and-unexpected things like “the way you set out a mug and a Splenda packet for me when you make coffee in the morning,” “the way you croon country music in the car,” or “the fact that you’re still trying to convert me to someone who will be on time.” The more specific here, the better!
MISHAPS & MISDEMEANORS
Write about “that time” you made a wrong turn and ended up weekending in a different town than you expected, or accidentally missing a birthday—little things that may have gone wrong that you weathered together (and maybe even ended up enjoying).
INSIDE JOKES
Do you and your partner glance across a crowded room and know exactly what the other is thinking? Are there inside jokes that you’ve shared for years? Write about your secret language of laughter and, well, just knowing what the other may need.
ROLE REVERSAL
How are you two different? Write about how you at times complement one another and at other times clash. Try to find the humor or the life lessons in your differences. Find the stories and also some underlying wisdom.
OFFER GRATITUDE
What are you most thankful for in your relationship? Think about your partner’s qualities that you appreciate, but also ways you mesh and make your way through the world together. Like with each of these memory prompts, try to hone in on some specific details or moments that come to mind when you think about gratitude.
GOING DEEP
Aim to write the most epic love letter, including thoughtful reflections such as:
times you missed your partner or wished they were near
ways your spouse has changed you or impacted your outlook on life
why you consider your partnership a successful one
your favorite romantic gestures from your years together
how you have manifested being there for one another “through good times and bad, through sickness and health.”
FROM THE ARCHIVE
Did you save early handwritten letters your partner sent you? How about everyday notes or even emails? Unearth these and consider including one or quotes from a few in your tribute.
BONUS REVEAL
You’ve been writing about your beloved all this time, but remember that sometimes the real gift is sharing a bit of YOURSELF. Consider telling them something they may not know about you yet. It could be a silly anecdote from your childhood or a deep-seated fear you’ve held for decades. No matter what you decide to share, allow yourself to be vulnerable.
BUCKET LIST
Perhaps you’ve been married for 25 years and you’re celebrating a host of favorite memories in this book. For this prompt, turn your attention to the memories you’d yet like to make. What’s still on your to-do list? What dreams do you hold for your future together?
Remember that your efforts to create something meaningful for the person you love is gift enough—this really is one occasion where “it’s the thought that counts.” So have fun with this, be thoughtful as you write, and you’re sure to craft a gift that your partner will cherish!
And if you need help packaging your extended love letter into an heirloom book, please reach out to see how we can work together.


How to create a vacation photo book or travel journal: Part 2
You've just returned from a family trip and know you want to make a travel memory book—just not right now! Follow these easy steps so you'll be ready later.
Organizing photos before you sit down to design your travel memory book will make life soooooo much easier!
Recently I shared Part One of this two-part blog about how to create a vacation photo book or travel journal, in which I shared tips for things you could do during your trip to make your memory-keeping project easier later. Here, in Part Two, I am sharing ways you can streamline your book creation after your trip.
Taking these steps will ensure that when you finally sit down to write and design your travel memory book, you’ll have everything you need conveniently at hand.
Do these things shortly after you return from your vacation to set you up for bookmaking success:
1 - Consolidate all your photos in one place.
Download all photos from smart phones and cameras and collect them in one digital space. I use a solid-state external hard drive that I back up regularly to the cloud for this purpose.
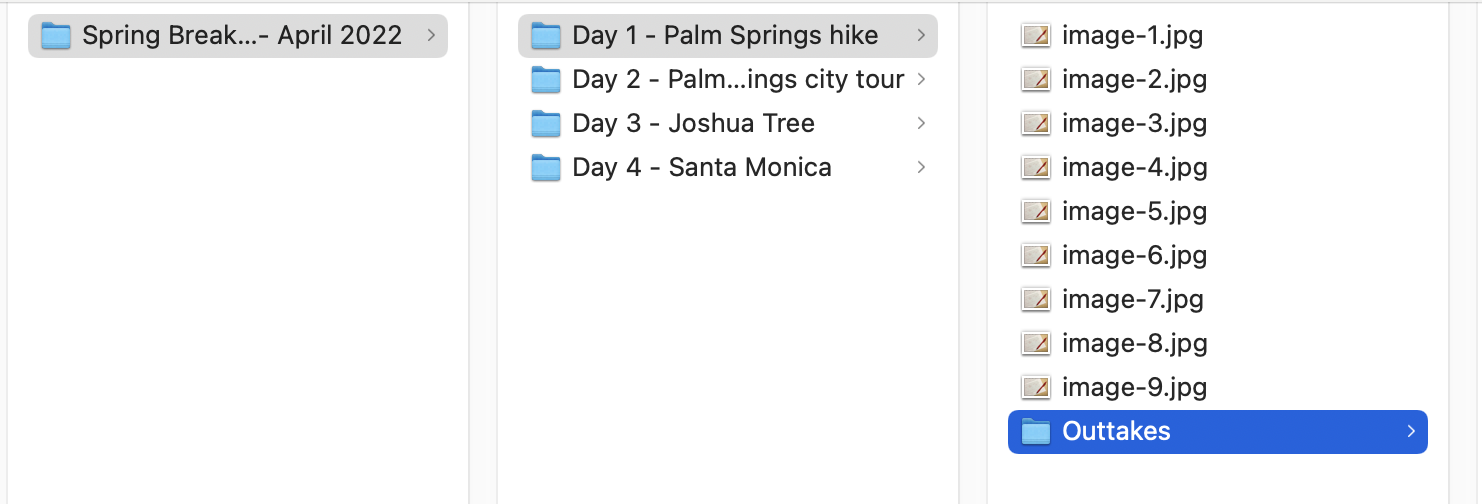
Here is a simple folder structure that works great for organizing vacation photos:
01 DAY 1 - Arrive in Rome
02 DAY 2 - Drive to Pienza + Easter dinner
03 DAY 3 - Winery tour + Tuscany exploration
04 DAY 4 - Vespas in Chianti
…etc.
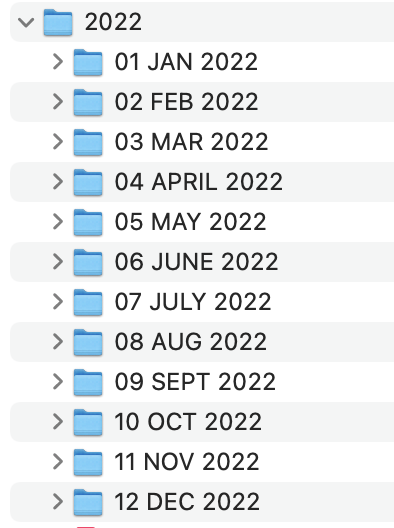
The two-digit introductory numbers at the start of each folder name ensure that the folders will stay in the correct order. I do something similar when organizing photos for my annual photo books:
01 JAN 2023
02 FEB 2023
03 MAR 2023
…etc.
Then, within each of these folders, you can organize your photos into subfolders by theme or subject.
You may also want to create separate folders for images you download from each family member’s phone—that way you can quickly scan for duplicates and know who took each shot. (I recommend gathering these images from everyone’s phone shortly after you return from your vacation—while you may save all those pictures indefinitely, other family members may be more keen to free up digital space, and you don’t want to risk losing their pictures!)
Seem like a lot of work? Trust me, using a smart digital filing system to organize your photos in advance of making your book is way easier than trying to find photos amidst the thousand you took WHILE you are creating that book (a nightmare!!).
2 - Select your favorite photos.
For this one, I generally suggest waiting at least two or three weeks before reviewing your photos with an eye for curation. This emotional and temporal distance will give you a better perspective and allow you to more easily cut photos from your book and select the ones that best tell the story you’d like to tell.
How you mark favorites will depend upon how you store your photos. You may be starring your faves in software such as Google Photos or Lightroom. If you are physically moving your selected digital photos into a folder on your computer, I recommend creating a folder within each thematic folder called OUTTAKES and moving photos you are NOT using there. That way your photo organization system is still in place. And it’s way easier to eliminate photos as you go than to know immediately which images qualify as must-haves!
Don’t stress about this step. Focus on:
choosing the best shot from the multiple you have taken of each part of your trip
giving yourself options for later—who knows, you may want that horizontal shot to be enlarged across a whole spread…but then again, the vertical version may be just right as a section opener!
finding a balance of personality-driven photos (your kids grimacing over a plate of vegetables at your preferred restaurant, say) with gorgeous scenery; of candid shots with stiff posed ones; of color with black-and-white
choosing photos that make you smile and that trigger your memories.
3 - Photograph or scan ephemera or souvenirs.
All those ticket stubs, maps, and random notes that you collected on your travels? Now’s the time to go through them with an eye for what will look good on the page and add visual interest to your photo book.
A ticket stub from a museum that has a Michelangelo sculpture printed on it is much more appealing than an unidentified stub with just text. A train ticket that shows your mileage traveled across Europe is far more compelling than one that simply lists a destination. A receipt that shows the ridiculously cheap price you paid a local villager in the Philippines for your sisal bag may be worthy of inclusion, but forget about most receipts in general.
I recommend scanning all of your paper souvenirs on a flatbed scanner (many home printers with a photocopying function can also scan nowadays, too). Set your parameters to scan full-color, 300dpi, at 100-percent size—this way, you’ll most likely avoid pesky moire patterns when scanning pre-printed materials, and when you place them in your design software, they will run at their actual size (if you create shadows beneath these images, the tickets or other ephemera will look like they are sitting atop your photo book pages, a very cool effect!).
If you don’t have access to a scanner, there are plenty of smart phone apps that can do the job of capturing these small items for print. Check out Google Photo Scan or Photomyne; these free apps enable you to use your phone’s camera to “scan” your souvenirs for use in your travel journal.
Yay! You’re ready to gather all those notes you took while on vacation (which we talked about in Part 1) and sit down to begin creating your travel book. Whether you choose to print photos to place in a good old photo album (my favorite smaller-size ones are from Project Memory, while great larger, archival photo albums are available from Kolo) or design and print a more full-fledged travel book (with written memories and reflections, of course!), you’ve now got everything you need to begin…and finish…your vacation memory book. Happy travels!!
If you prefer to hand over your keepsakes, photos, and travel journal to have a travel book professionally produced, please reach out to see how we could work together.


How to create a vacation photo book or travel journal: Part 1
Want to make creating a travel book easy when you return from your family vacation? Follow these steps for easier—and elevated—post-trip memory-keeping.
Postcards are waning in popularity, but you may still find some cool vintage or artistic designs on your travels that would make great additions to your travelogue.
Do you have the best of memory-keeping intentions when you travel, only to find your photos stranded on social media and your collected souvenirs stuffed away in a box? No—don’t let that happen to you! Follow these simple steps to help you gather all the right elements during your trip so you can easily put together a photo book or travel journal when you get back home. A little planning goes a long way.
Do these things during your trip to make creating your travel memory book a cinch later:
1 - Take notes over the course of your travels.
By ‘notes’ I mean anything that will help you tell the story of your trip (in the moment you can’t imagine ever forgetting a single detail, but I promise you will!). A few possible notes include:
reference photos—as you head into a venue or city, snap a reference picture of a sign that will orient you as to your location later
handwritten jottings—of everything from tour guide names to the restaurant your family fell in love with
printed ephemera—anything from the article you tore out of the in-flight magazine to a hotel brochure or museum ticket; you won’t necessarily keep all of these, but you will use them to fill in details when writing about your trip later.
a thorough travelogue—not everyone will want to do this (I admit I often have good intentions and then never get to it, especially since I became a mother), but writing about your trip in a journal as it happens can be not only a wonderful way to reflect on your time in a place but also to preserve memories to revisit later.

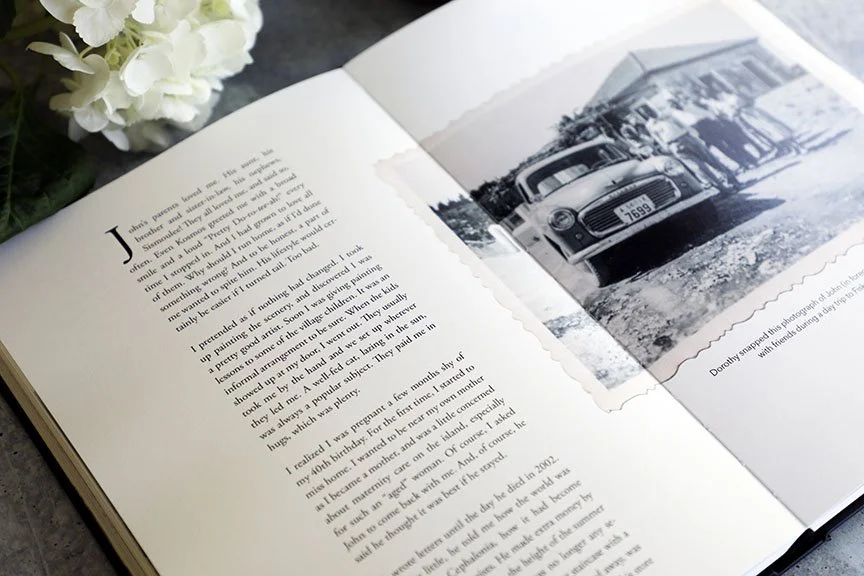
If I hadn’t snapped a photo of a nearby street sign before I took this shot of dramatic light on a picturesque church, I would never have known what Tuscany town this was from!
2 - Collect some items to add local texture to your book later.

Travel passes, museum ticket stubs, and other ephemera from your trip can be fun additions to your memory book when used in moderation.
There’s no need to buy a hundred postcards or tchotchkes, but selecting a few items that you can scan or photograph when you get home will add great visual interest to your travel book. Some favorite items I have collected on various family trips include:
matchbooks (especially from favorite restaurants or hotels)
stickers (especially these days, sticker designs are often way cooler than postcards!)
simple vendor bags (sometimes a shopping bag or even a small paper bag a vendor slips your gum into may have interesting graphics, like one I got in Florence with a fleur-de-lis pattern)
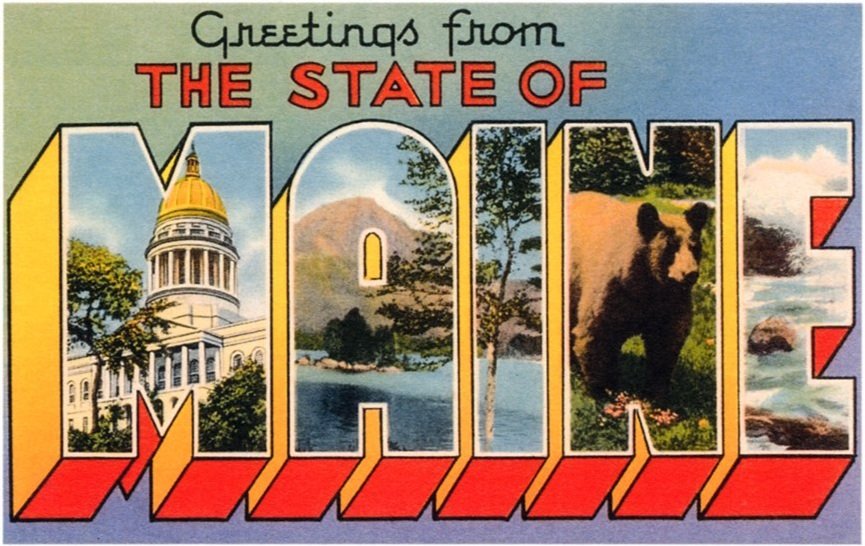
vintage postcards (I try to buy one of those “Greetings from…” postcards in every city I visit, but they’re getting harder and harder to find; I do seek out illustrated postcards, though, as they often have an artistic or nostalgic vibe I like)
local maps (I’m talking both the kitschy maps marking destinations of interest to tourists as well as beautifully rendered ones often sold in shops)
3 - Take unexpected photographs, too.
Yes, of course snap the famous landmarks and get some group shots of your family posing in beautiful locales, but remember to also take pictures of less expected details, such as:

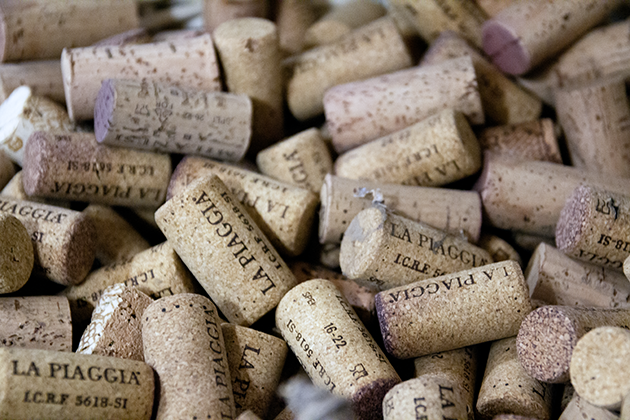
Detail photographs can add wonderful personality to the pages of your travel book. This bin of corks caught my attention on a winery tour not only because they have great texture, but because they say the name of the winery. And these cacti in bronzed shoes in Montepulciano—well, they’re just fun!
candid photos of your traveling party
fun selfies when the mood strikes
photo booth strips—admittedly, I am a sucker for these nostalgic gems which invite goofy faces and extreme togetherness (ever tried to squeeze more than four people into one of those booths?!)
details, details, details—on my recent Italy trip, for instance, I aimed my camera at wonderfully whimsical street art in both Florence and Rome; ancient bricks and walkways (ah, what texture!!); wrought-iron filigree designs; and even a few t-shirt slogans that resonated.
In Part Two I share next steps: what to do with all your photos, ticket stubs, and travel notes upon your return to make book creation a cinch!
If you’d rather hand over all your travel goodies to have your travel memory book professionally produced, please reach out to see how we can work together.
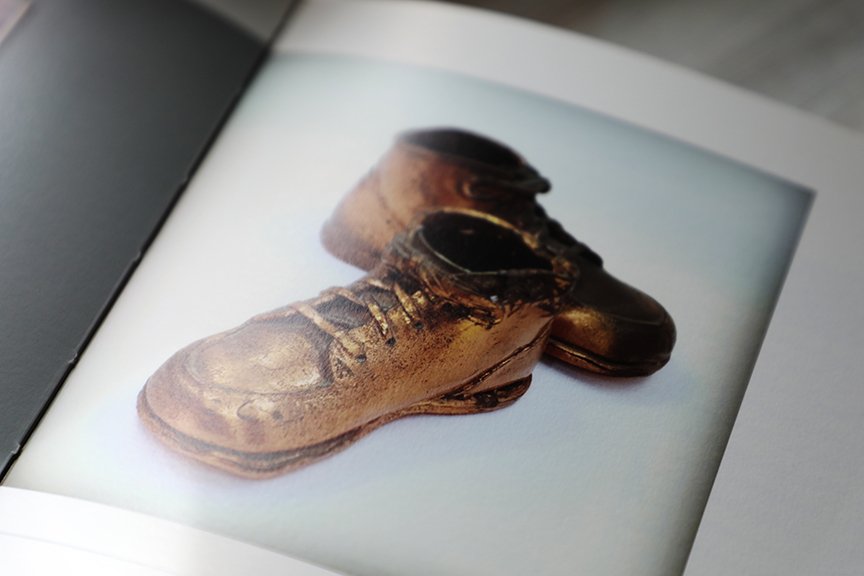
How to preserve the stories behind your family heirlooms
Whether your family heirloom collection consists of generations’ worth of antiques or a handful of sentimental items, catalog them for the next generation.
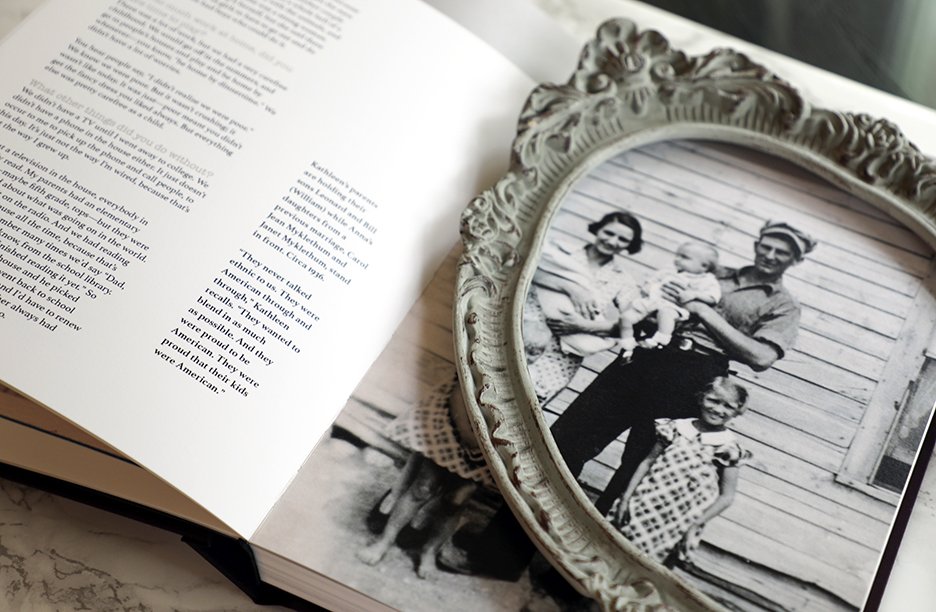
Photographing your family heirlooms is a first step in preserving their legacy. You can go as basic as snapping a few simple pictures with your phone’s camera or taking the time to style and properly light your heirlooms like I did with this image of my mother’s rosary beads.
So often a family history book has its genesis when a family decides to downsize. The kids are grown and have homes of their own—and they've yet to collect all the things that have been saved in boxes labeled MEMORIES. Going through those things inevitably sparks some pangs: What are we going to do with all this stuff? How can we part with ANY of this? Will the kids even remember what it all means?
The “stuff” holds stories, and it's often those stories we aim to uncover and preserve through personal history interviews—again, usually before donating or tossing much of the stuff…
Sometimes, though, the stuff matters as much as the stories. Just because you plan to hold onto the physical objects (fingers crossed subsequent generations will want to do the same) doesn't mean you shouldn't still capture their stories!
First step: Make an inventory of all the things you consider heirlooms. Next: Prioritize which ones hold the most meaning and begin to capture their history.
Just a few heirlooms?
>> Capture their stories, one heirloom at a time.
Whether you are writing a full-fledged family history or compiling just a few of your favorite personal stories, consider photographing the heirlooms that mean the most to you and writing about them.
Include each object's provenance:
Who owned it first, and who was it passed down to? Write the list in reverse-chronological order, and include years and locations (where the owner lived) whenever possible—these details are gold for any future family historians.
Where was it made/purchased?
Why does it hold meaning?
Do you personally have any special associations with the item (favorite memories, or stories you remember recounted by a grandparent, for instance)?
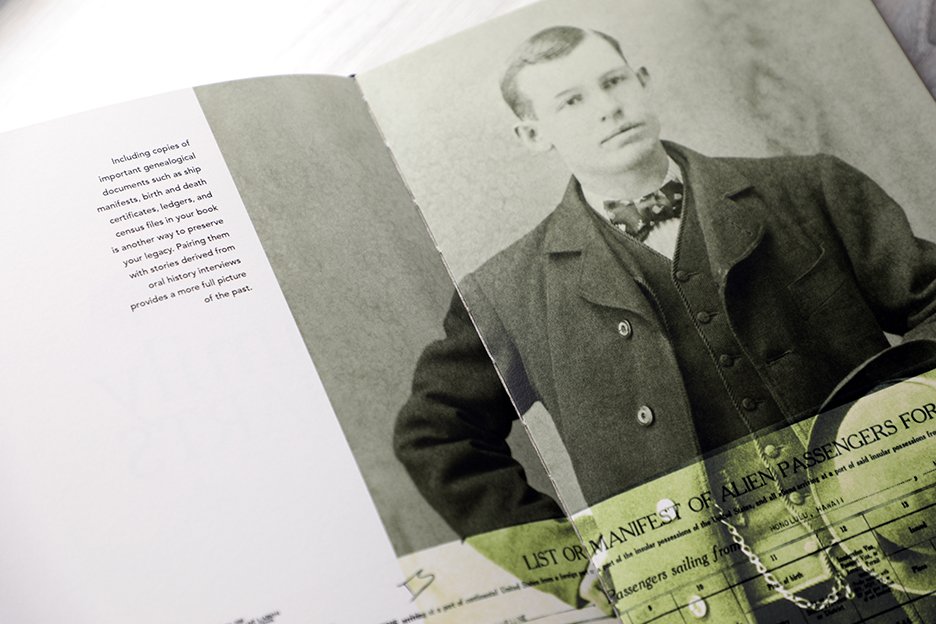
Lastly, even though you are including a photograph of the heirloom, write a brief description of the object: material (such as an oak cabinet), model (such as of a vintage pistol or a watch), size, etc. This is especially important if you are getting rid of the item or if it becomes separated from this history you are preparing.
Consider recording all of these details in a binder (one sheet per heirloom, stored in clear archival sleeves) or in a recipe box (one index card per heirloom, with a photo and name on the front and details on the back). Other options: Purchase an heirloom journal to capture all the history (I love this one from Hannah Bergen, who also has an heirloom provenance kit), or hire a personal historian to help you put it all in an heirloom book (reach out if interested!).
Loads and loads of artifacts?
>> Create a family heirloom catalog.
Maybe you are cataloguing generations' worth of heirlooms, or maybe you've got a treasure trove of vintage cabinet cards and other photographic heirlooms to make sense of. If you've got more than 20 heirlooms, consider creating a custom index of all of them.
In some ways, this type of project is as straightforward as the previous recommendation: You'll begin by photographing each heirloom (or digitizing your print photos, if you’re dealing with a family photo collection) and recording its provenance in writing. The subsequent steps, though, will elevate this catalog into a family history tool that will be an heirloom unto itself.
First, take your inventory and create categories for your heirlooms to fit into. These will be used to organize the structure of your catalog and to create a useful index for finding heirlooms in various ways, so be as intuitive and descriptive as possible (and know that some heirlooms may fit into multiple categories). Consider creating tags in various categories, such as:
Time period: Civil War Era, 19th Century, 18th Century, 1960s, etc.
Object type: Furniture, Jewelry, Household Object, Photograph, etc.
Owner(s): [names of specific family members who may have at one time had possession of this object]
Value: Sentimental, Financial, Historical
Second, assign tags from each category to every item in your collection. It may be helpful to use a spreadsheet to record all of this data (this is an especially relevant step when dealing with a large number of heirlooms, as you will be able to sort columns by categories or alphabetically—and therefore more easily generate an index).
Third, decide on the broadest categories to create your book architecture—these will be used as de facto chapter headings and will be reflected in your catalog's table of contents. You may want to present your heirlooms based on branches of your family tree, for example (so you may have broad headings of MATERNAL LINE and PATERNAL LINE, then family surnames used to designate chapters within each of those; or instead organize by type of heirlooms, so your chapter titles would derive from those subcategories (Photographs, Furniture, Jewelry, etc.). Choose what makes the most sense for your distinct collection.
Sound like a big undertaking? It is, but if you set parameters early and tackle a few heirlooms per week, it's a project you can complete in a year for even the largest family heirloom collections!
No heirlooms?
>> (I doubt it. Let’s see…)
It's a rare individual who hasn't held onto something of meaning from their childhood or ancestors. Chances are you just wouldn't think of calling those things ‘heirlooms.’
If you hear the word heirloom and think of a dignified mahogany clock or a great-grandmother's passed-down wedding ring, you're right on—that's an heirloom, and Merriam Webster would agree:
1 : a piece of property that descends to the heir as an inseparable part of an inheritance of real property.
But what about the second dictionary definition?
2 : something of special value handed down from one generation to another.
…and who's to say what holds value? You say, that's who. An heirloom in no way needs to be worth a lot of money! Consider these items that I certainly consider heirlooms:
the grease-stained recipe cards my mom saved (including a few of the ones with recipes clipped from old Better Homes & Gardens magazines)
my mom’s wooden spoon, which I use almost daily
my grandfather’s playing cards
my son’s tattered stuffed lion that holds more love and stories than almost any other item from his childhood.
What sentimental items come to mind for you? Once you've gone a nostalgic journey remembering the stories associated with those, consider recording their stories…and calling them heirlooms.


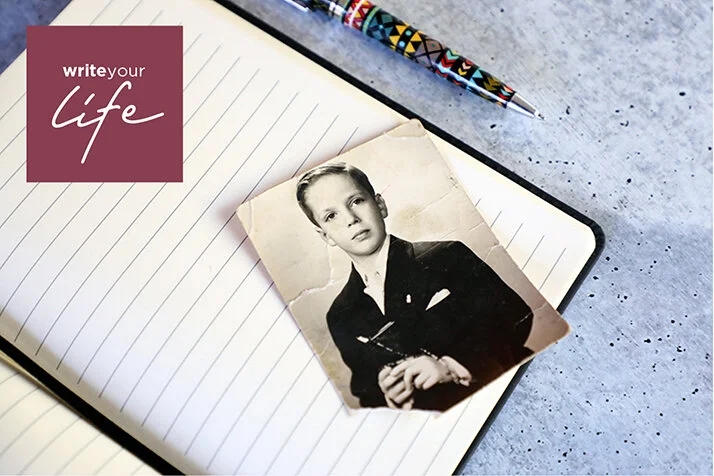
The best gift for a milestone birthday? A tribute book filled with love!
Here’s how to make a tribute book for their milestone birthday—your step-by-step guide to the most unique, thoughtful gift you can give someone you love!
Have you ever wondered how to make a tribute book for a loved one’s milestone birthday? Keep reading for a step-by-step plan (plus some tips for writing the best tributes ever!).
Early on at Modern Heirloom Books, creating tribute books in honor of deceased loved ones became a bit of a specialty of mine (inspired by the first book I created memorializing my own mom). I soon realized, though, that this same format could be used to honor living family members—and what better occasion than for a milestone birthday?
Whether you call them birthday books, memory books, or tribute books, the idea is to gather photos of and stories about the gift recipient. Once designed and printed, these one-of-a-kind books make a most meaningful (surprise!) birthday gift. But where to begin?
The very notion of having to put all these disparate pieces together can stop some people from ever undertaking a birthday tribute book—but I’ve got you covered. What follows are the essential steps to create the best tribute book as a unique, sure-to-be-treasured gift for a 40th, 50th, 60th, 70th, 80th, 90th (you get the idea!) birthday.
Oh, and one more thing: It’s key to start this process early, both so you are not feeling the pressure of a last-minute rush to finish and so you can have a cushion should any delays occur at the printer. How much time will you need? My best guess is about four months from start to finish.
1 . Consider who will contribute.
Your first order of business is to create a list of everyone you would like to participate. Think about family members, friends (new and old), work colleagues, sports teammates—anyone who knows and loves the birthday celebrant.
2. Designate a way for people to contribute.
How will you invite participants to share their stories? You may have a dedicated email address for receiving tributes and photos; or create a private web page or Dropbox folder for people to easily upload their materials, for instance. It’s handy to have a checklist of all contributors (I create this in a Google spreadsheet) so you can check each person off as their files come to you; label columns as
NAME
TRIBUTE RECEIVED
TRIBUTE EDITED
PHOTO(S) RECEIVED
PHOTO RESOLUTION CHECKED
NOTES.
3. Gather photos of the birthday celebrant.
I generally recommend including 1-3 photos per tribute, on average. That may mean that some friends or colleagues, for instance, have no photos, while close family members may have a handful extra. Curation is key: Ask for images that convey the subject’s most enduring traits, that capture happy times or vivid moments from their life; and that illustrate stories you (or others) plan to write about them. Include photos from different stages of their life, too—from childhood through old age—so you show their personality and experiences but do not overwhelm. And ideally, you’ll want to gather photos of each storyteller (the writers of the tributes) with the recipient whenever possible! The pictures should complement the stories, not detract from them. Technical tip: Source only high-resolution images—that means 300 dpi for print—and have print photos professionally scanned (it’s worth going the extra mile here else risk being disappointed with your final book).
4. Capture stories about your loved one.
It’s time to start writing your birthday tribute, and to send those invitations out inviting others to share, too (see Step No. 2, above). Before beginning, spend five minutes jotting down all the things about the person that make you smile, laugh, or feel strongly—include phrases about their traits, sure, but focus on specific experiences with them. You may want to use a few of the photos you gathered to stir your memories. Another foolproof way to get your stories flowing: Converse with a mutual friend or family member about the subject. One story will remind you of another, and you’ll undoubtedly be inspired—so either hit “record” during your conversation or have a laptop or notebook handy to write immediately afterwards.
5. Put it all together in a book.
In professional bookmaking parlance, we call this the production part of your project: editing, designing, and producing print-ready files; sourcing and working with a printer; and ensuring quality along the way. There are some DIY options out there—scrapbooking and the free software Bookwright among them—and I encourage you to give this a go if you have some creative experience and are a solid project manager. Remember, though: No one expects you to become a pro at this overnight, and there’s a lot to juggle to put a tribute book such as this together; so consider hiring a pro for this step to make your life easier, and to ensure you are thrilled with the book that is ultimately created. (Reach out if you'd like to talk about working together.)
6. Bonus tip: Set deadlines for each step!
Without deadlines, I doubt your project will get finished. Since you are creating this book for a milestone birthday, your deadlines are clear—work backwards from the date the books are needed (either their exact birthday or the date of a party in their honor). Here is a suggested timeline:
8 weeks before birthday:
Finalize list of contributors.
Record/confirm their email addresses or phone numbers (however you will communicate with them about their contributions).
Create checklist of contributors per Step No. 2 above.
Invite contributors to send their tributes and photos for the birthday book.
6 weeks before birthday:
Initial deadline for tributes and photos due to you (you can extend by a few days here or there for stragglers if necessary)
5 weeks before deadline:
Edit and design the tributes into a coherent, beautiful book.
4 weeks before deadline:
Order book from printer. (Note: This timeframe should be based on the estimated turnaround time from your specific printer. I always, always allot at least one full week extra to account for mail delays or production snafus.)
Setting clear deadlines such as this will not only lend your project a sense of urgency, it will give you a way to stay accountable—and ultimately get everything done!

The best tributes honor the birthday celebrant with specific stories of shared experiences and special times. Selecting key quotes to design larger on the page ensures that even if they’re just flipping through their gift, they will encounter meaningful notes along the way!
Ideas for making a birthday celebrant feel special
Use the prompt “remember the time...” to offer up:
Something ridiculous you did together that still makes you laugh (or, ahem, blush)!
A memory from your childhood that they may have forgotten.
That time you traveled together...or cooked together, messed up together, sang karaoke together, considered doing something daring together—you get the idea!
Or tell them a story that might surprise them, perhaps about:
Something seemingly insignificant that they did (for you or for another) that made a major impact on you.
Advice they gave that you took to heart.
Something they said off the cuff that resonated deeply.
Always be specific and offer up stories and memories that will make the gift recipient smile and, most importantly, feel deeply.
Write the way you speak and I guarantee your story will turn out beautifully. (If the notion of writing truly paralyzes you, use the voice recorder app on your smart phone to talk about your memories, then you can transcribe it later.) Allow yourself to be vulnerable, and use the list you brainstormed above to inform the tribute you are writing.
Good luck with this most meaningful project, and congratulations on taking the first step to creating the most unique and special gift for your loved one’s milestone birthday!
Why a “coffee table” life story book?
After we record your personal history interviews, I craft your story and photos into an heirloom coffee table book—not a video, not an audio file. Here’s why.
One of the most compelling reasons to preserve your personal stories in a coffee table book? You’ll display it in your home—which leads to people picking it up and engaging with it…which leads to even MORE story sharing and connection.
While I realize that most people have still never heard of a “personal historian,” I have been heartened over the years to understand that most people ARE interested in the services we offer—preserving life stories and family history, often through oral interviews; and the values we hold—a respect for preservation, a love of storytelling, and an abiding belief that intergenerational connectedness is a balm for the soul!
Often when I meet someone new and describe what I do, they ask me, Why books—why not video? Or, Why coffee table books specifically?
Well, the fact that I create personal history books in no way diminishes my respect for other forms of storytelling. If you prefer to record your loved one’s voice and receive edited audio recordings for your family archive, I can refer you to the perfect person to help you with that. Envisioning your family member talking about their memories on film? I’ll happily refer you to a video biographer I know and trust.
Me, though—well, I love books. And I have decades of experience in print. It’s my thing.
Large photos and ample white space give your heirloom book visual interest and breathing room.
My expertise is in print. And books have my heart.
I worked in magazines for years, back in the heyday when printed magazines were thick and juicy…before they were stunned by online journalism and “content creation.” I worked with some of the best writers, editors, and creative directors around at titles as diverse as Vogue, Harper’s Bazaar, Vanity Fair, Parenting, Child, and Latina. I gained a career’s worth of experience in compelling interviewing, project management, and visual narrative. And it’s both a love of the print medium and my desire to continue using all those storytelling skills that drive me to tell YOUR stories in print.
I turn your stories and family photos into heirloom coffee table books because I know you will display such a book in your home. Having your book out all but guarantees people will pick it up and engage with it. And designing it with great photos—and with plenty of entry points—makes it even easier to engage with: so the stories you have included in the book will encourage more (in-person, out-loud!) story sharing.
Some have heard me say, “I don’t want to read a 500-page book of straight text about Obama or Madonna, forget about my grandmother!” That’s not to say I don’t want to KNOW their stories—I do! I just want them presented to me in a way that’s inviting. Arresting. Compelling. INTERESTING!
Generations from now your ancestors will not need a new computer or updated software to access your book—they can pull it off the bookshelf and dive right in!
Print is the forever media format.
A book is a physical thing, with a sense of heft and permanence that the digital cannot provide. The tactile experience of reading a book is emotionally satisfying. A book confers status. It is special, and the story within is, too.
A book is destined to become an heirloom.
A book “can be read in the familiar tone of one’s inner voice, skipped where necessary, laid down when it pleases, and carried about freely,” wrote Robert Graves in 1958. It will never need to be upgraded, archived, or converted to a new media format.
In a digital world, print stands out.
And by the way: Merging print with digital can be more powerful than each medium alone; both serve different functions and are not only valid, but essential. As such, a digital version of your print book is always available: it serves as a backup of the book, and is more easily shared among friends who are not near.
Are both a form of social media? You bet. While you can share and tag and collect comments on a digital book, you may gather around a physical book on your table, laugh, share stories, relive memories, and...make some new ones.