
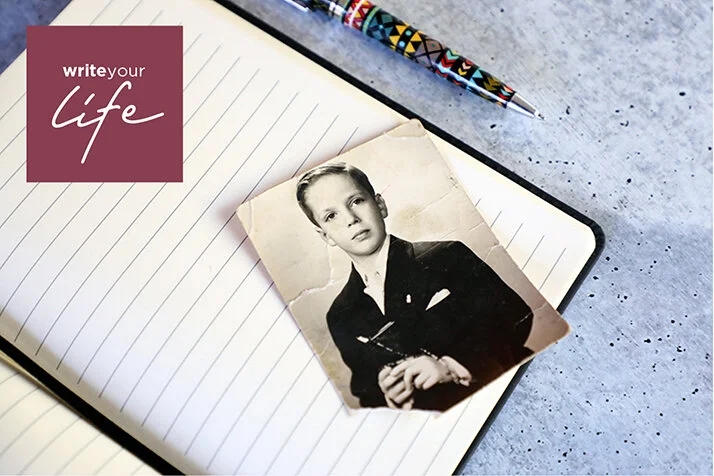
Memories Matter
Featured blog Posts


READ THE LATEST POSTS
4 steps to begin preserving your food memories
Knowing your family’s recipes are preserved for the next generation is reassuring. Adding stories and photos, too, brings your food heritage to life. Start here.
This past year I have gotten a lot of feedback asking for more content to help you preserve your food memories.
I wonder if it’s a sign of the times—we’ve all been homebound for much longer stretches during this pandemic (many of us even made our own sourdough starter and baked bread from scratch!)—or if it’s just that, as I say often, the memories that take place in our childhood kitchens are powerful and persistent. All it takes, after all, is one whiff of sauce simmering on the stove, or a tiny taste of cookie dough, to transport us right back in time.
Either way, I’ve planned a series of posts to get you started with saving your own food memories. First up: Four overarching steps to put you on the right path:
1 - Consider: How do you want to preserve your food memories?
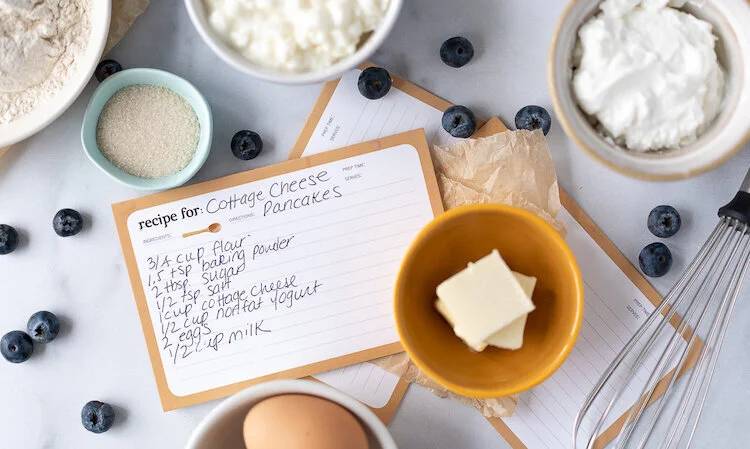
It’s wonderful to have a stash of grease-stained, handwritten recipes in a drawer in your home. But it’s even better to know that those recipes are preserved no matter what.
By digitizing your recipes (they can be scans of the handwritten cards or typewritten transcripts) you not only ensure they last for generations, but you can more easily share them with loved ones far and wide.
Our two favorite ways to preserve your recipes and food memories are:
In a book (of course!). Include both recipes and, at least for some of the foods, the stories and memories associated with them. You can go a DIY route or hire us to create a professional heritage cookbook for your family.
In a recipe box. Consider attaching photos and stories to your recipes and storing them together in a vintage recipe box.

A cookbook personalized just for your family could include a mix of recipes, stories, and images.

While some of your recipes may be handwritten on recipe cards, others may be scattered; look within the pages of cookbooks, in your siblings’ collections, and on your computer and phone apps.
2 - Gather recipes.
Even if you’re an incredibly organized person, chances are you’ve got some recipes in a drawer, some on the computer, and others in your head (perhaps those are the most important to write down!).
Make a list of everywhere you think your recipes reside, then tackle gathering them all in one place.
Two tips: Ask your loved ones which recipes you should include (you might be surprised what your kids ask for!), and then call your siblings and parents to solicit recipes from them, too. The more complete your collection, the better!
3 - Add pictures.
Do you have photos of Grandma in her kitchen, or Poppa pulling the turkey out of the oven on Thanksgiving?
Go on a treasure hunt to find as many food-related photos as you can. Then, digitize them with an app such as Google PhotoScan or hire a professional to scan them so you ensure you don’t lose them (and so you can use them in a printed book if you wish). Make sure to scour your phone scroll for recent images, too.
Also consider hiring a professional photographer to capture a cooking session in your home kitchen. I can recommend photographers across the country, so don’t hesitate to ask me for recommendations. You can include handed-down cast-iron pots, serving dishes, and other family heirlooms in the shoot to make it even more special.

Photos—especially those taken in your home kitchen—help bring stories in a family cookbook to life.

Gathering together around the dinner table (and your favorite family foods, of course!) is a great way to share memories to include in your heritage cookbook.
4 - Find the stories.
For your most-often-cooked foods, traditional fare, and family favorites, write about the memories associated with each of them.
Be specific: Mention the cast-iron pan with the always-loose handle that Bubbe cooked his eggs in. The apron Aunt Ida wore only on Passover. How cherry Jell-o brings you back to your childhood, and the aroma of anise transports you to Brooklyn at Easter. Details, details—the scents and colors and textures...the truth of the story lies in the details.
One fun way to capture these stories is to host a family get-together with the express purpose of reminiscing (over dinner, of course!). Designate someone to take notes, and set up a couple of voice recorders (your smart phone is fine) around the room to get the stories. Oh, and take some pictures while you’re at it.
In an upcoming blog post we will share a list of questions to prompt food memories, which you can use either as writing prompts or as conversation starters during your get-together. Sign up for our newsletter to be sure you don’t miss it!
Want to read food stories from others for a little tasty inspiration?
Check these out:
Billee’s “Famous” Foods
Gramma Billee kept a jar for bacon drippings on her stove; she used it liberally and kept it full. She knew everyone’s favorite foods and provided them—often. Click here to read Billee’s “Famous” Foods.
Mom’s Spaghetti & meatballs
Red sauce ran in her grandmother's blood, and every family member would one day memorize her beloved recipe. Peek into a family kitchen, and a mother's heart. Click here to read Mom’s Spaghetti & Meatballs.
POP’S PIE
Is a grandfather’s love the missing ingredient to the best key lime pie? A young mother delves into memories of the treats her beloved Pop made just for her. Click here to read Pop’s Pie.

Hey, memories! Come out of the closet, will you?
Your memories live in your head and heart, but family photos, heirlooms & mementos sure do call those memories forth—how to use them towards a life story book.

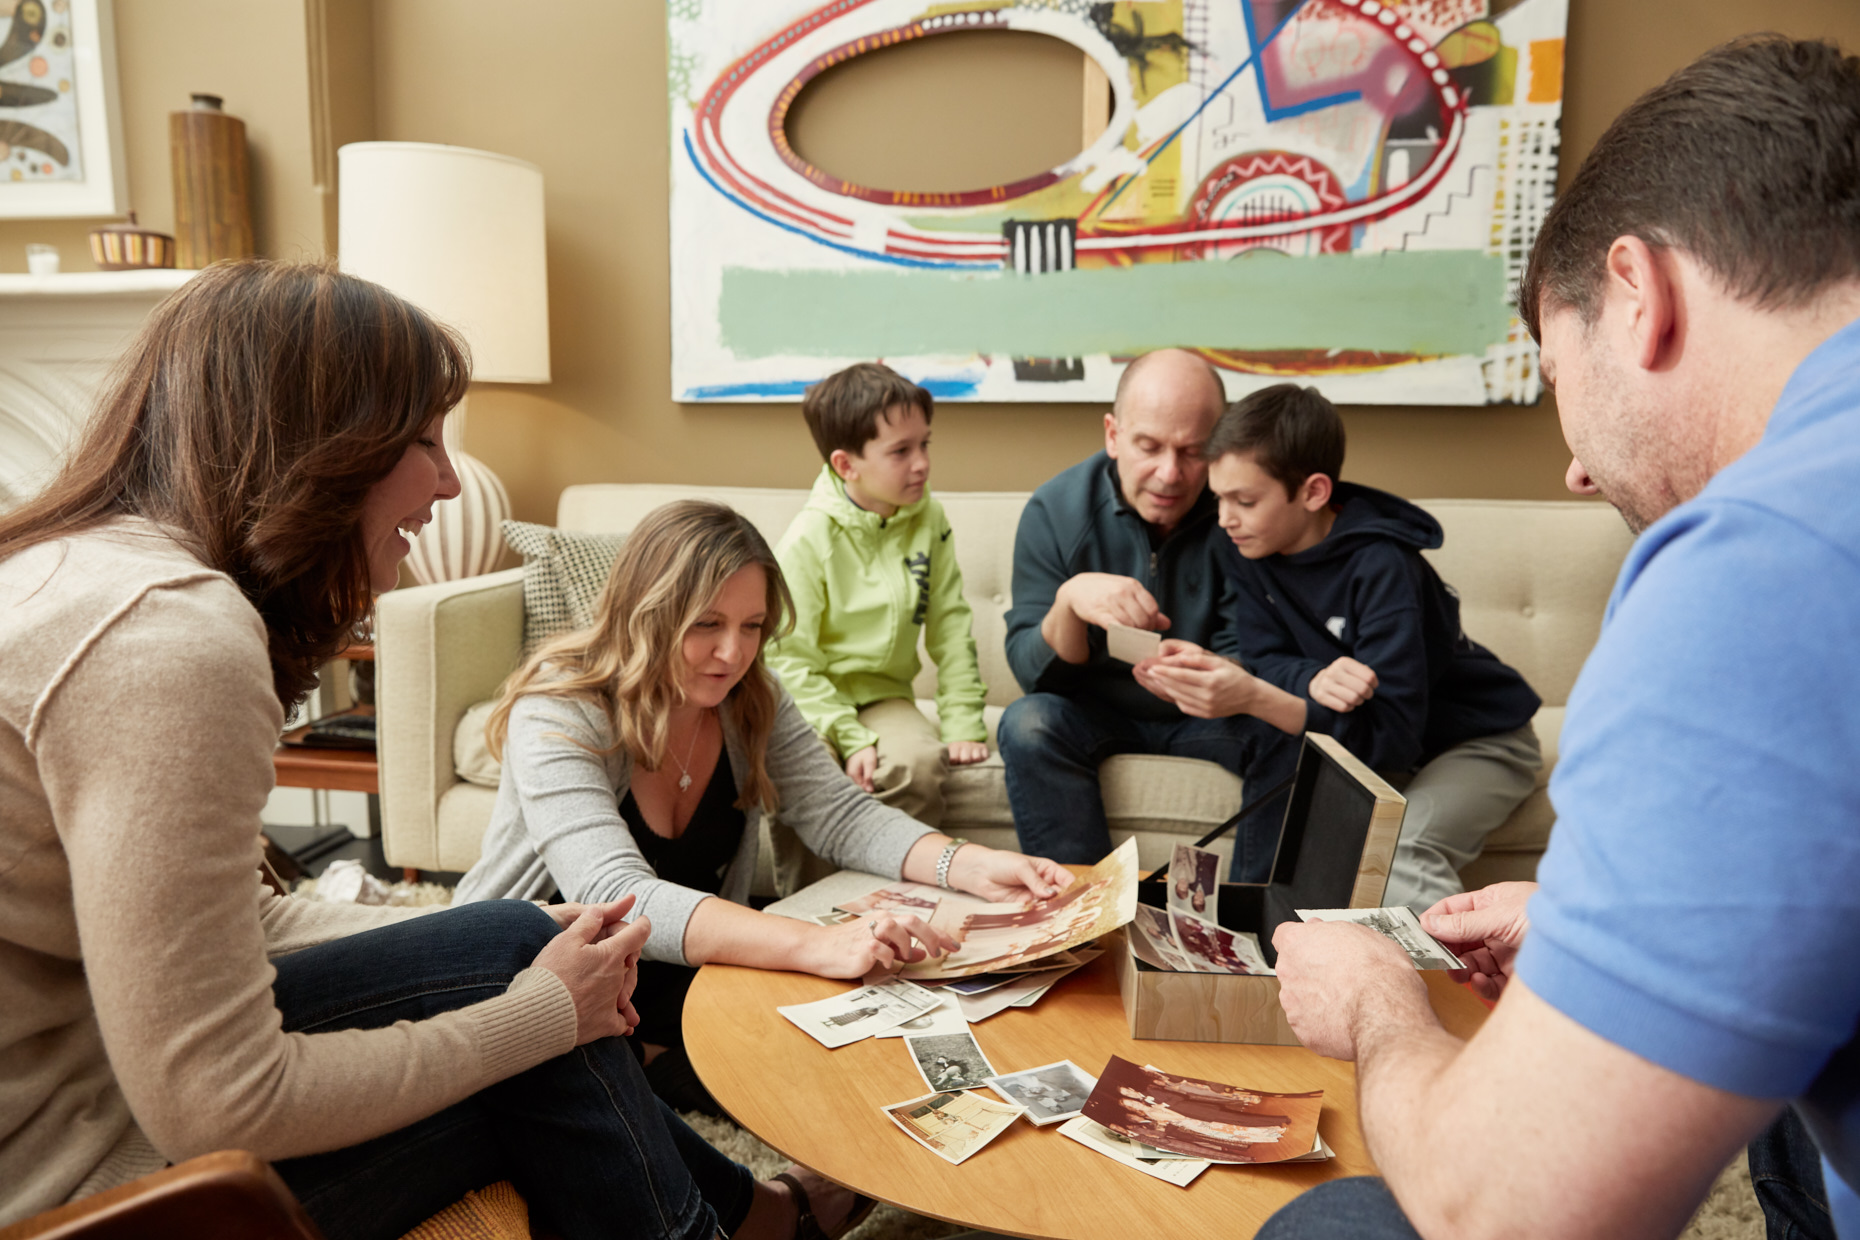
Sorting through your family archive for items for your life story book should be more strategic than organizing everything for posterity.
One of the first steps in any life story project is to begin to gather all the stuff in your family archive.
By that I mean photos, journals, letters, and mementos—the stuff of your life.
Finding and inventorying these items will help you in two ways:
as a tool for helping you prioritize and determine what is worth saving and what can be tossed—and how to plan for tackling the archive as a (separate) organization and preservation project.
as a resource for finding those items that will help tell your stories visually for your life story book project.
That second one is what we are focused on here!
How to organize your family archive as a resource for your life story book
Ready to get started? Using this free chart or a digital spreadsheet, make a list of everywhere your items live.
Remember: This is a guide to preparing your archive specifically as a resource for your life story book! That means yes, you should be focused on items that you want to include visually in your book, but also items that simply spark memories.
What is included in your family archive?
A Family Archive Checklist
physical family photos in boxes, albums, and frames
digital family photos on phones, computers, old disks, social media accounts, and external hard drives
family papers, including genealogy documentation, birth and death certificates, etc.
letters, journals, and diaries
mementos such as ticket stubs, postcards, report cards, scrapbook ephemera
physical family heirlooms such as inherited china, heritage furniture, passed-down jewelry
Finding inspiration and raw material
Back to using your archive as a reference for your life story book: Consider all of the items in your family archive to be raw materials that you can both find inspiration in and use to help tell your stories. A few ways to mine your family archive for this project:
Resources for remembering
Use specific family photos to jog your memories about your childhood.
Use letters and journals to help you recall details and emotions of recorded experiences.
Pull out tickets stubs and other mementos that hold the most meaning and make you feel something strong—they’ll likely be fodder for compelling stories if they hold that much sway.
Consider your genealogical files to be fact-checking resources for names, dates, and relationships that may be fuzzy in your memory.
Materials to reproduce in your book
Photograph family heirlooms so they can be accompanied by their stories in your book, so years from now they won’t be some dusty relics but heirlooms with a storied pedigree.
Select key old photos to digitize for inclusion in your book: Pictures help bring your words to life, but they must be chosen wisely.
Perhaps your handwritten journals evoke your teen years or capture a particularly emotional period in your life: Consider reproducing a key page or paragraphs throughout your book if you think they will add texture and a visual touchstone.
At this point, you should be most concerned with identifying and locating those items that you feel will be most useful to you in your life story project. Make a separate list, and pull out those materials to have on hand. Consider this a separate collection specifically gathered to help you tell your life story.
“When you have finished your appraisal, you’ll be left with a collection of the best and most significant artifacts,” archivist Margot Note writes. “Because you’ll be focusing on the collections that have the most value, you’ll be able to concentrate your efforts on what is most meaningful to you.” Indeed.
Keeping your curated archive on hand
Now that you have a tighter collection of photos, journals, and mementos set aside specifically for your life story project, keep them on hand—as well as the bulk of your family archive that you designated in the beginning.
Just because you set aside a photo initially doesn’t mean it will be the best for spurring memories later on; you may end up going back to those boxes to find another shot, or flipping through a different journal to discover a later recollection.
Be gentle with yourself. There’s no “getting it right”—this is a journey of discovery! Try to be strategic and deliberate while sorting your family archive, and understand that it’s all too easy to get lost in memories and nostalgia while trying to organize. When you realize that’s happening, steer yourself back to the task at hand, and remember: All of this is to provide you with the opportunity to reflect purposefully later on.

Printable Inventory Form
Download our free printable to help you keep track of all your life story project’s visual assets, from family photos to ticket stubs and journals—it’s easy-peasy.
Related reading
I will link to parts two and three in this series when they are posted:
You might also be interested in:
Tackling your whole archive?
If you would like to tackle getting your archive under control, I highly recommend purchasing archivist Margot Note’s book Creating Family Archives: A Step-by-Step Guide to Saving Your Memories for Future Generations. She’ll walk you through how to handle your materials, the best supplies, to buy, and ways to display and share your personal archives. Keep in mind: This is usually a big (and sprawling) project that takes some time to complete, but it is well worth your effort (especially if you have children; as I have written about before, leaving them a mess of family mementos is usually more of a burden than a welcome gift).

How to plan a life story book in 3 simple steps
These three simple steps will put you on the road to remembering, and make your life story book project proceed as efficiently and smoothly as possible.

The mere idea of creating a life story book is daunting. The notion of combing through boxes and devices full of photos, of writing (or even talking) about one’s life experiences—wait, will I even remember them??—and then organizing everything into some cohesive whole…phew. Forget it, there are dishes to do and movie marathons to binge.
Wait, what? Don’t forget it. Please.
If you know you want to leave a meaningful legacy in book form for the next generation but it scares the bejeezus out of you (or it’s simply not how you want to spend your time), let’s chat; as a personal historian with years of experience, I will guide you through the process—dare I say, even make it enjoyable.
If you are someone who is a little scared by the prospect but who still wants to tackle such a project on your own—congrats! And stick with me here, as I’ve got three simple steps to put you on the road to remembering, and to make your life story project proceed as efficiently and smoothly as possible.
3 broad steps to starting a life story book
Narrow down themes you would most like to address in your writing or interviews.
I will break out actionable steps and key things to consider for each of these in subsequent blog posts, but for now, a few quick hits:
1 - Organize your family archive.
I’m not talking about creating another huge project for yourself here (properly organizing all of your family papers and photographs could take months). What I am talking about is
creating an inventory of WHAT you have and WHERE you believe it resides (e.g., in a box in the basement or at your sister Susie’s house) and
identifying the key items in your archive that will help you with your project.
Help you how, you may be wondering? Designate photos and journals, for instance, that you anticipate will help jog your memories and spur you on to story sharing. Earmark genealogy papers that will be resources for creating your life timeline (step two, below) and be useful for fact-checking names, dates, and relationships later.
Hold onto this inventory, as it will be one of your primary tools when it’s time to dive into memoir writing or participating in personal history interviews.
2 - Write a life timeline.
Again, I won’t go into a complete how-to here, but I will say this: People don’t think chronologically; our memories come to us often unbidden, spurred by a scent in our grandmother’s kitchen or a scene in a novel we just read. A chronological framework of your life, though, will be a most useful tool in helping situate your memories in time and place.
Jot down years and major life milestones (decisions, employment, home moves, having children, etc.) in any format that works for you. That could be a document on your computer where you list the events in order with dates alongside, or a large piece of paper with handwritten notes broken up graphically into categories such as Childhood, Adolescence, Adulthood, and Golden Years.
Hold onto this timeline, as it will be another primary tool in your arsenal when it’s time to begin your life story project in earnest.
Click here to read a more in-depth guide to writing a life timeline.
3 - Narrow down themes you would most like to address in your writing or interviews.
Maybe you already know you want to cover only a sliver of your life in your book: your years in the military, say, or the profound transformation of becoming a parent. If so, you can skip this step.
If you are not yet sure which chapters of your life should become chapters in your book, then it’s time to brainstorm. Some questions to ask yourself:
What are the most impactful decisions I have ever made?
Are there times of struggle that serve as examples of resilience, or that hold other lessons?
What are the most joyful times of my life?
What have been the most challenging times of my life?
Is there anything about my career or vocation that is worth telling?
Who had the most impact on me growing up? As an adult? What did I learn from them?
What values do I most want to pass on to the next generation—and are there certain stories that exemplify those values?
Don’t edit yourself. Simply write everything that comes to mind when you think of “important chapters of my life.” You don’t have to decide now which musings will make it into the book—rather, these will serve as additional memory prompts, and some will have more resonance than others.
Hold onto this document of ideas, as it will be your final tool to have at the ready when your life story project gets underway.
Click here to read more about narrowing down themes for your life story book.
What’s next?
Now that you have your three pages of life story resources, it’s time to get into the business of remembering. How will you proceed? A few options to consider and tips to get you going:
If you are a writer:
Consider enrolling in one of my short courses to receive memory and writing prompts—as well as tips and inspiration—delivered straight to your phone. Current themes includes Childhood Memories and Food Memories, and more themes will be added soon.

Memory & writing prompts sent weekly to your phone
Short courses for anyone who wants to write about their life


If you would like to be interviewed to capture your stories:


If this all appeals but seems too daunting to take on yourself, please reach out. I would be honored to help guide you on this journey to create a legacy book capturing your stories for the next generation.

8 tips for creating your own tribute book in honor of a lost loved one
Writing a tribute book is a meaningful way to create a lasting legacy for a lost loved one. These expert tips from a personal historian will help.

Writing and designing a tribute book is a meaningful way to create a lasting legacy for a lost loved one.
After helping many individuals gather memories and express their love for a family member who has passed away, I have gathered my top eight tips for creating a tribute book on your own.
Remember: This is a labor of love. It may take some time, and you may get frustrated when you embark upon a part of the project with which you have no experience. That’s okay. Always think back to your why. Why you have decided to create this tribute book will motivate you to keep going, as I hope, too, will the advice that follows.
Top tips for gathering memories of a lost loved one:
Top tips for editing and designing a tribute book:
Click on any of the numbered items to go straight to that tip, or continue scrolling to read the whole story.
Gathering memories & tributes for your book

1 - It’s okay to be funny.
If your loved one was a vibrant and funny person in life, it stands to reason that tributes about them after their death should be infused with humor. It’s okay to step outside your grief and remember them with a smile, even a laugh. Happy memories provide comfort and help us heal, and will be a balm to the soul when you pull out this tribute book to visit with your lost loved one someday in the future.
2 - Be specific.
Be as specific as possible in your remembrances. This is the key to creating a moving tribute that holds meaning and calls the spirit of your loved one forth. Be heartfelt and open-hearted, and talk about distinct experiences you shared with the deceased. “That time Marc walked three miles to get Mom a cookie…” says so much more than “Marc was thoughtful”; “Deborah donned her Giants fan gear and ordered pizza from Sinapi’s every single Sunday” demonstrates her love of sports more than saying “Deborah was a Giants fan.” If everyone writes "Maria was a lovely person," it's not nearly as personal as saying WHY or sharing a story that illustrates the point!
3 - Be smart about gathering tributes from other people.
Chances are you won’t be the only person writing a tribute to your loved one who has passed away. Go ahead and ask family members, friends, work colleagues, and others to contribute to your tribute book. Ask for something concrete: “200-500 words about why you loved the person,” for example, or “please tell a story about a time they made you feel special.” Give contributors a deadline (even if you don’t need the book completed by a celebration of life or other event, choose a due date or you won’t get responses at all). Remember, too, that for some people, talking is easier than writing: If you think that may be the case for key family members, consider asking them to record their reminiscences, or record a conversation with them to capture their tributes, which you can type up later for the book.
4 - Include something in the deceased’s own words.
You don’t need to replicate full pages from their journal, but if you come across one or two things they have written that resonate, include them. Perhaps it’s a poem or a quote from a diary, a special letter to a family member, or even a handwritten recipe for that one comfort dish they always made. Hearing their voice come through in the pages of your tribute book will help keep their spirit alive.
Editing & designing your tribute book

1 - List relationships explicitly.
While it seems obvious to you as you’re creating a tribute book that the person you are honoring was your mother, someone else’s sister, friend, colleague…well, it won’t be so obvious in a few years’ time, and certainly not in a few decades. Make your tribute a lasting contribution to your family history archive. By providing full names and relationships to the person being honored, you ensure that the next generation may understand the bigger picture and get to know your deceased loved one more intimately.
2 - Include pictures—but not too many.
Will you include photos of the person being honored only? I recommend also including pictures of the people offering tributes. Alongside an individual’s quotes, include a photo of them with the deceased whenever possible. Include a curated selection of photos of the person you are honoring from different stages of their life—from childhood through old age—so you show their personality and experiences but do not overwhelm a reader. You want the photos to add to the stories within your tribute book, not distract from them.
3 - Consider transcribing handwritten notes.
While I love the idea of including handwritten tributes in your book, you run the risk of people not reading them if they don’t appear immediately legible. A design can get messy, too, if a book has page after page of scanned handwritten missives. Consider including portions of a note—such as a handwritten quote here and there—as design elements alongside typeset transcripts of everyone’s tributes. You can always save handwritten stories tied with a lovely ribbon or inside a special box; they’re destined to become a unique family heirloom all their own.
4 - Choose book materials wisely.
Whether you decide to use a digital on-demand printer to produce your book or go a more DIY scrapbooking route, plan for your tribute book to last. Use archival paper and acid-free adhesives in a scrapbook or hand-bound album; and save digital copies of your computer-designed book in multiple locations (an external hard drive or cloud backup, for instance). You and your family have worked hard to memorialize this special person who has passed away, so do what you can to ensure their legacy lives on.
Related resources
If you’d like to create a book but would rather have professional guidance along the way, consider our personal historian services: Explore our tribute book packages.
Contact Dawn to learn how we could work together on a tribute book or other heirloom book project.

FREE:
Questions to Help You Honor Them
This printable list of 35 questions to ask to prompt memories of your lost loved one is a helpful tool, especially to have on hand when gathering with family.


What to save for your adoption journey book
If you would like to document your family stories in an adoption journey book, here is a road map for what to save, how to record memories, and when to begin.
It’s been a while since I worked on an adoption journey book, but I have recently gotten a few inquiries about them and thought I would share some helpful tips on how to best preserve your memories of this transformational time in your life.

Including images in your adoption journey book of your child’s everyday moments during the early years (think eating, bath time, reading a book) will help to bring those experiences to life in the most amazing way.
What is an adoption journey book?
While a life book is your child’s story, an adoption journey heirloom book is your story—you as an adoptive parent, and you as a member of your growing family.
Your adoption journey book might include:
memories of the first meeting, the long journey home, first weeks together, first bonding experience...the memories that you don't want to fade
a visual timeline of the adoption process
photographs through the years
maps of your child’s birthplace and where you physically traveled
handwritten notes from your journal, especially during the early days as a new parent
typed or handwritten letter with dreams for the future
thoughts on what it means to be a parent—and a family
memorabilia such as your ticket to your child’s birthplace, or the email alerting you to your approval as adoptive parents
insights and feelings—the inner story of your adoption journey
There are so many paths to parenthood. Your journey, though, is the one that matters to you and your family. An adoption journey heirloom book is a beautiful means of honoring your family’s unique story and of preserving the memories and emotions for your children—and, just maybe, for the next generation.
How to keep track of your adoption journey
Did reading the above list give you palpitations? Angst at realizing you have no idea where you would dig up all that info, or guilt at not having kept a journal? If you are eager to create an adoption journey book but unsure how to access your memories, I can help you.
But if you’re thinking about this earlier in the process, first, I congratulate you; and second, I offer you a road map for keeping track of your journey so documenting it in a book later will be an even smoother process. I generally recommend undertaking making an adoption journey book around the first or second anniversary of your adoption (also called a “Gotcha Day” or “Homecoming Day”).
Some ideas for what to save:
1 - Keep an accordion file of things to help you fill in a timeline of your adoption process:
all adoption paperwork (including email correspondence, postponements, requests for new forms, etc.)
airline boarding passes
postcards from the locations you travel through
ticket stubs or restaurant menus
2 - Save photos of:
your travels, in the airport, at the adoption locale
first family photo
milestones for your child(ren), including new foods, first American travel destination, first friends, etc.
any photos showing you in the country of origin for your adopted child
photographs of special, everyday moments (parents feeding a baby, reading to your children, hugs)
images that show your child’s personality (active kid running, a funny child laughing).
Ideally, you will have a mix of photographs that will help you recall this special time in your family’s life, including both the monumental (the day of adoption) and the everyday (bath time).
Consider keeping a journal.
While a journal will of course help you preserve memories for an adoption journey book down the road, writing about your feelings will also have an immediate benefit: Journaling has been shown to have a positive impact on physical well-being and to be a helpful stress management tool.
A few topics to consider journaling about:
forging bonds in the early stages of adoption
how you choose to share details about your child’s origins
ways you intend to incorporate your child’s culture into his/her life (traditional foods, holidays, language)
moments of grace
moments of struggle
Adoption is a lifelong journey.
Adoption is a lifelong journey. And while an adoption journey book such as I am recommending typically focuses on the process of adoption and the first year of settling in and becoming a new family, you always have the option to delve into your stories later in the journey, too.
I focus on these early months because, for one, they are so emotional and life-changing; and two, because they are often the most difficult to remember in detail in later years—when you will undoubtedly want to share them with your child(ren) as they mature.
For those of you who are in the midst of your adoption journey or who have already made an heirloom book, what other things might you suggest?
Additional reading:


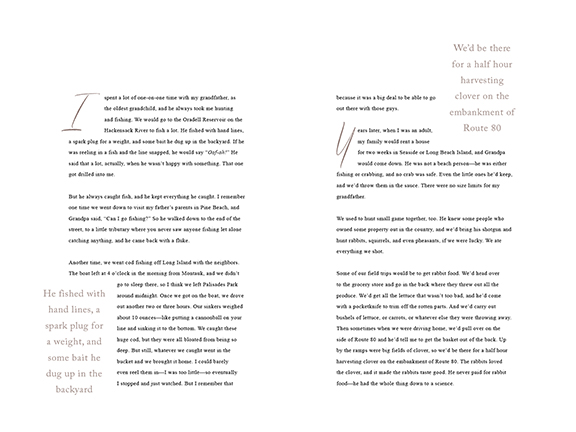
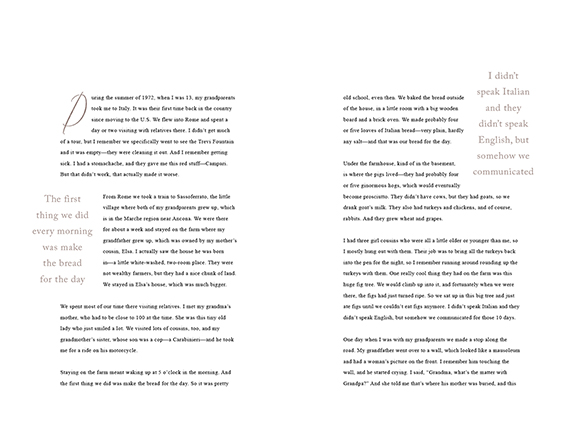
How to use short vignettes to create a mosaic of your life
How the best life story vignettes are powerful ways to capture your past, and why writing short pieces from your memories is a smart way to begin your memoir.
While most of my clients share their stories in a series of one-on-one personal interviews (which we then transcribe and edit into a larger narrative), some have already written—or are trying to write—their memoir. It’s usually when they are stuck that they seek our help, but it’s my goal to empower everyone to be able to write their life stories for the next generation, whatever route you take.
Since one of the most debilitating fears I hear is, “How would I even begin to tell my story?!” I often advise: Start anywhere—just start small.

“What is a vignette?”
vignette (noun)
vi·gnette | \ vin-ˈyet , vēn-\
a : a short descriptive literary sketch
b : a brief incident or scene (as in a play or movie)
A vignette is a recollection of a memory or an episode from your life told evocatively. It is a snapshot of a moment.
You may describe it in your own voice, or using dialogue reconstructed as best as your memory allows, using language to recreate your sensory experience—what did you smell, how was the light, what textures might you have touched?
“Vignettes are tiny essays, story placards, postcards of injustice, single-image stories, little wisps of big ideas,” Tamara Pearson writes in Red Wedge Magazine.
The best life story vignettes transport the reader to the scene and elicit reactions—feelings.
There are two primary reasons I encourage people (non-writers, particularly) to begin with a vignette:
It is a lot less intimidating to write one scene than “the story of your life.” And any writer will tell you: Just write. The words will not begin flowing unless you start.
If you don’t have to worry about traditional story structure—beginning, middle, end; plot, conflict, resolution—the writing process becomes more straightforward.
So don’t worry about story structure and especially, don’t think about the BOOK. Simply think about your memories.
“How do I create a life mosaic from a series of vignettes?”
Assembling shorter pieces into an extended work is more than copying and pasting the vignettes together in one document. It’s more, indeed, than even thematically grouping them.
Editing the stories, finding the narrative in order to group the vignettes for impact and cohesion, revisiting and embellishing some and discarding others—all of these tasks should come on the heels of writing.
While I have referred to the resulting narrative of assembled vignettes as a mosaic, Tristine Rainer, director of the Center for Autobiographic Studies in California, calls it a quilt. “When you follow the quilt model of assembling a work, you spontaneously write and collect pieces that seem to you thematically related. As you proceed, a pattern or story begins to link the pieces. Certain areas will easily cluster, but you won’t have the whole picture until it is all in place.”
Additionally, I prefer to enhance the written words with photographs that help bring them to life—that allow readers multiple entry points to engage with the text. Imagine a coffee table book about the Civil War sitting beside a 1,000-page tome void of any pictures—which would you pick up? Even if the stories of my ancestor were highlighted in each of these books, I would undoubtedly look at the coffee table book first.
How material is presented makes it more (or less) accessible, and I take the viewpoint that you are writing these stories so they will be read (ideally, often). So let’s invite people in! Taking the time to design a mosaic of these stories cohesively—and beautifully—ensures that they will live on. That your legacy will be recounted and woven into the fabric of your progeny’s lives.
“What if I can’t get past writing the vignettes?”
When you have written a series of vignettes from your life, you will have created a wonderful legacy for generations to come. If taking the next steps seems daunting, consider hiring us to edit, compose, and package your stories into a cohesive heirloom book.
Even if you’re not ready for that, though, remember, as Lois Daniel asserts in How to Write Your Own Life Story: “You may be able to enhance your stories by the way you arrange and connect them, but you can’t diminish them, so move ahead with confidence.”
And no matter what, share your stories with those you love—please.


Check out more in-depth posts on memoir-style vignette writing
Here is some helpful content to help you get down to the nitty-gritty of writing your life stories. Check out our writing prompts series and explore more on memoir and life story writing, starting here:
Memory & writing prompts sent weekly to your phone
Short courses for anyone who wants to write about their life—just $15 for 8 weeks of guidance & inspiration!
Get FREE Writing Prompts Guide
All our vignette writing prompts in one easy-to-read, printable guide!
6 tips for choosing the best family photos to use as writing prompts
Family photos can be useful tools to jog memories and call forth stories. We share how to determine which images will elicit the best family stories.
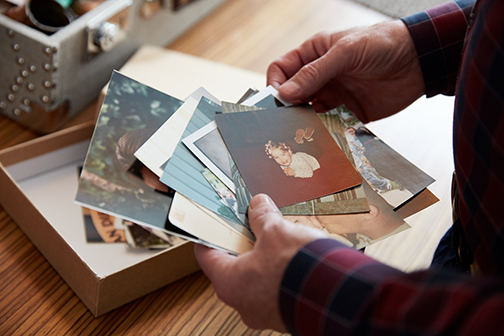
There are no rules for how to choose a photo that will be effective as a biographical writing prompt, but we can offer a few guidelines for the types of images that often elicit storytelling that is deeper and more meaningful than a mere identifying caption.
That’s the goal, after all: To use a photo as a starting point for your storytelling—as a jumping off point for memories, a touchstone for emotions, a lead-in to a narrative from your life.
So get out your old family photo albums or that dusty box of print photographs from the basement! Then…
Step One: Choose 10-20 pictures to start with.
Begin randomly looking at photos.
Rather than focusing on those that are frame-worthy, look for photos that elicit a strong feeling from the viewer (you, or the family member from whom you would like to capture stories).
Set aside 10-20 images that stopped you in your tracks in number two (even if you stopped to wonder about the image as opposed to reliving memories as a result of looking at it; sometimes it’s the mysteries behind a photo that draw forth particularly revelatory stories).
Now it’s time to choose a photo with which to begin your reminiscing. Whether you are using the photo as a writing prompt or as a vehicle to jump-start conversation in a personal history interview, the following suggestions will be helpful in selecting images that lead to substantial storytelling.
“Photos reveal themselves in layers,” Maureen Taylor (aka ‘The Photo Detective’) writes on her blog. “You study the clues and talk to family but every time you look at it or show it off to family you might learn something new. One thing leads to another.”
Step Two: Determine if the photo is story-worthy,
Ask yourself if the photo you are holding does any of the following six things—and if the answer to one or more of them is yes, then you’ve got yourself a winner. Set it aside and make sure it’s on hand the next time you want to delve into some family history writing!

The photo invokes an emotional response.
Do you feel a rush of excitement or a flush of scarlet creep up your face when you first spy the picture? It may make you feel anguish or sorrow, pride or exasperation, abundant joy or abiding love—the key is, it makes you feel.
If a family photo has such a visceral effect on you, this will be most fruitful for writing its story.
“Photographs are about one specific second, but they can also be about the future,” Beth Kephart writes in The Quest for Truth. “Photographs can operate as metaphor and counterweight, as tease and opposition, as the other half of a parenthesis.”
That photo that moves you is a doorway to your past that is clearly connected to your present in some way. Explore why you feel the way you do, and how this feeling fits into your life then and now. Provide context for your feelings; set the scene.
The picture tells a visual story.
Sometimes a picture itself already reveals a story: If the who, what, where, when, and why (or most of those) are apparent just from looking at the photo, then it’s likely a good candidate for embellishing upon. Of course, it’s ideal to choose images whose stories matter to you in some way.
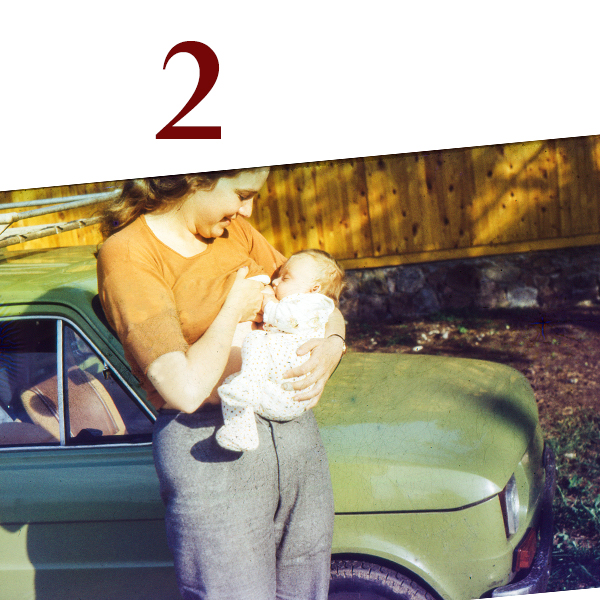
The snapshot of this woman breastfeeding certainly tells a story about who she was as a mother—and if the mores of the time period and the town are known, and her character as well, then the storyteller can dive deep. A grown child looking at this image might use it as a jumping-off point for talking about their relationship over the years; or perhaps how their mom was part of a strong line of women before her; maybe she was only able to have one child, or 10, or only girls…
A photo is a moment in time, but on the periphery are details that help make up its narrative. What photo would have been shot just before this one? Just after? What’s in the frame? What (and notably who) is not in the frame? By starting with a picture whose story seems readily available, we can develop depth by asking such probing questions and tapping our memories for more.

Details draw your attention.
Your facial expression at the time the picture was snapped. The pattern of your grandmother’s well-worn house dress. A missing button on your dad’s shirt, or the papers falling from his briefcase. The water stain on the bedroom wallpaper. If some detail in a photo draws your eye again and again, there is more to be probed.
What does the detail begin to tell you? What beyond the frame of the photo—on that day, or a decade before or after the photo was taken—makes you focus on it? By taking the time to meditate upon all that the detail calls forth in your mind, you will reveal a greater meaning to this photo than could ever be revealed upon initial inspection.
The photo portrays part of the subject’s everyday world.
My favorite type of modern family pictures could be described as documentary family photography: people in their natural environment, doing what they do every day. (Check out talented photographer Jen Grima’s work for inspiration.) I love capturing our routine family narrative this way because the resulting photos are so evocative of time and place, and they set us in scenes that are real and personal, uniquely ours.
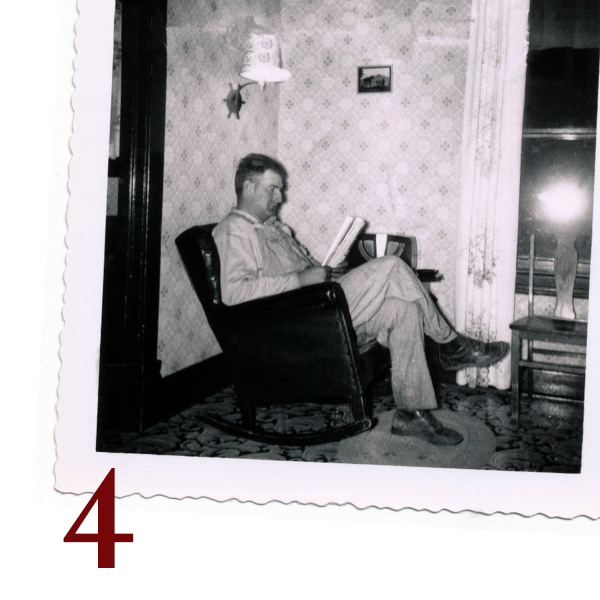
Many old family photos do so less consciously, perhaps, but the impact is the same. We are drawn to such pictures because they reveal what our or our ancestor’s life was like back then. So if a snapshot of your aunt holding you while she’s hanging the laundry crosses your path, use it to tell a story. If you find a picture of grandpa reading in his favorite recliner, dad trimming the hedges at your childhood home, or your baby crawling amidst the messy remnants of Christmas wrapping paper, use them all—find their stories.

The image intrigues you.
Is it a curious shot? Out of the ordinary for your family or for the time period? Is someone missing who you would have expected to be present in that scene?
If it makes you wonder, then it very well may lead to a worthwhile story. Perhaps you end up asking for relatives’ input to get to the bottom of your intrigue, or maybe in lieu of concrete answers you surmise the story behind the old photo, thereby revealing a narrative of your own in relation to the photo. Chances are, whatever your approach the resulting observations will be as alluring to the next person as the original photograph was to you.

The physical print tells its own story.
My grandmother had a tendency to hold a grudge, so it was not too surprising to find among her things photos that had an individual literally cut out of the scene (or crossed out with ballpoint pen). Now there’s a story to be revealed! The same could be said for pictures that have been torn, damaged by flood or fire, or found tucked away in a book.
Sometimes getting to the story behind the photo is as fun—and constructive—as getting to the story that resides within it.
Step 3: Start sharing your stories.
Read more about how to use old family photos as biographical writing prompts—we’re talking nitty-gritty advice, from where to begin after looking at the photo to how to capture your memories.
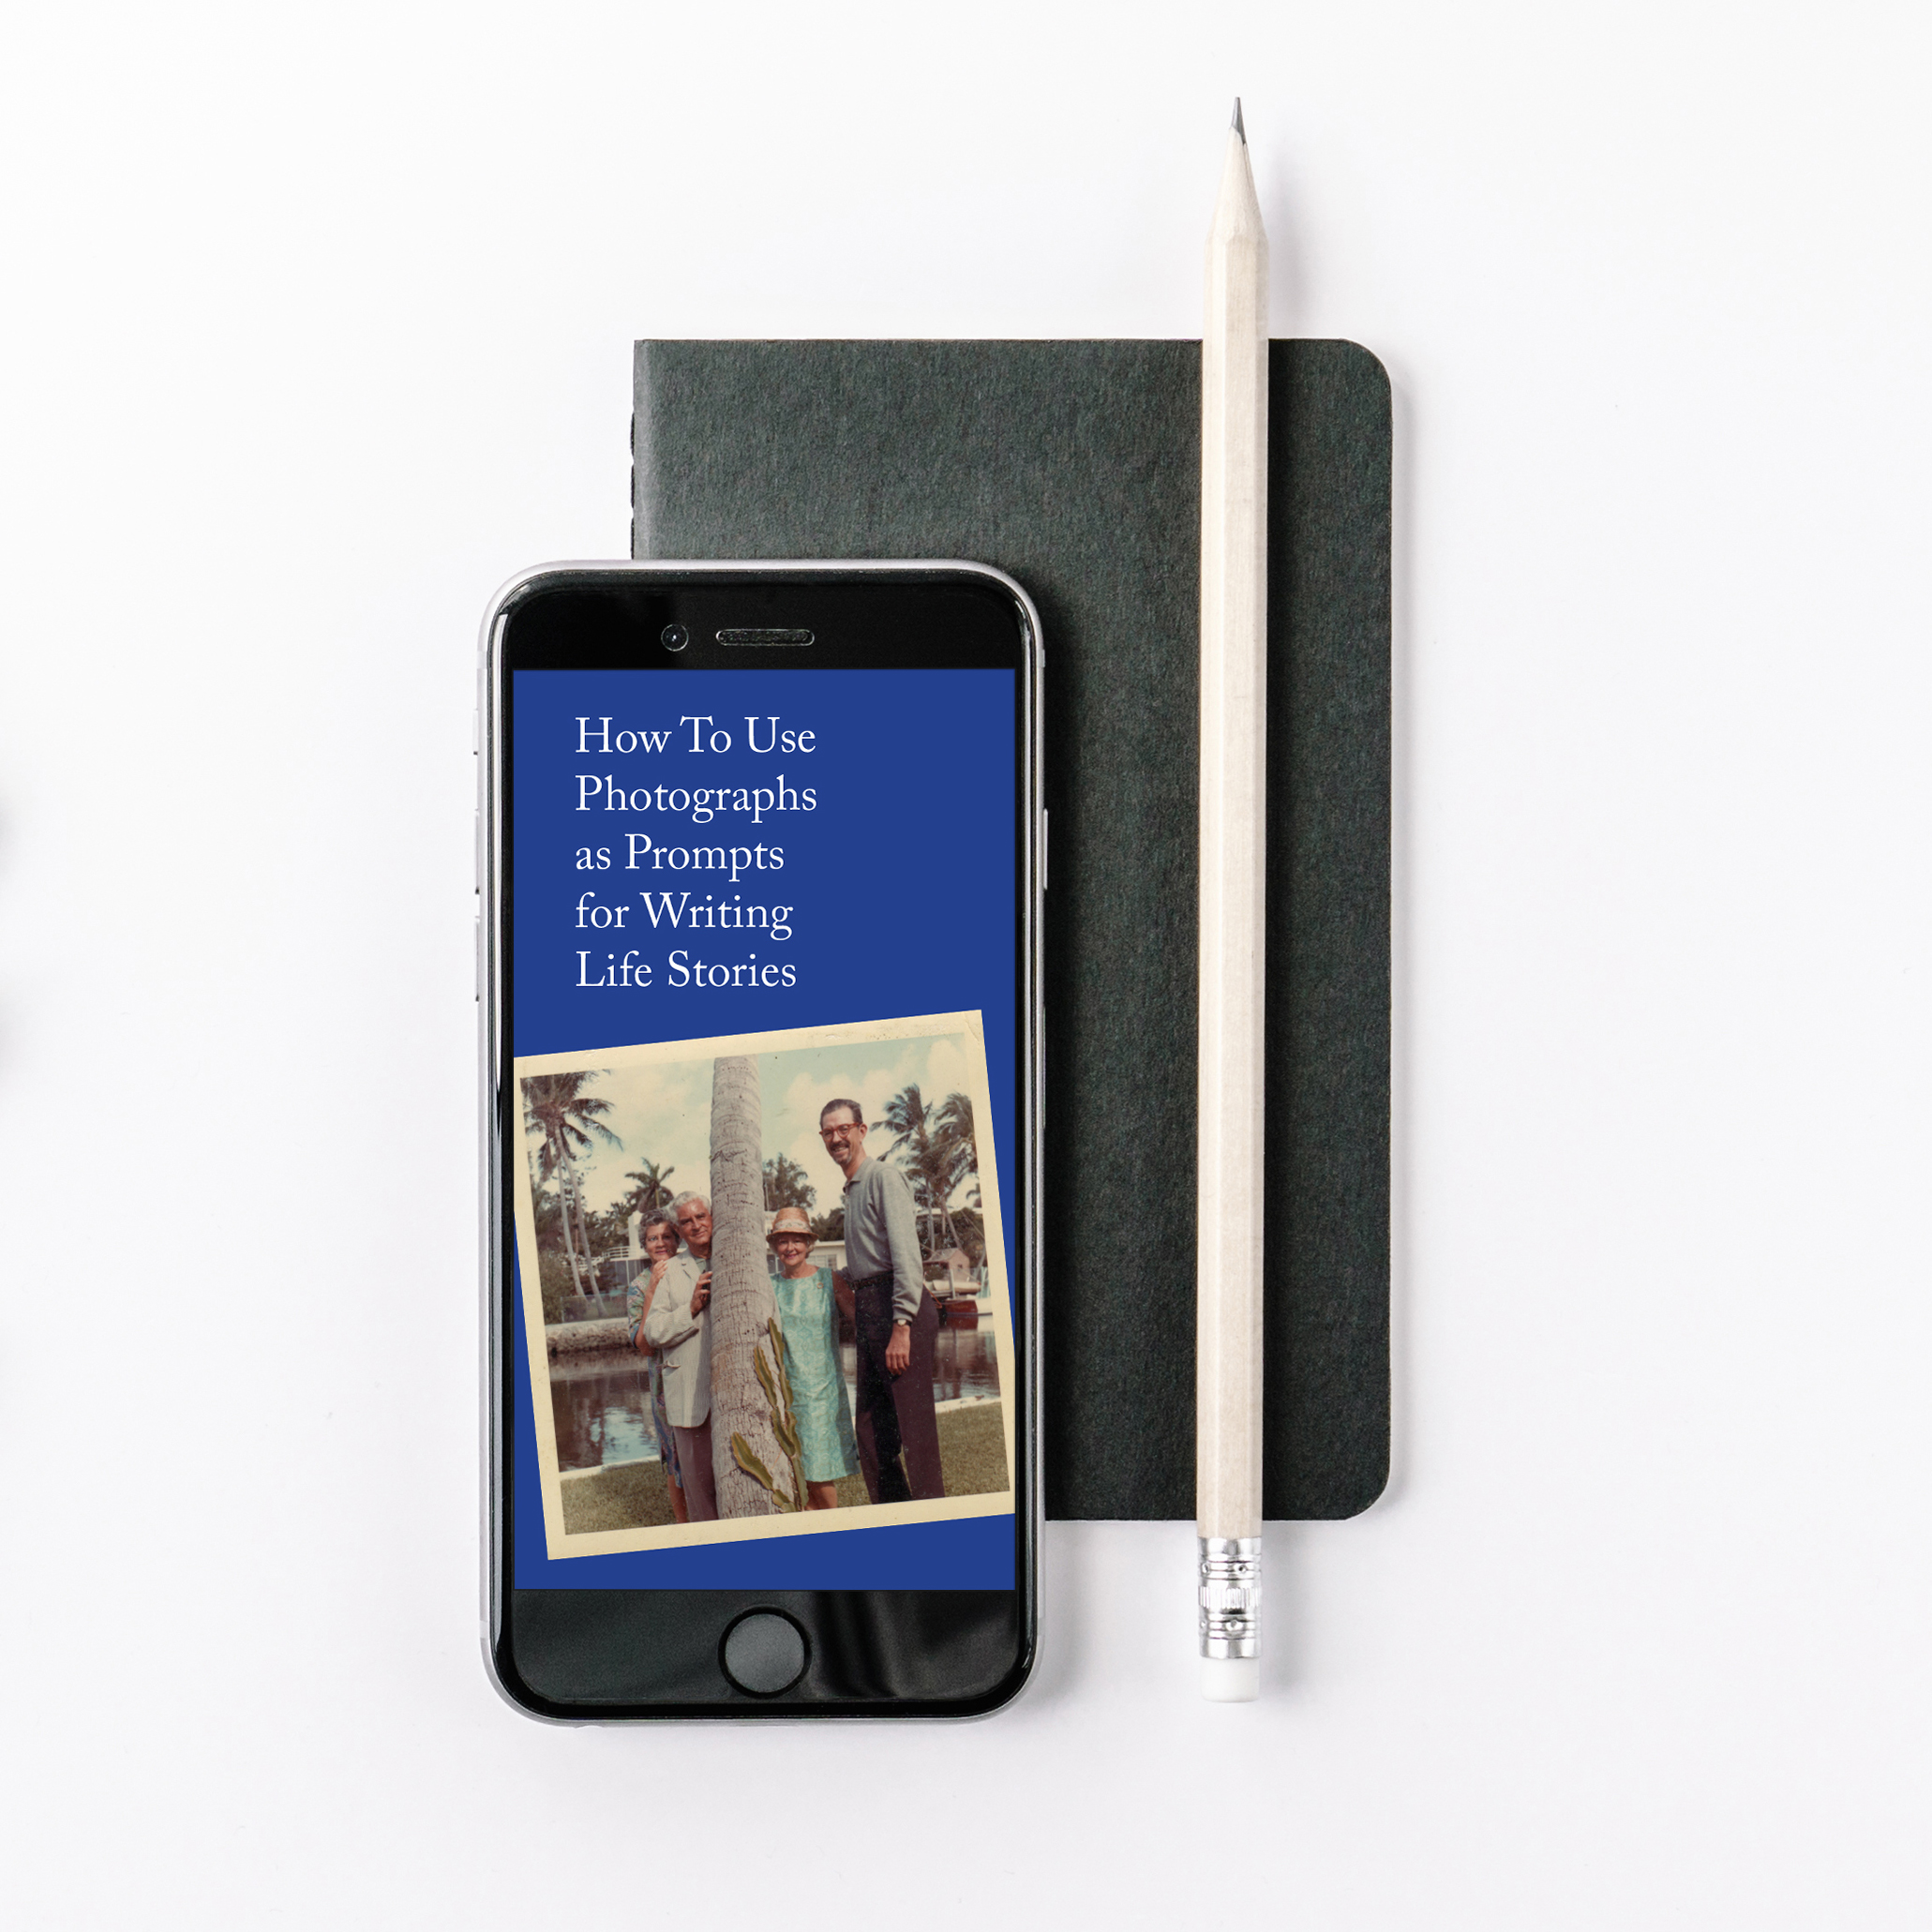
Download the advice in a handy printer-friendly booklet here, entitled “How to Use Photographs as Prompts for Writing Life Stories.”
Explore more intense self-reflective writing prompts in Beth Kephart’s memoir writing workbook.
Once you’ve written your first life story vignette, consider doing something special with it—we’ve got five easy ideas.

How to use photographs as prompts for writing life stories
Use these tips to tell the stories behind your family photos and leave a visual AND narrative history to your children—a gift from the past to the future.
“Your photography is a record of your living, for anyone who really wants to see.” —Paul Strand
If writing a life story book seems overwhelming, write shorter stories from your life using some favorite family photos to jog your memory.
My generation knows the pleasure, both tactile and emotional, of exploring a box of dusty old photographs: the sense of discovery, of time travel, the good fortune of glimpsing our parents as carefree teenagers, of seeing ourselves as Garanimals-clad kids.
But this is becoming a thing of the past. Do you even have a box of photos in your home?
It saddens me to think of our children inheriting a box of old devices (your iphone will be extinct one day, you know!) and wondering how they can access the digital trove of photos they know must be stored within. And they likely won’t be able to retrieve those images, as the technology will have changed by then.
Just as I wish my mother and grandmother had jotted names and dates on the back of their old photos, our kids will one day be wishing we left some clues about our own pictures (metadata, anyone?).
I urge you to go a few steps further, to not only record the details of important photographs, but to elucidate the stories associated with them. To leave a visual AND narrative history to your children, a gift from the past for the future.
How to Shape Your (Small) Life Stories
I’ve written about this before, but it’s worth reiterating: Shorter is often better, especially when it comes to autobiographical writing. That’s why using photos as jumping-off points for your stories can be such an effective method.
Don’t worry about length when you sit down to write. Just choose a photo, and begin sharing. A few initial ideas:
1 - Talk, don’t write.
Pick up a digital recorder (or use the function on your smart phone) and talk into it. Often spoken language is more direct. You won’t get hung up on sentence structure or finding the perfect words. Rather, your language will flow and have a natural rhythm. Your words will be honest and forthright. You can transcribe your recording later.
2 - Find a partner.
Having someone to listen to your story can be a powerful aid. Even if that person doesn’t engage you or ask questions, the very act of listening—an occasional nod, an understanding expression—let’s the speaker know that what they are saying matters. The more you converse with someone about your life stories, the easier it becomes to share them, shape them, and delve even deeper.
3 - Be specific.
Small details. Moments. A focus on life as it is truly lived. Did your mother enjoy a cup of room-temperature tea every night before bed? What did the hand-me-down pajamas you’re wearing in the Christmas-morning picture feel like? It wasn’t just a red car, it was a 1955 crimson Cadillac convertible that your dad referred to as “My Dorado.” This is not to say get lost in the details: Do not go overboard describing every object and movement in your story with multiple modifiers. This is to say that the specificity of the right details brings an era or a person to life in a most vibrant and revealing way. Choose wisely.
4 - Interview you.
If you hadn’t taken the picture, what would you want to know? Make believe you’re interviewing yourself. This is a helpful exercise in making sure the most essential (often obvious to you but not others) elements do not get left out of your story. And then, like HONY’s Stanton, edit, edit, edit: whittle your interview down to the bone, keeping in those details that surprise, delight, enlighten. I suggest waiting at least a day, longer if you have the luxury of time, to do the editing; it’s amazing how such distance enables us to better self-edit.
Let’s get started: Choose a picture, and use it as a prompt to write a life story vignette

Step 1: Look at your chosen photo.
Study it; ignore it. Eat some lunch and let the memories the picture elicits percolate. Now sit down at your computer to free write: Don’t worry about story structure or creating something for an audience, just write from your heart. If you are more comfortable with pen and paper, you might forego sentences altogether and jot down phrases, recollections, adjectives. The key to both approaches, whether stream-of-consciousness writing or brainstorming, is to go fast and to not worry about anything. Just do it.
thumbs up?
You may find that this one photo has stirred a wealth of memories for you to mine. Perhaps it recalls one vibrant scene from your childhood. Consider yourself lucky if either of these is the case! You’ve got the makings of a life story vignette at your fingertips.
thumbs down?
If the photo you’ve chosen reveals nothing more than a string of boring observations, don’t fret. First, go through this list to see if you get anywhere:
What is your personal connection to the photo?
What would you caption the photo (include as much basic factual information as possible, answering Who, What, Why, When?)
Write a question the photo brings to mind.
Write a detailed observation about the photo.
Still boring…? Don’t worry, just move on to the helpful exercise below to get the story behind your photo!
Step 2: Go beyond the frame.
Next, try this exercise from author Beth Kephart, an early assignment she would give to her creative nonfiction students at the University of Pennsylvania, as detailed in her book Handling the Truth:
Study the background of any chosen photograph. Not the foreground, the background. What’s in the picture that you didn’t see when you were snapping? What lies beyond the chosen subject—just to the right or the left? … What does the startle of the once-unnoticed detail suggest to you? What would happen if this small thing—and not the obvious thing, the central thing, the thing easily seized and snatched—was the start of your story?
Still nothing of interest?
Step 3: Enlist Help.
If you are convinced there is a worthy story attached to the photo, show it to a sibling or other relative to see what memories they may have. If you have other pictures from the same period, gaze at those for clues. Maybe it means something to you not for the story it tells, but for the one it does not tell: Who is the subject gazing at? What happened right before the camera was snapped? Who was left out of the moment—was it you? Or was the picture in a frame at your grandparents’ home, and your memory of that is what’s important?
If nothing more reveals itself and yet you are still compelled to include the photograph in your life story, ask yourself, why? Draft a caption that at least puts the image in context, reveals a mystery, or taps an emotion. Then leave it at that, and turn to your next photo. It is likely that after taking this approach with more of your family snapshots, this one will eventually find its way into your narrative or, rightfully, be edited out in favor of others that weave a more textured and colorful tapestry.
FREE Printable Guide
Download our FREE GUIDE, “How to Use Photographs as Prompts for Writing Life Stories” and get started asap on your journey of preserving your memories!
Next steps, and advice for non-writers
If all of this appeals to you but you’re not a DIYer, that’s what we are here for.
You may want to begin the journey of remembering and selecting photos on your own, using much of the advice provided on the blog—and then hand it over for refining and shaping; our expert editors and designers will transform your memories into a beautiful heirloom that reveals even more than you had imagined.
If you only get as far as piling up those boxes, no worries: We’ll walk you through the whole process! Set up a free consultation to learn how we can work together.