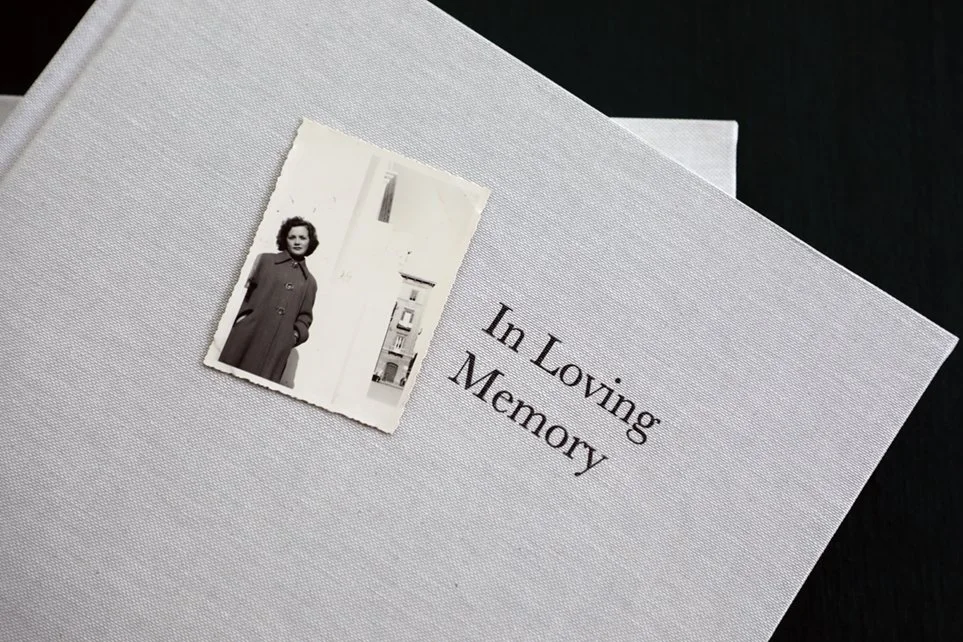
Memories Matter
Featured blog Posts

READ THE LATEST POSTS

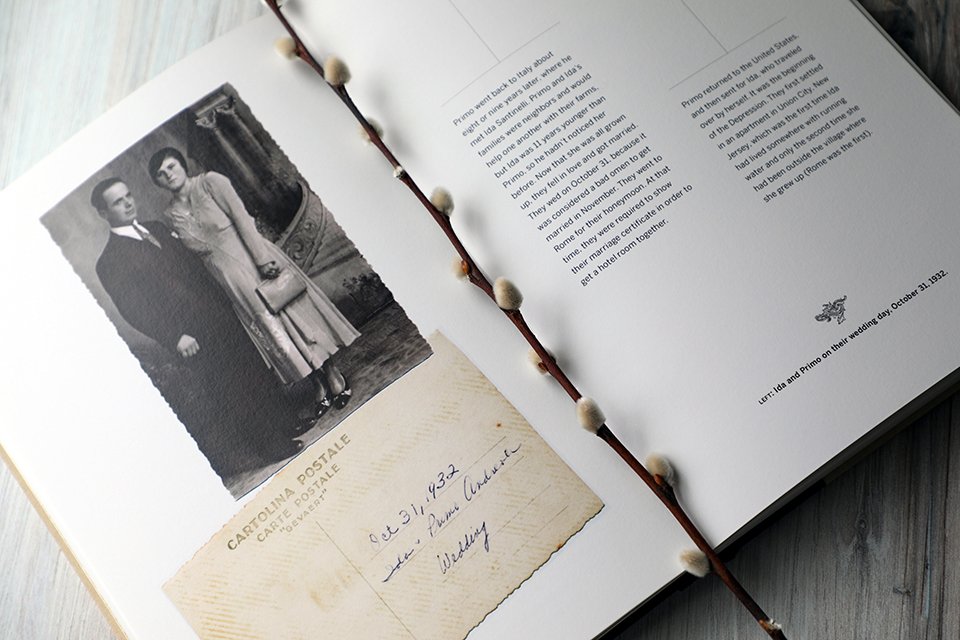
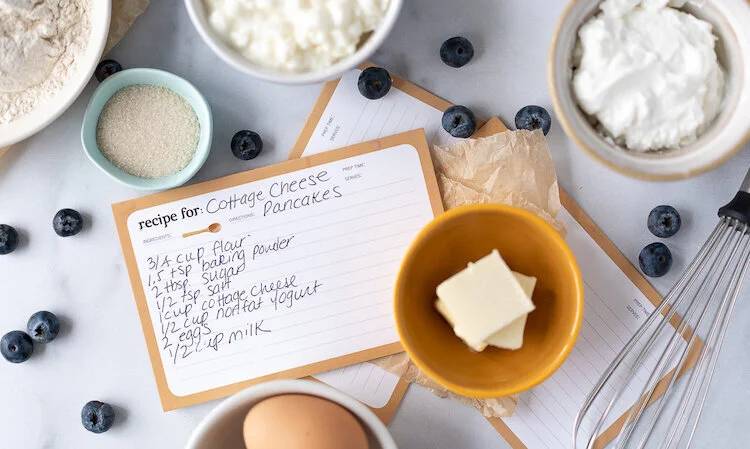
How to photograph your family heirlooms like a pro
Cataloguing your family heirlooms in a book is a great way to pass down their stories. Here are some tips for capturing incredible images of them, too.
Heirlooms can be unexpected—such as the gorgeous glass doorknobs shown here: “I was born into the bedroom with the glass doorknob and I didn’t leave it until I got married at age 23,” the subject remembers; she uses the object as a jumping-off point for stories from her life in that home (she even took the doorknob with her when the house was sold—a true heirloom). This is an example of a family heirloom photograph that has been styled and arranged in an environment, used as part of a broad family history book.
Whether you have centuries’ worth of expensive heirlooms handed down through generations or a few sentimental objects from a single ancestor, you should consider photographing your heirlooms to preserve their stories and provenance.
An heirloom’s preciousness does not derive from its financial worth, but from its meaning to you. Some of my most treasured heirlooms are valuable only to me—a crocheted blanket my mom made for me, a few shells I gathered on beaches during travels with my grandmother, and a wooden spoon that they both used that I now cook with daily. And yes, I consider each of those worthy of photographing—because they hold stories and love that I want to pass on.
Styling and photographing heirlooms can be as simple or as sophisticated as you’d like, depending upon your skill set and needs. Here are some guiding questions and helpful resources to empower you to photograph your heirlooms like a pro.
Decisions that will guide your heirloom photo shoot
What heirlooms do you want to photograph?
Knowing how many and what types of objects you want to photograph is a necessary first step. Make a list of the objects (some to consider: jewelry, letters, portraits, works of art, family Bibles, furniture, kitchen gear, instruments, clothing, china, military medals or uniforms, firearms, collectibles). Which do you want to photograph?
How will you be using the photos?
The two main ways I utilize images of family heirlooms in my books are
in a straightforward family history catalog, where the heirlooms are the main point of the book; or
in a broad family history book with a narrative focus, where the heirlooms are just one way of revealing a family’s stories.
For a straightforward heirloom catalog, the images need to clearly identify each object, perhaps show them from different angles, and hone in on relevant details. To achieve this:
Photograph each heirloom on the same backdrop. Using a large white foam board, available at any craft store, is an easy, clean option.
Maintain consistent lighting—either natural light from a window (in which case I recommend you schedule your shoots at the same time each day to ensure steady shadows) or artificial lighting (such as from studio lights, a camera flash, or directional light from a lamp). Strive to make each image look like they belong together in the same catalog.
Consider including a ruler or tape measure in some shots to clearly depict an object’s size.

I photographed this hand-turned plate, made by my client’s father, on a clean white background and from various angles, because it was being used in a catalog of family heirlooms. The lack of styling yields not only a timeless image, but a straightforward record of what the objects look like.
For images that will be included within a larger narrative book, you have many more options (and therefore, more choices—and more challenges). Consider:
What is the tone of your book? The design aesthetic? You will want to photograph the objects in a way that complements these.
In what context will the images be shown? This will influence how you style and shoot your heirlooms.
For example, in a recent book telling the story of a Jewish man who fought in the Red Army during World War II, I shot the subject’s military medals on clean white backgrounds, but in a stylized way—at an angle, with strong shadows, so when placed in the page layout they appear to be sitting on the book’s pages; I wanted the awards to stand on their own, visual reminders of the subject’s valor.
For another client, whose book encompassed generations’ worth of family history, I shot various heirlooms in styled settings that fit into the warmer, nostalgic tone of the book—an inherited cast-iron pan was styled with other items in their kitchen during a cooking session, capturing not only the textures of the heirloom, but its familiar use with a passed-down recipe; while a stack of letters that an ancestor had saved was tied beautifully with twine and styled with a handkerchief, floral stems, and one letter open for reading, an invitation into their intimacy.

This styled heirloom photo uses candles and flowers to add dimension and texture, natural lighting for soft shadows, and a simple wooden surface as a warm yet simple backdrop.
Where are the heirlooms?
Logistics can play a major role in how you photograph your family heirlooms. If you are the keeper of them all, then life is easy—skip this question! However, if your heirlooms are divided among various family members, or tucked away in a storage facility or bank vault, you will need a plan of attack.
Can you arrange to have all the heirlooms brought to a central location for one or two days of shooting?
If not, can you enlist the help of a family member at each location to make tackling multi-location shoots easier? Or ‘assign’ photo shoots to a different individual at each location?
How will you achieve consistent lighting across various locations (or change up your visual approach based on location)?
Have you thought of everyplace your heirlooms might be? Consider the homes of other family members; storage facilities, bank vaults or lock boxes; your own attic, basement, shed, closets;
Bonus: heirloom photography resources and ideas
Some easy heirloom image ideas:
Shoot a framed photograph in its environment, instead of scanning the image itself.
Shoot an everyday heirloom (one you use often, such as your grandma’s wooden spoon or your great-uncle’s woodworking plane) while you are using it—your hands and the surroundings will bring life to the object.
Have a collection of items such as baseball cards? Choose one or two representative items to make the center of your photo’s focus, but scatter many of the others around—you don’t need to see every item in a collection to understand its vastness or its value.
Shoot engagement rings on the hands of the wearer or in an elegant velvet ring box.
A few keys to getting great shots:
Remember, the subject is the focal point of the image—any props or backdrops you include should add texture and visual interest, but not distract from the main subject.
The angle you choose to shoot from will impact how the heirloom is seen. I recommend always shooting from a few angles—you might be surprised by which one resonates in the end.
Keep the trim size of the book in mind when shooting your heirlooms, as this may influence the orientation of your photographs.
Go for dimension and layering, but not a cluttered feel, when arranging props and heirlooms for your shoot. A simple dishcloth or ribbon, when styled beautifully, might be enough.
Reflective items such as mirrors and glass can be more difficult to shoot. Search YouTube for a tutorial on how to approach these objects.
“A ‘narrative’ is a little story or subtext that gives the shot its purpose,” prop stylist Robin Zachary writes in her beautiful book, Styling Beyond Instagram. “By combining any given theme and narrative, you can create endless options to give purpose and meaning to your images.” Be creative!
A few of my favorite (affordable) styling resources:
Related reading:
For tips on how to learn more about your family heirlooms, check out this piece in Family Tree Magazine.
For more ideas about preserving the stories behind your family heirlooms, explore the posts below:


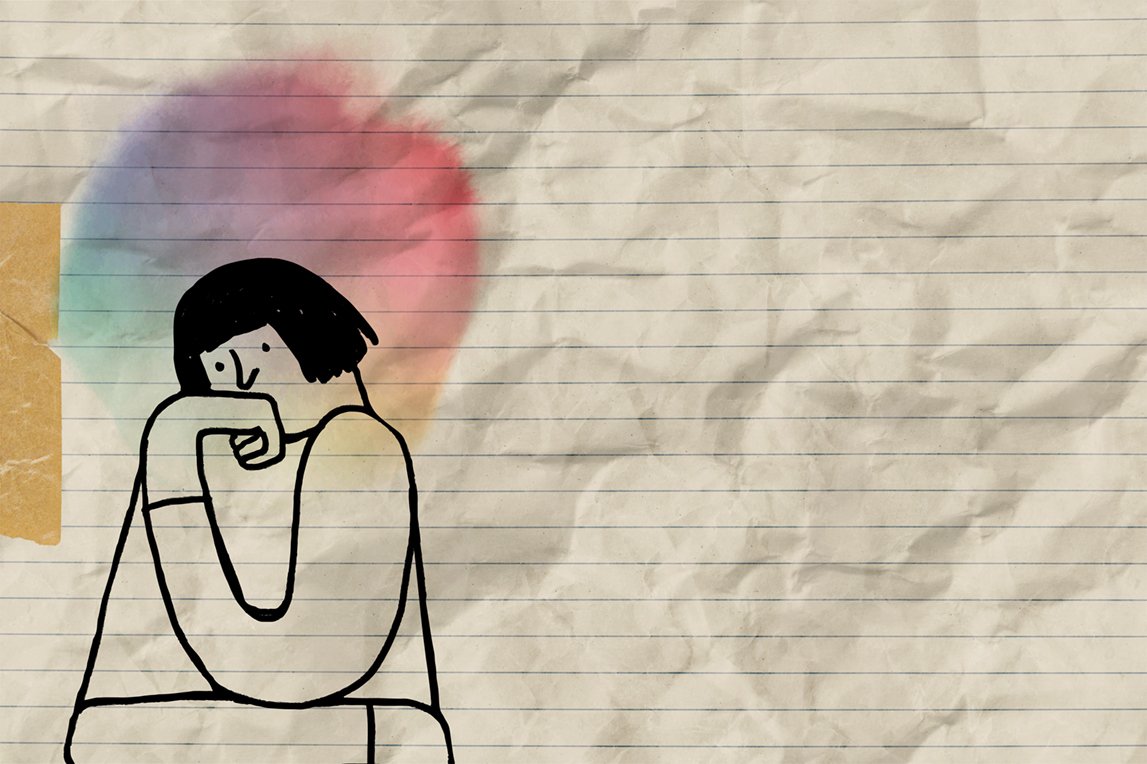
More memory, more memories? Nope.
Sure, smart phone memory is getting cheaper—but is that reason enough to save every photo in an endless scroll? Don’t lose your memories amidst digital clutter!
As most of the TV I consume these days is streaming, I don’t see nearly as many commercials as I used to. But sports are different, and I happened to see this ad from Apple during the NBA playoffs—and maybe because of what I do for a living, I couldn’t get it out of my mind:
How did this “Don’t Let Me Go’ ad make you feel? My guesses: guilty (about possibly deleting photos of someone you love!), hopeful (about not having to delete those photos anymore!), and maybe even nostalgic (“awww, remember all those special moments I’ve captured?!”)…
But before you go upping your device memory, consider that it’s not just money you’ll be spending to avoid inconvenience—it’s memory-keeping capital. Let me explain…
Where’d all my good pix go?
There are a whole bunch of huge numbers illustrating how we take so many more photos these days, especially since the advent of digital cameras—but, from my perspective, the numbers are so ridiculously large that it’s hard to even grasp their magnitude (1.5 trillion photos were taken in 2022, for example). But here’s one statistic that says something beyond the scale it measures:
Approximately 4.5 trillion photos are stored on Google Photos, with 28 billion uploaded each week, but most are never viewed, according to data from Google.
While I can’t grasp those numbers—28 billion pictures a week!!!—I am not surprised by that last morsel: Most of those photos stored on our phones are NEVER VIEWED!
You know what might actually be surprising, though? It’s not just the pictures of the paperback you might want to buy or the cheesy pizza you just Snapped that go unviewed—it’s the ones of your grandchild at the playground and your mom blowing out her birthday candles…the ones that hold special memories. That’s because those photos are lost amidst the digital clutter. They’re sitting on a device that you use to keep creating more and more content, without curating it. And when the photos are lost, the memories just might be, too.
Skip the guilt and say goodbye to some photos!
Despite how the folks at Apple want you to feel—guilty for deleting pictures of those you love!! privileged enough to just buy more memory and store ALL your photos for all time!!—I say: Forget the guilt. It’s much better to be intentional about what photos we save than to just mindlessly add a photo (or 20) a day to an endless scroll.
Back in 2015 I blogged about what to do if you are a “photo hoarder”—and, I must say, the post seems almost quaint now. Almost 10 years on and pretty much everyone I know is a photo hoarder, but our devices and the services that power them have made it not only easy but acceptable. Don’t buy in.
What will you gain if, instead of hoarding your digital photos, you cull through them semi-regularly and delete what’s not worth saving?
First off, you won’t have to spring for the extra money to increase your device storage (even if it seems like a negligible amount to you, it’s not always worth it).
Secondly, you will be creating a photo legacy that is BOTH manageable and special. Trust me, I’ve seen the flip side all too often with clients and friends: A parent or loved one passes away, and the mess of stuff, both physical and digital, is so overwhelming that much of it ends up in the trash. Think it won’t happen to you? Read this (please).
Lastly, and perhaps most importantly, you will be able to access, enjoy, and share your photo memories in ways that are easy and that bring joy!
So, where do I begin…?
While my intent today was mostly about getting you to think more deeply about this topic, of course, if it resonates, the next logical step is for you to take some action. Here’s some help:
want to use your photos to document memories?
One quick (joyful!) way to share one photo (who doesn’t have time for THAT?!)
How to choose the best family photos to use as writing prompts
want to decrease the number of photos you have?
How to organize your family archive as a resource for sparking memories
Follow these basic photo organizing principles so you leave a manageable photo legacy for your kids.
What to do to ensure your kids don’t throw out your family photos
If the DIY route isn’t your thing, consider hiring a professional photo manager to help you get your family photo library under control. You can search for a pro near you here, or if you’re in the greater NY/NJ/CT area, drop me a note and I can refer you to a trusted colleague.

Free printable guide
Our thoughtful guide, “How to Use Photographs as Prompts for Writing Life Stories,” is a handy reference for all those photos you do decide to save!

Are you ever intentional about your memories?
We all get a happy feeling when a “memory” pops up on a social feed on our phone. Just remember that you have access to ALL your memories ANY time you want!
Are you ever intentional about your memories? I don't mean doing something to preserve them (yes, I talk a lot about that, I know!), but simply visiting with them?
The easiest way may be to open an old photo album to a random page and allow yourself to be transported back in time. I find it's often easiest to do this when we are thinking about someone we love—our child(ren), our parents, our significant others, our dear friends. Why not visit some of your own (singular) memories, too? Does a picture of toddler you jumping into a pool bring back feelings of freedom and summer joy? Does a high school yearbook photo make you feel vulnerable and on the verge of your life? How about a shot of professional you at the podium—are you overcome by a feeling of pride, or perhaps compassion for the person you were?
Memories shouldn’t be things we are reminded of by Facebook or Google or Apple Photos (don't get me wrong, those are fun...but your memories aren’t all housed on your computer!!). Memories should be moments we can return to whenever we want, whether by flipping to a page in a photo book or by popping some cookies in the oven and being transported by the smell.
Savoring happy memories may be significant for one’s ability to cope with stress, potentially promoting better decision-making and wellbeing, according to one study; and other research shows that “intentional activities that boost positive emotions” include remembrance of positive autobiographical memories.
So—there are mental health reasons for reminiscing, for sure. But even if sitting with your memories just gave you a temporary mood boost, wouldn’t it be worth doing for that alone? I don’t know about you, but finding a few minutes to simply smile and feel nostalgic is a welcome gift to myself on any given day!
So I challenge you:
Can you pull out an old photo today and indulge in some intentional remembrance?
Can you pick up the phone to tell a loved one you were remembering “that time we…” [fill in the blank]?
Can you find five minutes to journal about a happy childhood memory (or pull out an old diary and revisit some random day from your past)?
Can you stare into space and conjure a memory from a particular time in your child’s life? (As a parent of a teenager I find that waiting in car pick-up lines is an opportune time for such intentional remembering; walking in nature or while doing the dishes are other great options!)
Can you show your child a photo from years ago and share a story or two?
I know you CAN do any of these things, the question is really: WILL you? No pressure to DO anything with your memories…just sit with them and visit a while 🤗
What are you remembering...?


How to create a vacation photo book or travel journal: Part 2
You've just returned from a family trip and know you want to make a travel memory book—just not right now! Follow these easy steps so you'll be ready later.
Organizing photos before you sit down to design your travel memory book will make life soooooo much easier!
Recently I shared Part One of this two-part blog about how to create a vacation photo book or travel journal, in which I shared tips for things you could do during your trip to make your memory-keeping project easier later. Here, in Part Two, I am sharing ways you can streamline your book creation after your trip.
Taking these steps will ensure that when you finally sit down to write and design your travel memory book, you’ll have everything you need conveniently at hand.
Do these things shortly after you return from your vacation to set you up for bookmaking success:
1 - Consolidate all your photos in one place.
Download all photos from smart phones and cameras and collect them in one digital space. I use a solid-state external hard drive that I back up regularly to the cloud for this purpose.
Here is a simple folder structure that works great for organizing vacation photos:
01 DAY 1 - Arrive in Rome
02 DAY 2 - Drive to Pienza + Easter dinner
03 DAY 3 - Winery tour + Tuscany exploration
04 DAY 4 - Vespas in Chianti
…etc.
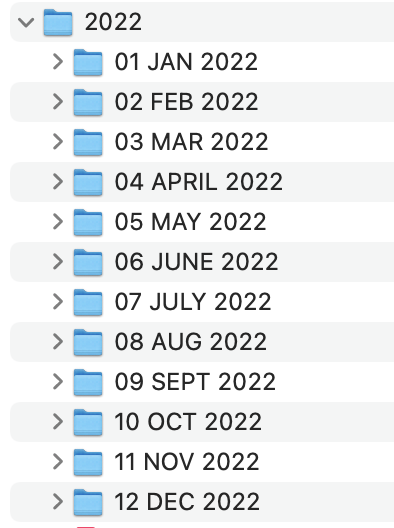
The two-digit introductory numbers at the start of each folder name ensure that the folders will stay in the correct order. I do something similar when organizing photos for my annual photo books:
01 JAN 2023
02 FEB 2023
03 MAR 2023
…etc.
Then, within each of these folders, you can organize your photos into subfolders by theme or subject.
You may also want to create separate folders for images you download from each family member’s phone—that way you can quickly scan for duplicates and know who took each shot. (I recommend gathering these images from everyone’s phone shortly after you return from your vacation—while you may save all those pictures indefinitely, other family members may be more keen to free up digital space, and you don’t want to risk losing their pictures!)
Seem like a lot of work? Trust me, using a smart digital filing system to organize your photos in advance of making your book is way easier than trying to find photos amidst the thousand you took WHILE you are creating that book (a nightmare!!).
2 - Select your favorite photos.
For this one, I generally suggest waiting at least two or three weeks before reviewing your photos with an eye for curation. This emotional and temporal distance will give you a better perspective and allow you to more easily cut photos from your book and select the ones that best tell the story you’d like to tell.
How you mark favorites will depend upon how you store your photos. You may be starring your faves in software such as Google Photos or Lightroom. If you are physically moving your selected digital photos into a folder on your computer, I recommend creating a folder within each thematic folder called OUTTAKES and moving photos you are NOT using there. That way your photo organization system is still in place. And it’s way easier to eliminate photos as you go than to know immediately which images qualify as must-haves!
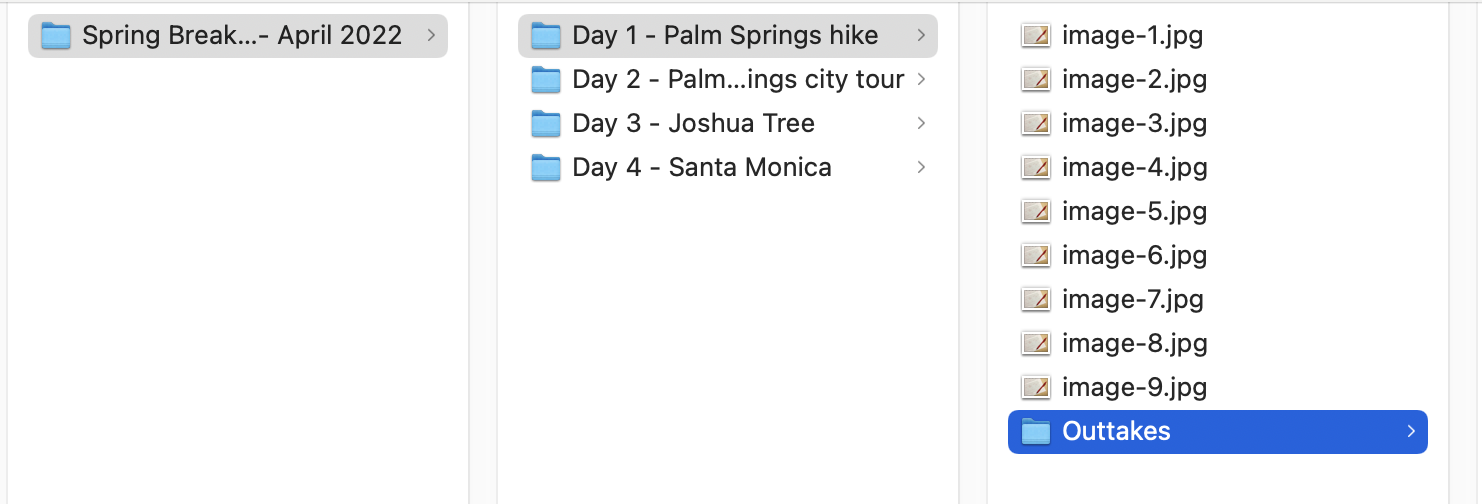
Don’t stress about this step. Focus on:
choosing the best shot from the multiple you have taken of each part of your trip
giving yourself options for later—who knows, you may want that horizontal shot to be enlarged across a whole spread…but then again, the vertical version may be just right as a section opener!
finding a balance of personality-driven photos (your kids grimacing over a plate of vegetables at your preferred restaurant, say) with gorgeous scenery; of candid shots with stiff posed ones; of color with black-and-white
choosing photos that make you smile and that trigger your memories.
3 - Photograph or scan ephemera or souvenirs.
All those ticket stubs, maps, and random notes that you collected on your travels? Now’s the time to go through them with an eye for what will look good on the page and add visual interest to your photo book.
A ticket stub from a museum that has a Michelangelo sculpture printed on it is much more appealing than an unidentified stub with just text. A train ticket that shows your mileage traveled across Europe is far more compelling than one that simply lists a destination. A receipt that shows the ridiculously cheap price you paid a local villager in the Philippines for your sisal bag may be worthy of inclusion, but forget about most receipts in general.
I recommend scanning all of your paper souvenirs on a flatbed scanner (many home printers with a photocopying function can also scan nowadays, too). Set your parameters to scan full-color, 300dpi, at 100-percent size—this way, you’ll most likely avoid pesky moire patterns when scanning pre-printed materials, and when you place them in your design software, they will run at their actual size (if you create shadows beneath these images, the tickets or other ephemera will look like they are sitting atop your photo book pages, a very cool effect!).
If you don’t have access to a scanner, there are plenty of smart phone apps that can do the job of capturing these small items for print. Check out Google Photo Scan or Photomyne; these free apps enable you to use your phone’s camera to “scan” your souvenirs for use in your travel journal.
Yay! You’re ready to gather all those notes you took while on vacation (which we talked about in Part 1) and sit down to begin creating your travel book. Whether you choose to print photos to place in a good old photo album (my favorite smaller-size ones are from Project Memory, while great larger, archival photo albums are available from Kolo) or design and print a more full-fledged travel book (with written memories and reflections, of course!), you’ve now got everything you need to begin…and finish…your vacation memory book. Happy travels!!
If you prefer to hand over your keepsakes, photos, and travel journal to have a travel book professionally produced, please reach out to see how we could work together.


How to create a vacation photo book or travel journal: Part 1
Want to make creating a travel book easy when you return from your family vacation? Follow these steps for easier—and elevated—post-trip memory-keeping.
Postcards are waning in popularity, but you may still find some cool vintage or artistic designs on your travels that would make great additions to your travelogue.
Do you have the best of memory-keeping intentions when you travel, only to find your photos stranded on social media and your collected souvenirs stuffed away in a box? No—don’t let that happen to you! Follow these simple steps to help you gather all the right elements during your trip so you can easily put together a photo book or travel journal when you get back home. A little planning goes a long way.
Do these things during your trip to make creating your travel memory book a cinch later:
1 - Take notes over the course of your travels.
By ‘notes’ I mean anything that will help you tell the story of your trip (in the moment you can’t imagine ever forgetting a single detail, but I promise you will!). A few possible notes include:
reference photos—as you head into a venue or city, snap a reference picture of a sign that will orient you as to your location later
handwritten jottings—of everything from tour guide names to the restaurant your family fell in love with
printed ephemera—anything from the article you tore out of the in-flight magazine to a hotel brochure or museum ticket; you won’t necessarily keep all of these, but you will use them to fill in details when writing about your trip later.
a thorough travelogue—not everyone will want to do this (I admit I often have good intentions and then never get to it, especially since I became a mother), but writing about your trip in a journal as it happens can be not only a wonderful way to reflect on your time in a place but also to preserve memories to revisit later.

If I hadn’t snapped a photo of a nearby street sign before I took this shot of dramatic light on a picturesque church, I would never have known what Tuscany town this was from!
2 - Collect some items to add local texture to your book later.

Travel passes, museum ticket stubs, and other ephemera from your trip can be fun additions to your memory book when used in moderation.
There’s no need to buy a hundred postcards or tchotchkes, but selecting a few items that you can scan or photograph when you get home will add great visual interest to your travel book. Some favorite items I have collected on various family trips include:
matchbooks (especially from favorite restaurants or hotels)
stickers (especially these days, sticker designs are often way cooler than postcards!)
simple vendor bags (sometimes a shopping bag or even a small paper bag a vendor slips your gum into may have interesting graphics, like one I got in Florence with a fleur-de-lis pattern)
vintage postcards (I try to buy one of those “Greetings from…” postcards in every city I visit, but they’re getting harder and harder to find; I do seek out illustrated postcards, though, as they often have an artistic or nostalgic vibe I like)
local maps (I’m talking both the kitschy maps marking destinations of interest to tourists as well as beautifully rendered ones often sold in shops)
3 - Take unexpected photographs, too.

Yes, of course snap the famous landmarks and get some group shots of your family posing in beautiful locales, but remember to also take pictures of less expected details, such as:

Detail photographs can add wonderful personality to the pages of your travel book. This bin of corks caught my attention on a winery tour not only because they have great texture, but because they say the name of the winery. And these cacti in bronzed shoes in Montepulciano—well, they’re just fun!
candid photos of your traveling party
fun selfies when the mood strikes
photo booth strips—admittedly, I am a sucker for these nostalgic gems which invite goofy faces and extreme togetherness (ever tried to squeeze more than four people into one of those booths?!)
details, details, details—on my recent Italy trip, for instance, I aimed my camera at wonderfully whimsical street art in both Florence and Rome; ancient bricks and walkways (ah, what texture!!); wrought-iron filigree designs; and even a few t-shirt slogans that resonated.
In Part Two I share next steps: what to do with all your photos, ticket stubs, and travel notes upon your return to make book creation a cinch!
If you’d rather hand over all your travel goodies to have your travel memory book professionally produced, please reach out to see how we can work together.
The best photo captions do these things
Photos that have no captions will leave readers of your heirloom book guessing. Make sure to write captions that either tell a story or provide vital details.
Every photo caption in your life story book should either tell a story or provide vital information.
Whether you are designing a family photo book with highlights from the past year or creating a long family history book with plenty of narrative text alongside a few select images, writing good captions is a key to success.
Why do I even need captions?, you may ask—especially when you already know who is pictured and you immediately recognize the scene. Who wants to state the obvious?
Well, consider this: You (and even your immediate family) are not the only ones who may be looking at this book. What if your cousins or a friend pages through it? What if—and hopefully this is the case—your kids’ kids one day read it?
And think about the effect of time: Just because you currently remember that Tom’s birthday party was held at the bowling alley two towns over, will you really remember that detail a few years from now (I can say with certainly I would not!).
Don’t worry, though, as I’ve got a little cheat sheet for you. Every caption should do one of these two things:
Every family photo caption should…
Tell a story…
Sure, you may have told a long story in the main text portion of your book that relates to a given photo, but you want to deliver value to the reader who is combing through the pages quickly, too. Admit it—sometimes you just want to page through a book and read the graphic type and look at some pictures! I guarantee your descendants will one day do this, too. So either add a new detail in the caption (how wonderful it is to get even more context or emotional punch through a caption!) or concisely reiterate what the photo is showing.
Sharing interesting info alongside the photos in your book entices new readers to go further and read the whole story. Strong captions also provide touchstones for someone who has already read the entire book, but wants to revisit the stories to reminisce and sit with their memories for a while.
…or give vital information
Indicate who is pictured in a photo with clear directionals—for example, “clockwise from top left” or “from left.”
Family photo books don’t need full names for immediate family members, but do consider using first and last names for your children’s classmates or your work colleagues, for example.
In more in-depth storytelling books such as a memoir, a legacy book, or a family history book, do use surnames to identify people the first time they are shown. And occasionally be specific about relationships, particularly as you get further back on your ancestral lines (“my paternal grandmother, Betty…”, for example, orients the reader so they don’t have to flip back to your text or a family tree to avoid confusion).
Include dates and locations for milestone events such as a bar mitzvah, a wedding, or a ship passage across the ocean. If you know an approximate date, you can say something like, “circa 1912” or “early spring, 2020.”
Ask yourself: If I encountered this photograph in a book, what would I want to know about it? That simple strategy will help guide your caption writing.
Photos that don’t need captions:
secondary shots from the same scene or location, when details are enumerated in a nearby caption
mood shots, such as the spring flowers blooming in your yard or the sunset on your camping trip
photos used graphically on section openers, as long as they appear again in the main text
images that are self-explanatory (so if it’s a location shot and there is a sign saying where it is, for instance)
The best graphics to add to your family history book
Beyond family photos: Consider adding vintage maps, family tree charts, and professionally shot images of special heirlooms to your family history book.
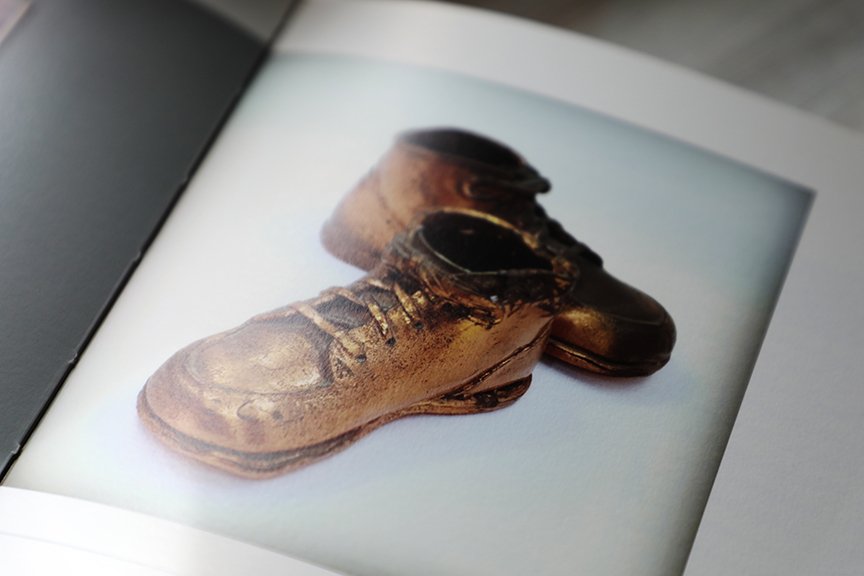
Shooting some of your family’s most treasured heirlooms for your book not only provides beautiful visuals to accompany your stories, it ensures that the details of those heirlooms will get passed on. These happen to be my bronzed baby shoes from 1970.
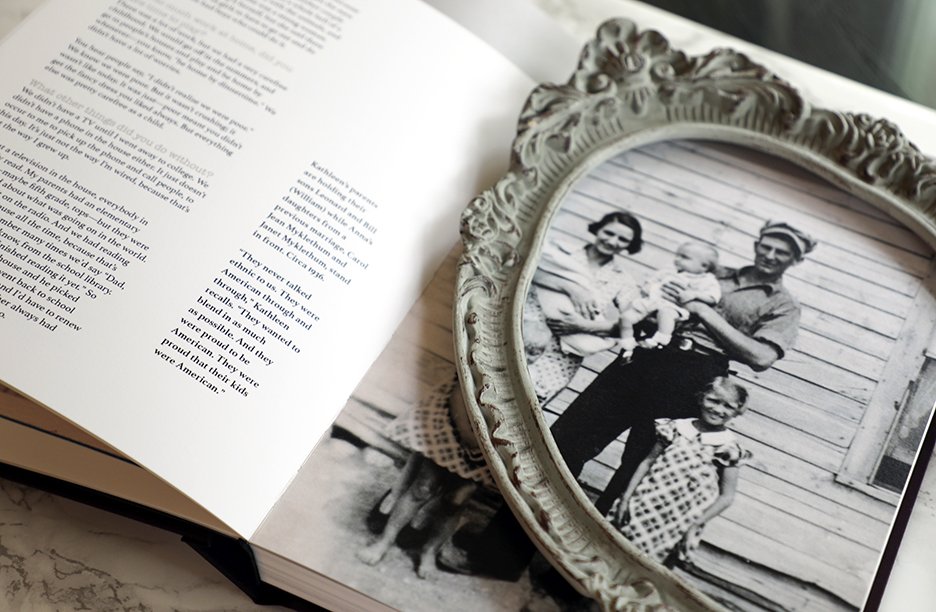
One of the more fun parts of putting a family history book together can be deciding what to include to visually illustrate your family’s stories.
Your first line of business is to sort photos and memorabilia and digitize it. (Some helpful resources for that include “How to Decide Which Photos to Use in Your Life Story Book” and, if you’re still in the early stages of planning your book, “How to Organize Your Family Archive as a Resource for Your Life Story Book.”)
Once all that’s done, consider these three types of visual media to add color, texture, and graphic appeal—all while helping to tell your stories clearly—to your family history book:
Family tree charts
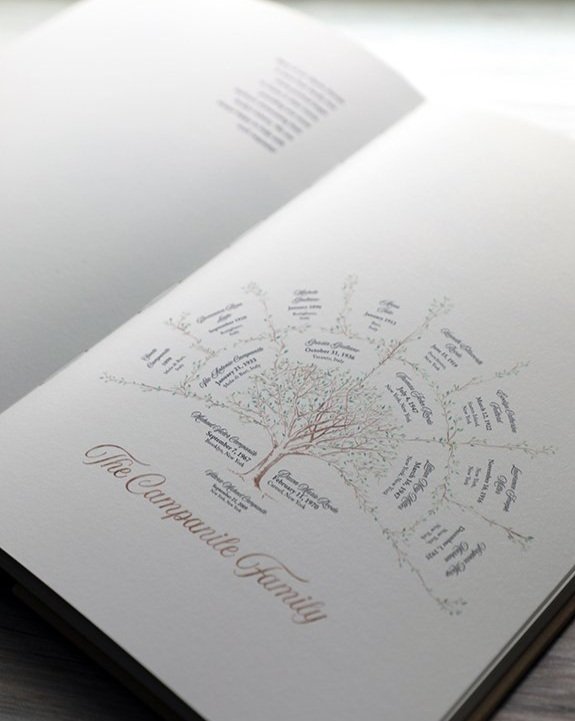
Family tree charts can be a simple ancestor chart such as this one, embellished with an illustrated tree and roots; or they can be extensive all-in-one genealogy documents listing multiple generations, with all relations including ancestors and descendants (the larger a family gets the more challenging it can become to print an all-in-one tree in your book; in that case, multiple graphics of each family line are recommended).
As the steward of your family history, you are abundantly familiar with the names of your ancestors—and, more importantly, of their relationships to you. But consider this: Future readers of your family history book will be separated by generations from their kin, and will not intuitively understand those relationships. A graphic family tree chart provides them with a visual reference that they can easily flip to for confirmation—Yes, that is my two-times great-grandmother!—and clarification—No, Great Uncle Pete was actually on my paternal side!
Search Instagram, Pinterest, and Etsy for “custom family tree” and browse the myriad styles out there. You’ll want to create a family chart that feels consistent with your book’s design (is it modern? traditional? fun?)—so either emulate one you like in your preferred design software, or hire a graphic artist to create one for you. Many designers provide you with a large-scale print to be framed but will also provide a high-resolution digital file for you to include in your book for an extra fee (trust me, it’s worth it!).
Photographs of family heirlooms
No doubt you’ve got some heirlooms sitting around your house that hold meaning (of course they do, otherwise why hold on to them?). Families often pass down the lore behind family heirlooms via good old oral storytelling, and I’m all for that. But to ensure that the provenance of those heirlooms, and the stories they hold, don’t get forgotten as new generations inherit them, it’s key to record their details.
A few notes on heirlooms: The word ‘heirloom’ connotes for many an item of import, and often one of high monetary value (think of Great-Grandfather’s grand piano or your mom’s passed-down diamond engagement ring, for instance). Value can derive from more than money, though (think of the family Bible in which family members have recorded—in their own handwriting—births, marriages, and deaths for more than a century; or the family recipes on grease-stained index cards that are pulled out every holiday).
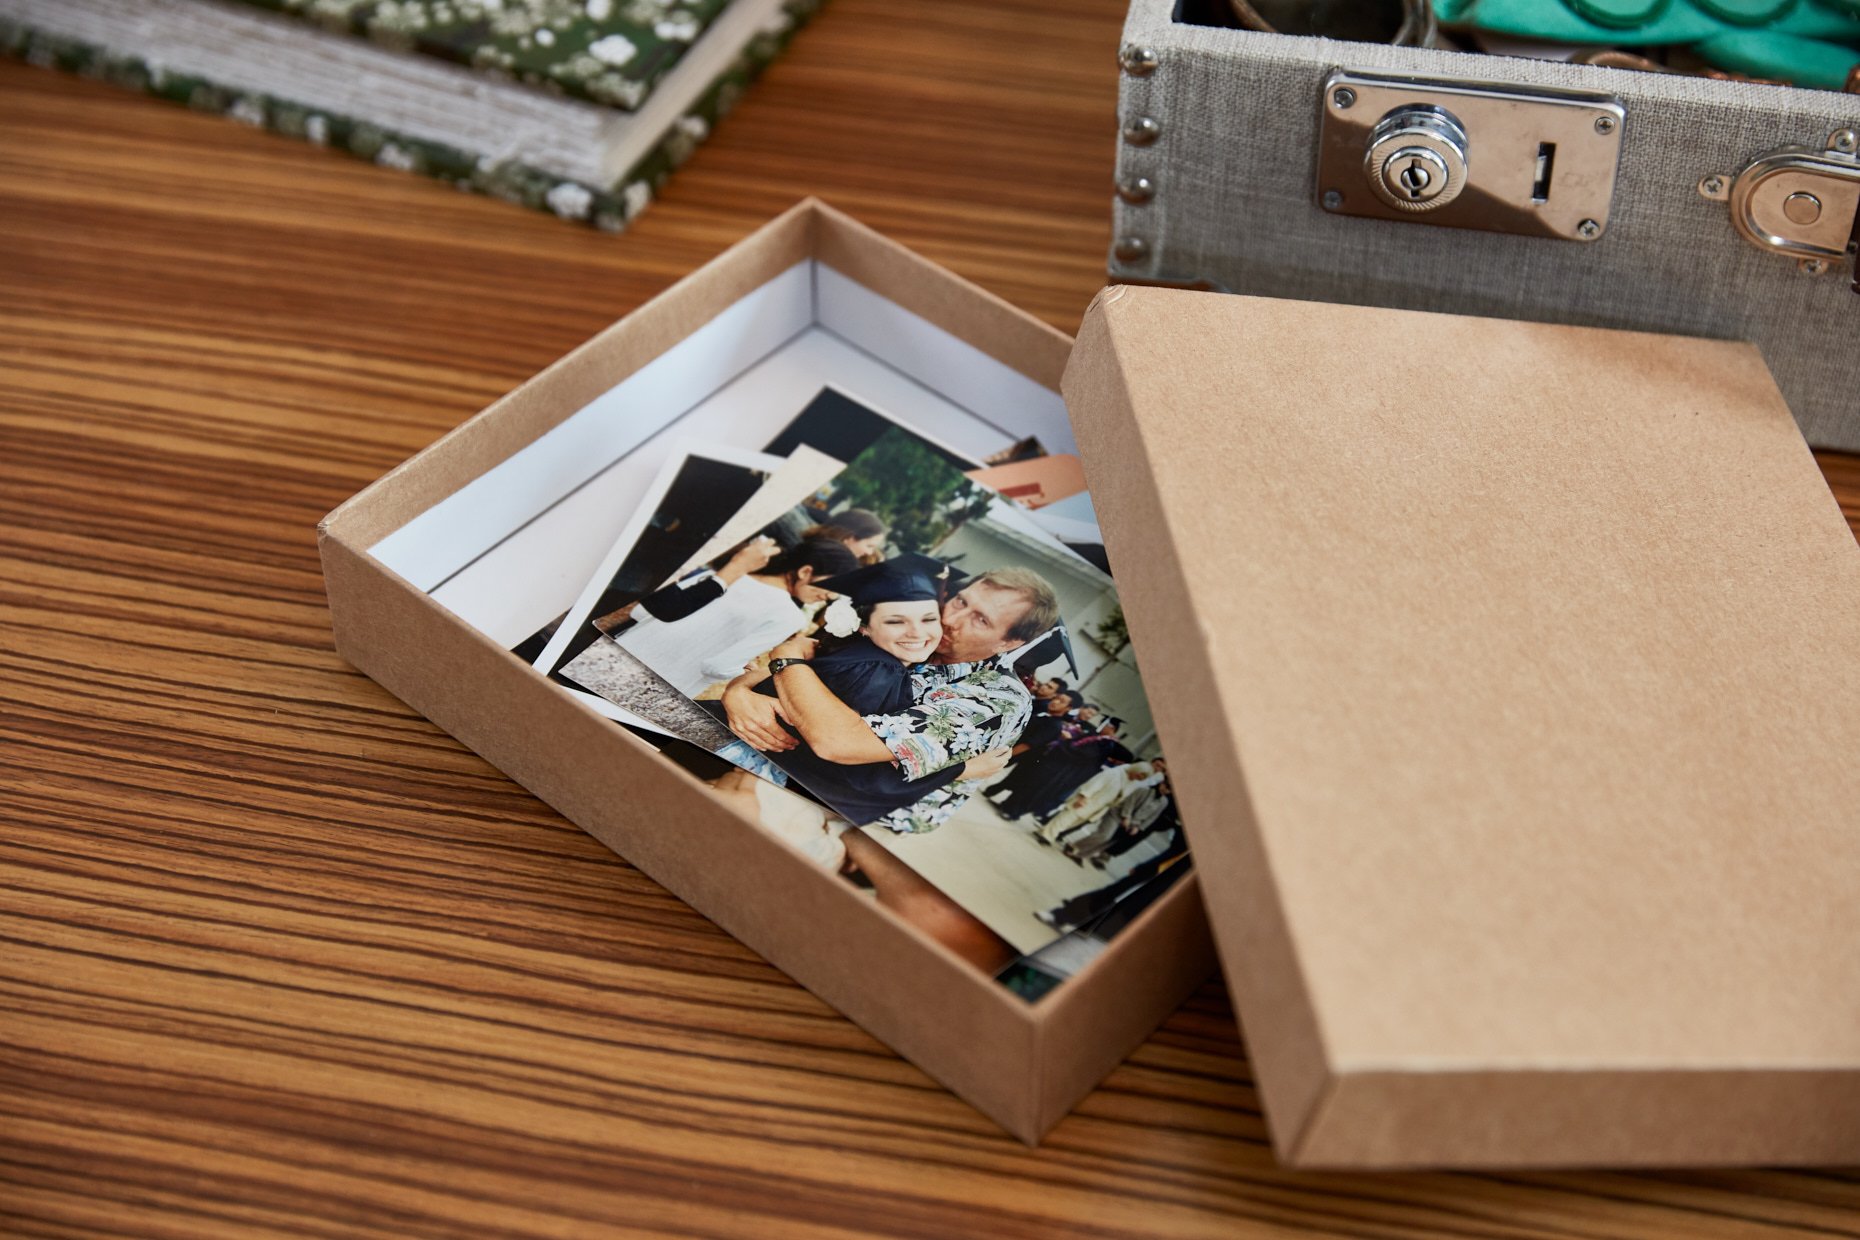
Make a list of all the heirlooms, big and small, that hold meaning for your family (and remember, some may be kept at the homes of other family members). Then, decide on an approach for preserving their stories.
One idea: Use your smart phone to take clear photos of all the items (some from multiple views), print those out, and write their details on back (include who it originally belonged to and to whom it was passed down; any relevant dates; and bonus points if you also record a narrative remembrance about the heirloom, as well!). Make copies of these for interested family members, and store one in a bank vault or safe location so it’s secure in the long-term.
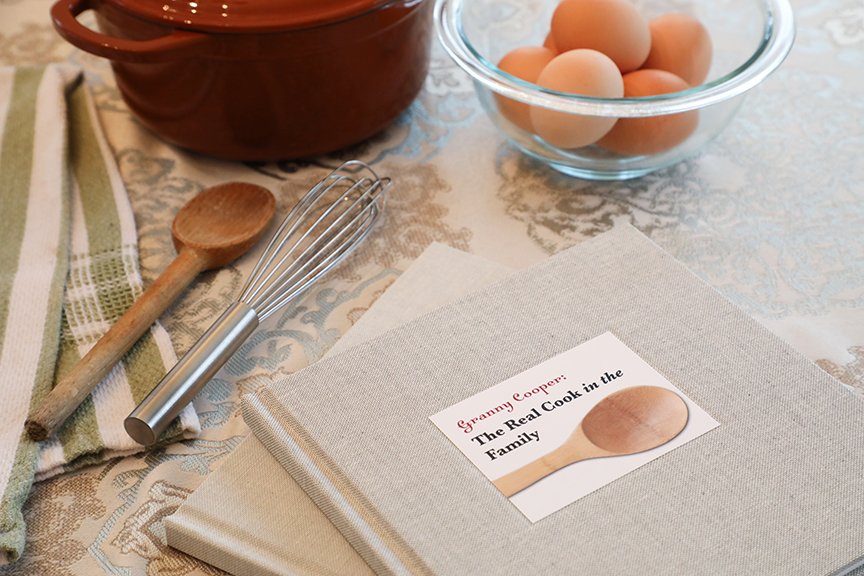
Another option: Use a high-quality DSLR or hire a professional photographer to get beautiful shots of your heirlooms to include in your family history book. For this use you want to capture photographs with studio lighting (pro-grade lighting set-ups are now easily portable, so photographers can bring them into your home) and that show strong detail. You can either create a full chapter devoted to your heirlooms and their stories, or you can pepper these photos throughout your family history book, including them where relevant (a shot of Grandma’s well-loved wooden spoon near her stories of holiday cooking, perhaps, or a close-up of that third-generation quilt near the ancestor who worked on it).
Using proper lighting and adding props to your family heirlooms help make the resulting photos worthy of inclusion in your heirloom book. How much more boring would these blue glass rosary beads be if they were shot simply from above on a table with your smart phone?
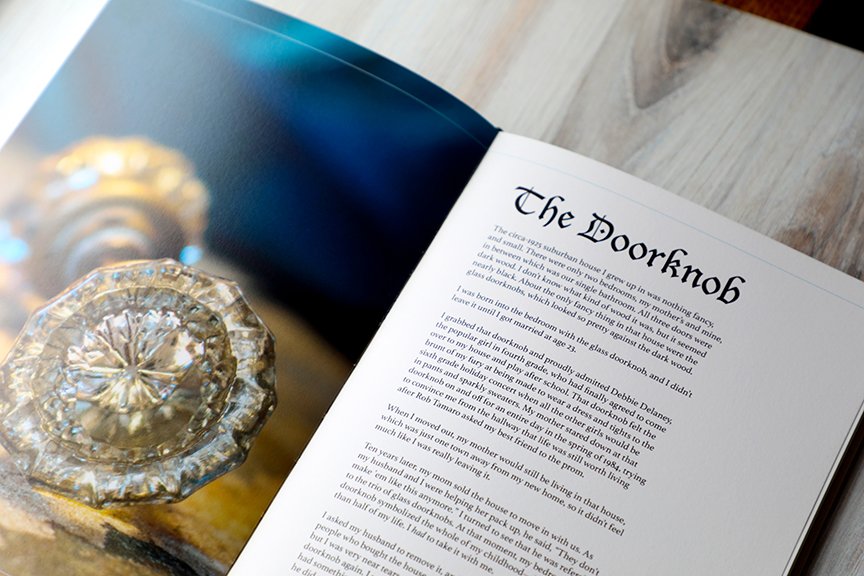
Heirlooms can be unexpected—such as this gorgeous glass doorknobs shown here: “I was born into the bedroom with the glass doorknob and I didn’t leave it until I got married at age 23,” the subject remembers; she uses the object as a jumping-off point for stories from her life in that home (she even took the doorknob with her when the house was sold—a true heirloom).
Historic maps
Reproducing maps within your family history book will help orient readers to the geography of your family and add a wonderfully historic feel to your book. Fair warning, though: While there are numerous resources for finding royalty-free digital maps spanning centuries, you’re in for some intense research to find exactly which map(s) will best illustrate your family history.
This article, “Old Map Collections That Every Family Historian Should Know About,” is one of the most comprehensive and helpful, listing 11 sources for researching vintage map collections.
One of my favorites is the David Rumsey Map Collection, which includes more than 150,000 maps that you can easily download and use. The interface can feel overwhelming, but there are gems to be found, including 1950s road maps from Shell Oil Company and
The Library of Congress map collections home page is a little more straightforward to navigate and has advanced search capabilities. Here you’ll find everything from maps and charts from the time of the American Revolution to fire insurance maps that get granular with street-level details; from WWII military situation maps to railway and other transportation maps.
You can also purchase basic city and country maps from stock photo agencies or freelance illustrators, or scan in maps from your family genealogy archive. Always be sure to check copyright details to ensure you have legal permission to reproduce chosen maps in your book.

An example of a vintage map you might include in your family history book: This one is an 1872 topographical map of Adams, Brown, Highland, Pike, and Scioto Counties in Ohio, originally published by Stedman, Brown & Lyon, Cincinnati, 1872; courtesy of David Rumsey Historical Map Collection. The Rumsey collection allows for downloads of varying sizes so you can ensure you have the highest resolution for printing in your book.


How to decide which photos to use in your life story book
When choosing photos for your life story book, consider emotional impact and storytelling interest—the right images will ensure your descendants are drawn in.
Rule number one: You don’t want to use ALL of your photos in your life story book. Thoughtfully choosing which pictures help tell your story—and elicit emotions—will produce a finished product that feels inviting and impactful.
You’ve finished your memoir manuscript or your personal history interview sessions and are itching to move on to the design stage of your life story book—but first, photos! Choosing which images will make it into your book can be a daunting task. Having done some pre-project photo organization will help, but honestly, it comes down to keeping two principles in mind:
Choose photos that have emotional impact.
Choose photos that help tell your stories.
You want to choose images that not only help you tell your story, but that make the readers of your one-day book feel something. Because, remember this: While you and your friends and family will enjoy your life story book now, it’s your kids’ kids—those future descendants you may never meet—who will one day flip through the pages of your book and wonder: Who were you? How did you live your life? What made you laugh and cry and feel afraid? How were you like them? How were times different?
The photos that accompany the written stories in your book serve not only to amplify and illustrate those stories, but to draw folks in. So choose varied images. Make some really big (how I love a full-bleed photo!). Make others small, along a timeline or in a grid. And, unless you only have a handful of old photos in your possession, don’t include them all: You must curate them, choose photos that serve your story and your audience, that add context and color and visual interest.
Choose photos that make us feel—because, again, it’s all about emotional impact. Beyond that, here are a few tips for choosing the best photos for your life story book:
4 tips for curating your life story book images
Zoom in and zoom out.
Choose photos that show a scene in context—the whole family standing around in your backyard during a get-together, for instance; and then include a detail shot—your child’s hands holding a stick roasting s’mores over the fire pit, perhaps. Your readers will feel invited into the scene by the zoomed-out shot, and feel emotions (nostalgia, comfort, love!) well up from the intimate detail shot.
Choose people when possible.
Do you have some stunning pictures of the Alaska landscape from your trip there? Certainly consider including a scenic shot to set the tone of a chapter, but opt instead for the photos that show you in the scene to aid in your storytelling. We connect with people.

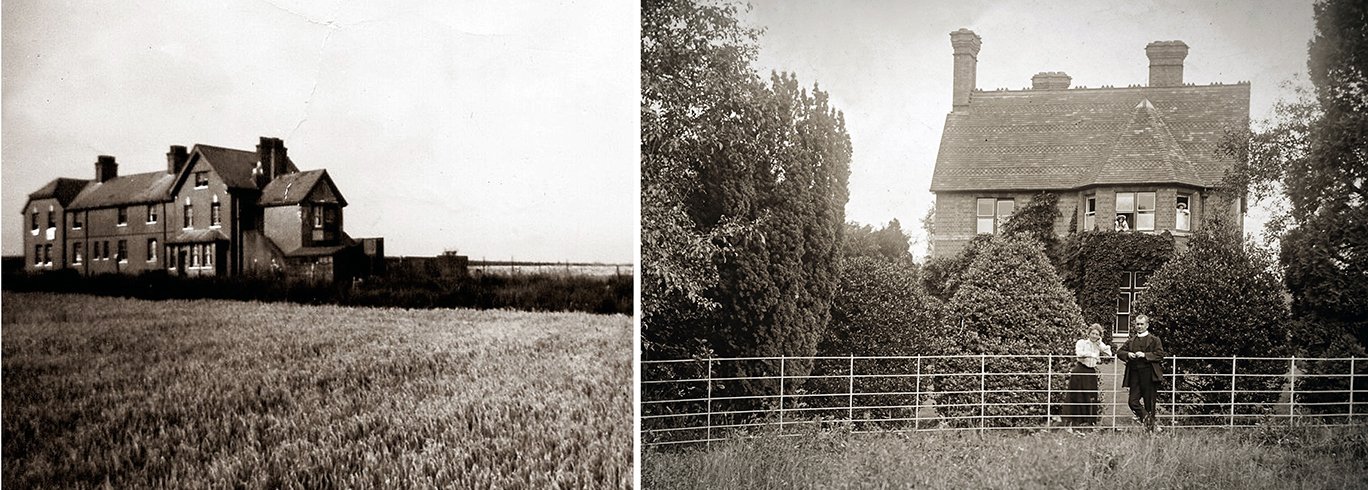
The image on the left, above, would be great in a travel album, but the one on the right—which shows not only the Brooklyn Bridge but the person who was visiting—is better suited to a family history book. Below, wouldn’t you agree that the photograph of an old family home resonates more when there are people in the frame, too?
Let details shine.
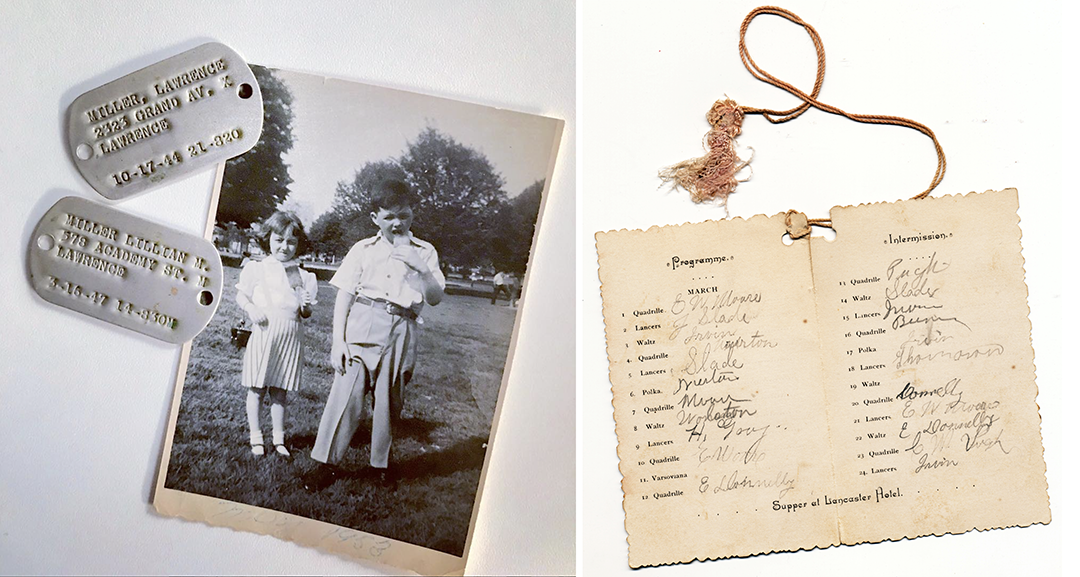
Nanny’s floral-print house dress. Momma’s slim cigarette burning to ash in a glass dish on the kitchen table. The framed prayer card with rosary beads hung over it on the mantle. Pop-Pop’s cane leaning against the wall. Scout out details in your photos that bring your family’s stories to life. And don’t just think about homespun details—consider those that reveal history in a broader sense: Grandpa’s World War II dog tags, a photograph of your ancestors in their hometown before immigrating, a headline on weathered newsprint. Such particulars add nostalgic flavor and ground your stories in history.

In all three photos above, details—from the old television boxes to the wood paneling to the trophies and the plastic-covered couch—provide texture and context, making them fun choices for your life story book.
Another idea, below: Photograph small items that bring your stories to life, such as these Civil Defense Identification Tags from the 1950s (these belonged to my mom and her brother) or this tasseled dance card from 1889 (a cherished memento from a former client).
Always go for personality.
I gravitate to a candid photo over a posed shot every time. Think about it: That picture of your dad as a handsome teenager laughing as he almost drops his sister into the pool has way more personality than the studio portrait of them side by side in their Sunday best. I am not saying not to use those polished portraits, but rather to use them in straightforward ways such as on a graphic family tree, or early in your book to identity people. Then, enlarge the images that have motion and humor and joie de vivre—I guarantee those are the ones your descendants will connect with and be drawn to years from now!

Candid photos are vibrant—they jump off the pages of your family history book with energy and life. Certainly used those posed pictures and studio portraits to identify family members, but don’t forget to include images that show your loved ones’ personalities, as well.