
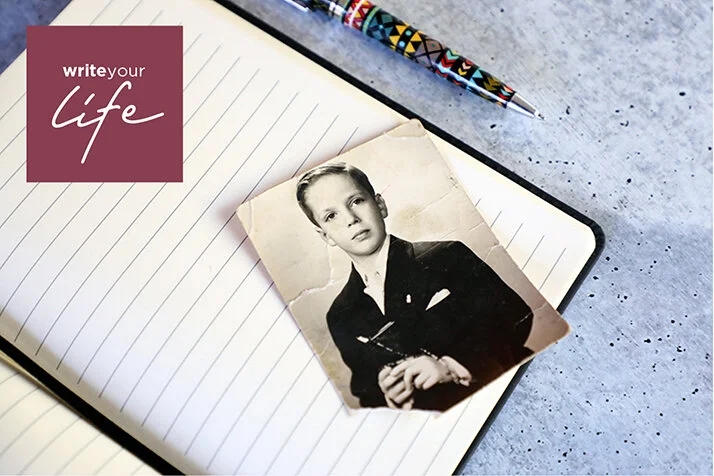
Memories Matter
Featured blog Posts

READ THE LATEST POSTS
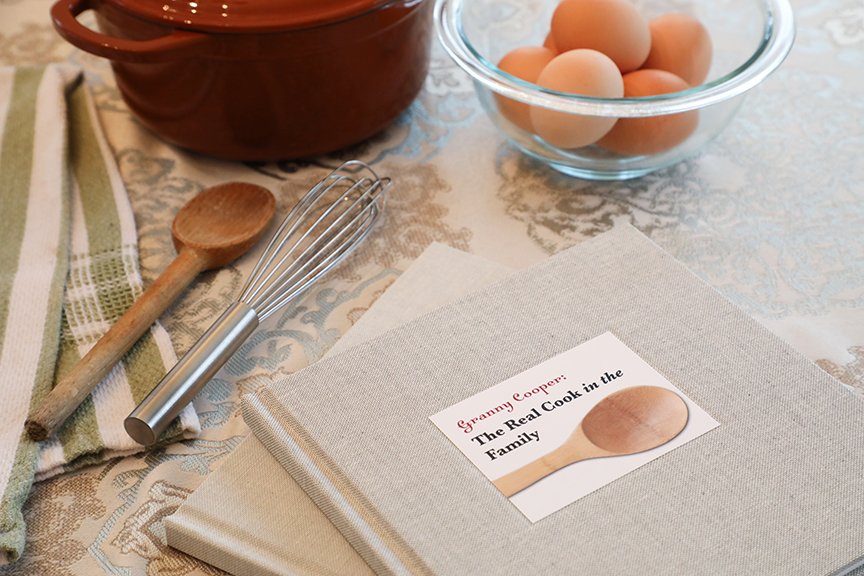
Wait, your photo book has no captions?
A family photo book without captions is nice—but one with captions is an heirloom. A primer on what type of captions to include and how to design them cleanly.
Whether your photo book includes current snaps for a family yearbook or older images for a family history retrospective like this one, it’s important to include some captions. Design with ample white space and classic typefaces for an engaging and modern feel.
If you do an annual photo book, you’re way ahead of most people in the memory-keeping game—so big props to you! I am a vocal proponent of printing your photos rather than letting them languish amidst a ton of digital clutter on your phone, and getting them into a printed book is a wonderful way to preserve memories for your kids and yourself.
It’s what you’re creating your memory books for, isn’t it? To be able to look back one day and recall the moments big and small from your family’s life? To create a record of your experiences, and celebrate the milestones? To revisit travels and everyday occasions one day in the future?
Well, imagine this: It’s ten years hence, and your daughter is about to graduate from high school. You sit down together and pull out a family photo book from her childhood. What was that teacher’s name? How about that friend she was inseparable from for a whole year? Where was that awesome waterfall you climbed all day to see?
Or this: It’s 30 years from now and your son has recently become a new dad. He’s curious about what his father was like, and if he himself had as much hair as his newborn. You dig out one of your earliest family albums (hopefully you’ve made an extra copy for your son to have, too 😉) and you start reminiscing. But which baby is that in the stroller? Was that photo of your toddler son walking from when he was 10 months or over a year old?
All those details that are so fresh and obvious to you now while you are putting your photo book together won’t be so obvious down the road. Chances are you’ll forget a lot of the nitty-gritty things like places, dates, and ages—and there’s no chance that your kids (or their kids!!) will know if they’re not written down.
Ugh, you’re thinking—what a royal pain in the @$%. I have to write everything down?
No, you don’t have to write everything down. But some things? Sure. Consider doing so a gift to your kids. Adding some captions to your photo book ups the value from a “nice” album to an “invaluable” family heirloom.
The two types of captions every photo book needs
The purely informational caption
You don’t need to type names and dates for every photo—not only would that be time-consuming, it’d be rather boring.
Consider creating sections for every month in your annual family photo book, and titling each section accordingly; you can include specific dates when photos represent milestones such as weddings, Bat Mitzvahs, or graduations (and if you scan a ticket or program that includes the date, you’re covered!).
As far as names go, always include names of new babies when they are first pictured, of close friends or schoolmates alongside your kids, and of family elders who aren’t part of your immediate clan.
Type out locations when you think it might be interesting—perhaps you’d like to revisit that hotel in Hawaii, or take that hike again with the grandkids one day. You can use lots of discretion here, but consider when making your decisions about what to include: If I were looking at my parents’ photo books, would I be curious about this?
The storytelling caption
As a personal historian, you might guess that these are my favorite types of captions, and you’d be right. Rather than get intimidated by the idea of telling a story, consider these ideas:
Choose one photo or series of photos from each month of your family yearbook to elaborate on. If your son’s soccer team made it to the finals and lost by one goal, tell us about it in a sentence or two (include the details of what happened, as well as how he was feeling—proud? disappointed?). If you have a cluster of pictures of family members lounging around the house, talk about it—believe it or not, looking back on everyday moments such as this can feel even more special years from now!
Another option: Have each family member write a few sentences about their favorite memories from the year. It can be off-the-cuff and more emotional (certainly there were plenty of emotions during the early parts of quarantining in 2019, for example); or you can let each person choose one or two photos to spark stories. You might scan their handwritten notes to include as caption-like images, or type out their responses for more traditional captions.
Keep a running list in the Notes app on your phone of memorable quotes from your kids and others throughout the year. You can then incorporate these into your family photo book near appropriate images—voila, ready-made captions that preserve your family voices.
If you want to go even deeper with your storytelling, download my free guide, “How to Use Photographs as Prompts for Writing Life Stories”; and if you’d like to see an example of how you can say a LOT in just 200 words, check out the extended caption in this post.
How to keep your photo book design modern and clean, even with captions
I can think of two main reasons someone might forego including captions altogether: (1) it will be too time-consuming (to which I say: your efforts will be rewarded!); and (2) it will make my layout look too busy (to which I say: read the tips below!).
For some guidance on designing clean, clutter-free book layouts, I enlisted the help of Ontario–based graphic designer Mei Mei Wood, whose aesthetic, like ours at Modern Heirloom Books, is one of timeless elegance.
Here are her top tips for creating a photo book that looks clean and modern, even with the addition of text:
Use one classic font family that has a variety of weights and italics.
“This allows you to style typography in different ways throughout a piece of work, while staying consistent and keeping things simple,” Mei Mei says. Choosing classic typefaces—such as Baskerville or BentonSans (see examples at bottom of page)—also ensures that your book will feel timeless.
Embrace white space.
Oh, Mei Mei, you are singing my tune!! “I can't say this enough: Don't fill your pages with elements. Leave breathing room for your eyes.” Amen.
Always pare back.
“Less is more,” Mei Mei says. “One of the greatest tips I've heard: When you've written something, cut it in half. Then half that again. When you think you can't possibly cut it down any further, reduce it by half again. That's how you figure out what the message truly is.” Such editing can be challenging, though, so I recommend giving yourself a few days between writing your captions and then cutting them down—that distance will help give you perspective and allow you to recognize anything extraneous in your text. “I know this is extremely difficult with ancestry-based memory-keeping projects because the instinct is to preserve as much as possible. But it really is about revisiting work multiple times over a period of days and paring back to what’s essential,” she says.
Incorporate pull quotes.
Again, Mei Mei zeroes in on an easy design approach that pros use that most people don’t think of: “Highlight an important line or two in the layout. It's so visually impactful and can shine a light on what's important.” Pull quotes—short snippets of text that are designed in a larger type size—work well with large blocks of text or alongside a handwritten letter or journal entry.

An example of a serif font family with various weights

An example of a sans serif font family with various weights

A graphic pull quote can accompany an enlarged photo such as this, or can go alongside a block of text or handwritten letter to create visual interest and an emotional touchpoint for someone just flipping through your photo book.


Simple, modern memory-keeping: How to tell the stories behind your family photos
These 3 ideas for telling the stories behind your favorite family photos are easy-peasy—and they’ll get you well on your way to preserving your family legacy.
Can a single photo tell a story? The answer is a wholehearted YES. The question becomes: How will you tell it?
Here are three ideas for choosing one single photo and transforming it into a gift that is destined to become a family heirloom.
3 ways to tell a photo story
1 - Frame your photo—with an extended caption.
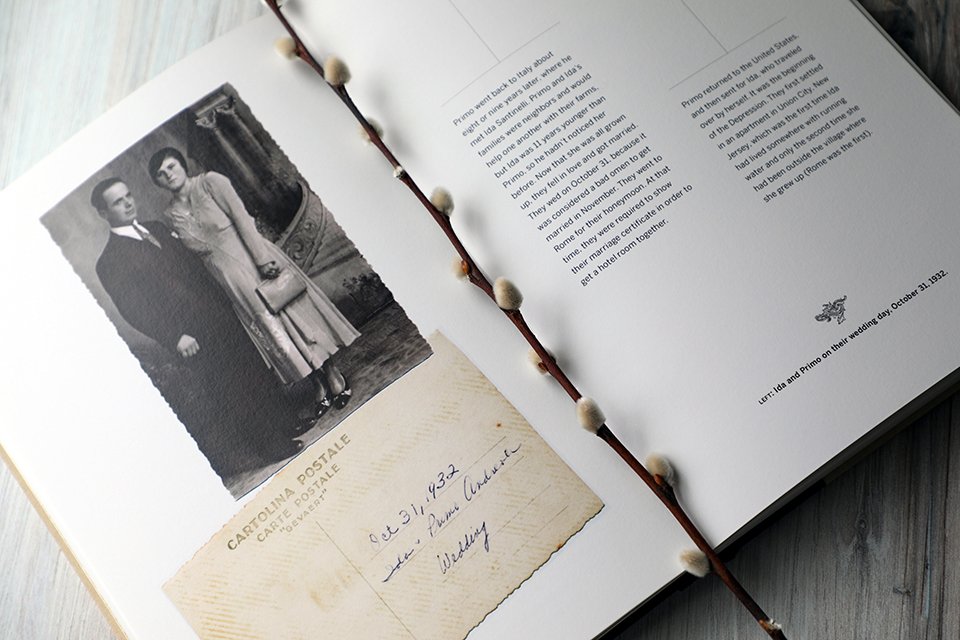
Who’s to say that a photo must be framed on its own? There are myriad ways to incorporate words into your wall art. First, choose a photo that by itself seems to tell a story: It’s clear when or where it was taken, and there are emotions conveyed in people’s expressions. Then, write a brief synopsis of the story behind the picture: 200-300 words is usually sufficient to paint a picture that includes the vital details (who is pictured, the date and specific place if they are known) as well as a little bit about what makes it so special (humor goes a long way!).
Once you have both the photo and your story, it’s time to typeset the text so that it looks worthy of being framed. If you have access to design software such as InDesign (favored by professionals) or Lucidpress (a free alternative), you may consider aligning the text next to or below the image, saving it as a JPEG, then having it printed on photo paper by your local digital printer. If that sounds intimidating, don’t worry: You can create beautiful text right in a Google or Word document, print it on paper, then have it framed in its own mat window within the frame, as shown below.
Here’s a sample caption that tells the story behind the photo above—in fewer than 200 words: “I will always remember Abuela Manuela wearing a brightly patterned house dress, smiling, and smelling like garlic or some other pungent spice that seemed to permeate her pores. Every time we visited her home in Paramus, New Jersey, she had something for dinner simmering on the stove (to this day I often cook her recipe for ropa vieja, but it’s never quite the same!). She used to slip dollar bills or fifty-cent coins into our pockets when we were leaving as kids, but it was her hugs that I longed for—they were tight and comforting, and you could feel the love. This picture of her in her kitchen in 1990 captures her spirit just so: her lipstick always smudged from the countless kisses she bestowed on her grandchildren, her gold jewelry always on, even if she was working in the garden outside, and bathed in the warm glow of her favorite room—a room where we kids were always welcomed, and always spoiled. We miss you, Abuela!”
2 - Mail your photo—on a custom postcard that’s surprisingly easy to make!
It’s a rare occasion indeed when we send someone we love snail mail just because. But when it’s as simple as uploading a special photo from your phone and dictating a personal message, what’s stopping us? Modern technology has made mailing Grandma or Poppy a custom postcard as easy as 1-2-3.
So get to it: Pick a picture of your kids that you know their grandparents would love to see (think big—holding the trophy at the spelling bee; and think small—licking the spoon while baking cupcakes with mom). Upload it to a site such as Postsnap or via an app like TouchNote, and for less than five dollars you can personalize and mail a postcard they’ll treasure.
Remember to tell the story of the photo with words. Incorporate dialogue (especially that adorable kidspeak that they’ll one day grow out of!), describe emotions (yours and your kids’), and of course include vital details (when, where). I am willing to bet that the excited response from your recipient will warrant more of these being made—and sent—in the not-too-distant future! Bonus idea: Mail a duplicate to yourself, too, to save in a scrapbook or keepsake box for your children.

For a few dollars more than the cost of a postage stamp you can create and send a customized postcard to a loved one that will delight and surprise.
3 - Journal about your photo—with the intent of using it for a book later.
The idea of creating a photo book—no less a photo book with stories!—is undoubtedly overwhelming. The key to getting past the overwhelm is to tackle one photo and one story at a time.
I suggest setting aside a journal specifically for your photo stories. Then set a goal that is manageable—say, one photo for every month. At the end of each month, go through all the pictures you have taken to decide upon one that feels right (click here for some tips on choosing the best photos for story sharing). If you are journaling on your computer, copy and paste the photo to the top of your journal page before beginning to type. If you are handwriting your memories, print a copy of the photo to tape into your book.
Then, begin writing. Set the scene: What was happening when this photo was taken: Was it just before your kid’s big soccer final, when anticipation was running high? Or was it the day after Thanksgiving, when everyone was exhausted but content to lounge around the house together? By choosing moments that encompass all aspects of your life—both the milestones and the everyday activities—you’re sure to preserve stories that will resonate with your family for years to come.
You won’t believe a year has passed when you write about that twelfth photograph! (And hey, don’t let me stop you from writing MORE than one photo story every month—the idea is simply to set a reasonable goal!). At this point you may want to create and print a photo book that more permanently preserves your photo stories, or you may simply want to keep going for another year. My suggestion? Do both!

Whether you are journaling digitally or by hand, be sure to include the photo at the beginning of your story—and include the vital details that you might assume are a given, but that truly need to be recorded to ensure they are not forgotten: who, what, when, and where!
Do you have other ideas for preserving the stories behind your family photos? I’d love to hear them (you can share them in the comments below, or hop on Instagram where I am talking with the broader memory-keeping community about this topic a lot!
And, of course, if you’d like help preserving your family stories and photographs, please reach out to set up a free, no-pressure half-hour consultation to see how I might be able to help.
Printing a family photo book? Don’t do THIS to your digital photos, please.
Want your photo memory book to print beautifully? Here's the one thing NOT to do when it comes to your digital photos.

I wrote recently about the main reason so many images end up printing small in life story books: It’s because, quite simply, the digital files are too small. There are three main reasons this happens, and they are avoidable. Unfortunately, the only way to avoid them is to take some action BEFORE a photo is taken.
What if, however, you’ve got a bunch of photos that you simply must include in your printed book and the resolution is lower than needed? Well, they can often print at a small size and look quite good; and there are some tweaks that can be made to optimize print quality of smaller images, too—but these will increase print quality incrementally, not allow you to double the size of your pictures.
What about simply changing the resolution, you ask? Nooooooo—please don’t do that.
The biggest mistake you can make when printing digital photos
Do NOT manually change your image’s resolution.
Repeat: Do NOT increase your image’s resolution in a program such as Photoshop or Lightroom.
Why?
You can’t go in reverse, from a low-resolution image to a high-resolution image. Sure, you can type a higher resolution into your image editing software, technically adding pixels per inch—but those pixels are made up, imagined by the computer to fill in detail where none exists. It’s called resampling, and it’s decidedly bad for print. Simply put: Don’t increase your image’s resolution by resampling.
If you’d like to read a more thorough explanation of DPI, PPI, and resolution, I recommend checking out this thorough and clear post from a Boston-based design studio.
Generally speaking, if you are sending your files to a professional to design your book, always send the file with the highest DPI or PPI (which is most often also the biggest file in the bunch—i.e. 10MB as opposed to 30KB!).
You don’t want them to appear grainy or, even worse, pixelated.

This is an example of a fairly SMALL image that will NOT print well. You can see that at 72 pixels per inch (which is the optimal resolution for displaying on a computer screen, but not for printing) the image would be approximately 12x7 inches. In this Photoshop dialogue box, the option to resample is checked; if you were to increase resolution to 300 ppi here, the resampling would “fill in” pixels to theoretically increase the image’s resolution, but it will do so poorly—see a comparison below of how the image would look.

SMALL TO LARGE FILE SIZE: This is what the image looks like when we attempt to increase its resolution through resampling, as in the dialogue box above. As you can see, detail is poor, and there is a halo effect throughout.

LARGE FILE SIZE TO START: This is what the image looks like when it is scanned at a resolution of 300 ppi instead of the 72 shown above. As you can see, a higher-quality scan yields a higher-quality digital original that WILL print beautifully.
Most of the advice here and above is sufficient for most people to produce gorgeous, high-quality photo books and prints.
Professionals (like me!) who optimize your images for books and other high-quality output will go even further to not only ensure optimal printing results, but to enhance images for visual appeal. We do things such as:
calibrate our monitors so the screen images match the printer specs as closely as possible
consider paper texture and tone when optimizing images for print
extend photos so they have enough bleed to print as full-page images without cropping anything out
retouch imperfections or distracting background noise
sharpen images adequately (but not too much) for print; photographer Christian Hoiberg offers a course called “Ultimate Sharpening Workflow for Fine Art Printing” if you are interested in learning more yourself.
scan print images at high resolution so they can be significantly enlarged with no quality degradation
digitally “repair” rips, stains, and yellowing on old photos
Much can be done to ensure that your precious photos print beautifully in memory books and elsewhere, and I am always thrilled to be the expert on your journey. Just remember, if you go the DIY route: DO NOT manually increase your digital photo’s resolution if you want it to print well…please.
“Why the $#%&* are my pictures so small?!”
Ever printed photos from your phone or digital camera and they look grainy, blurry, or small? Here’s why, and how you can fix it for optimal print results.
In recent months I have heard from more and more people wanting to celebrate their loved ones in tribute books. Whether for a milestone birthday or anniversary, or even to say “congrats” for an achievement (virtual graduation, anyone?), these books are an opportunity to show your love through words and pictures.
But it breaks my heart when the pictures in the books look like postage stamps.
So, today a public service announcement: If you are taking digital photos of your life—whether it be for an eventual family album, yearbook, scrapbook, or even just to live on your devices indefinitely (shudder to think!!)—you MUST use high-resolution images.
Despite sending detailed instructions on how to upload high-resolution images for a book, many people still send me low-resolution digital files and then wonder: “Why the $#%&* are my pictures so small?!”
Every answer I give is some version of: “Well, they’re too damn small!”
Why your digital photos are printing so small: 3 mistakes to avoid
1 - Your photos are too small because you are relying on social media to save and gather them.
Often clients will tell me it’s just easier to pull the photos from an album on Facebook—they’re easy to find, so readily accessible. But what many people don’t realize is that once you upload a picture to Facebook, the platform immediately converts your image to a lower resolution—translation: the file is now smaller, and you can’t get those pixels back.
Even Google Photos degrades photo quality when uploading images to your collection unless (a) you change your setting to request differently or (b) you have the paid version that allows for more storage.
Solution: Keep an archive of all your important photos on your computer, an external hard drive, or in the Cloud. The better organized they are, the easier it will be to find the original (high-resolution) image when you need it!

While it may seem convenient, pulling an image from a social media platform such as Facebook is NOT ideal for printing. These sites immediately strip away pixels from images upon upload, so you’ll need to find your original digital file if you want it to print with a high quality.
2 - Your photos are too small because you have your digital camera settings wrong.
Maybe you wanted to ensure you could hold as many pictures as possible on your memory card, or maybe you simply never went in to check the settings on your new high-end digital camera. Whatever the reason, many people (are you one of them?) are shooting all their family photos on a low-resolution setting.
If you are taking photos that you plan to eventually print for an album or in a book, you must ensure that the images are taken with enough pixels per inch. And just because your camera comes with a high megapixel count, you’re not necessarily set up to capture high-resolution images (there’s image compression to consider, for example, and how much digital zoom you may be using when taking a shot).
“Choosing the right settings on your camera is only the starting point to getting the best resolution possible out of your images,” Elizabeth Mott writes in this helpful piece about how to ensure you’re taking high-resolution photos with your digital camera.
My advice? The cost of both smart phone storage and memory cards for digital cameras has come down sufficiently that I think buying one with LOTS of storage is worth the investment; once you know you’ve got plenty of space to save your photos, snap away at the highest resolution possible—I promise you won’t regret it when you feel compelled to print one of those precious gems (or, even better, many of them in a book).

Every camera manufacturer displays resolution settings differently. Here is an example of choices on a Canon DSLR. If you’re photographing for print, use either the large setting (L, which translates to a 5184 x 3456 JPEG image of 18MP) or the RAW one (which has the same pixel dimensions and file size, but is not compressed like the JPEG).
3 - Your photos are too small because you are being, ahem, lazy.
Not sure where to find the original image? Take a screenshot, many people figure. Or use the shot your daughter emailed to you (without realizing she did not attach the original but a lower-resolution version to increase send speed). If you, like most people, do not have a meticulously organized folder system for backing up your digital photos to a computer or external hard drive, then finding images when you need them will undoubtedly be a challenge. But if you want photos to appear in your book, then you need to do the legwork to discover where those high-res versions are.
A professional personal historian or photo manager can help you do this detective work, if you’re not so inclined. (Give me a call ; )
But no matter who does the legwork, I implore you: Go to the effort of finding the original—larger, higher-quality—photo if you plan to print it. Why pay for a book, an enlargement to frame, or any other printed memory if it’s not going to look good?
When you email a photo from your phone to another person, you have the option of choosing if you want to “reduce message size by scaling the image.” Doing so is one way images get degraded and end up needing to print at small sizes. For optimal print results, choose “actual size” when sending an image.
Your memories matter enough to treat them with care—and your photos are, if nothing else, repositories of your memories!
Think YOUR KIDS would never throw away your cherished photos? I wouldn’t be so sure...
Imagine: Your treasured family photos, one day thrown in the trash—by your own kids?! Here, the secret to ensuring your photo memories live on.

I know you didn’t snap all those family pictures just for them to end up in the trash…did you?
What would you grab first if your house were on fire?
Your family photos, if you’re anything like most Americans, would be somewhere atop your theoretical list.
We value those old albums passed down from our parents. We cherish the letters Gram tied with a ribbon from when Pops was at war.
But you know what? Those family mementos of old were typically part of small collections, often curated into albums or stored neatly in a single box. In other words, easy to move—and inviting to go through on occasion.
What of your own photos? Are they curated? (Doubtful.) Is the collection in one place? (Yeah, right.) Is it accessible—emotionally accessible, not easy to reach on a shelf? (Oh, you don’t even understand this question?)
Allow me to explain: If your photos number in the thousands, exist across multiple social media platforms and devices, and finding one image that holds meaning poses a challenge—well, that’s not an emotionally accessible family archive.
What does make for an inviting family photo collection?
Your descendants will be more likely to hold on to your photos if:
they can find ones that matter to them
they know who is in the pictures
the stories behind the photos are evident
they are not overwhelmed by the sheer volume and disarray of the photo collection.
I write often about finding the stories behind our family photos, and I believe those stories are what make those photos valuable in the first place.
There are plenty of approaches to whittling down our photo collections, from Marie Kondo minimalism to genealogy purists’ detailed preservation. And I’m more than happy to connect you with a professional photo organizer who can take on the grunt work for you according to your own values.
But I urge you to go beyond mere organization. Paring down and labeling your collection will certainly go far in making your collection valuable to your kids. Adding stories and curating your collection to convey meaning, however, will make your family photo collection invaluable to them.

Would you like to learn more about how we can work together to preserve the stories behind your photos? Please schedule a time for a free 30-minute consultation.
Would you rather begin such a project on your own? I’ve got some resources for that, too:
free download
Grab your free copy of this helpful guide chock-full of tips and ideas for writing the stories behind your favorite family photos.
recommended read
Your memories live in your head and heart, but family photos, heirlooms, and mementos sure do call those memories forth—here’s how to use them to help you begin to create a life story book.
advanced techniques
Interested in paring down your family photos? Photographers call this process culling, and I’ve put together some best practices for culling your family photo collection with intention.
“What’s the best way to share my family photos & stories online?”
You want a digital record of your photos and other family history stuff but realize social media is not a good permanent solution. Consider a family website.
Sure, my primary focus is on creating books to preserve your stories—but at the end of the day, it’s my mission to help you ALL undertake some type of personal preservation project to ensure your legacy is passed on. And there’s no denying that we live much of our lives online these days.
While I love Facebook for keeping me updated as to what’s going on in my local community, and I can sure as heck get lost on some of my favorite Instagram feeds, I don’t recommend relying on ANY social media platform for permanent storage of your family archive. So, what if you want to share your family photos and stories online—for more than just a few fleeting likes?
I invited a memory-keeping colleague to share her thoughts on the matter—welcome NYC–based certified professional photo organizer Marci Brennan on why you should consider creating a family website:

Consider letting the whole family, from kids to grandparents, contribute to making your new family website.
Consider Making a Family Website
Staying in touch with family is paramount these days. Social media, for example, has been instrumental in helping us maintain relationships. But when it comes to tech, not everyone is comfortable with every social media site or app. This is even more important when considering family members of various ages. And social media sites often change their privacy policies. There’s also an increasing number of targeted, distracting ads on them.
Families are realizing that creating a dedicated family website is the best option. It provides a safe and secure place to share and preserve family history while avoiding the pitfalls of social media sites.
Many of these family websites are multi-functional. They offer a variety of services such as message boards, blogs, calendars, and other options. And they have aesthetically pleasing, user-friendly interfaces.
Here are a few of the benefits and features of a dedicated family website:
Access and sharing for all
Family sites level the accessibility field. Age and comfort with tech matter less, as the best sites make navigating their contents easy. All ages can access the site by typing a customized URL / domain name into their browser. Sites are device-agnostic. No special passwords or registration required.
easy connection to your family
Staying in contact with our families allows us to grow closer together. By using a family website, members can share their photos and videos as well as create events. It can become a family communication and library hub. Weddings, anniversaries, birthdays, and graduations can be shared, as well as other important events. Personal projects, movies, family recipes, and other tips can even have their own pages.
Preserving your history
Adding a family tree is a great way to manage, organize, and preserve your family heritage. Photos of people, special places, and memorabilia can inspire memories and spark conversations. Posting digitized versions of old media (such as 8mm, Super 8 and VHS tapes) add another layer of interest and history. Older family members can share and document their stories, preserving their memories. The current family as well as future generations will benefit.
Getting started
There are a few options to choose from when creating your family website. I recommend
…which are all dedicated to photography and family memories. Take a look at each site and see which one is best for you.
The Rewards
Many of us will accumulate a massive amount of photos in our lifetimes—tens of thousands, if not more. Perhaps your photos have been professionally scanned, organized and backed up on an external hard drive (or two) already. Or maybe, as the family historian, you have even done this yourself. While that is an essential step and an added layer of security, passing along your photo legacy on a family website to future generations is the ideal solution. This makes inheriting family photos much easier and more enjoyable for everyone. Sharing a curated family library with present and future generations is a timeless and uniquely precious gift.
about the author
Marci Brennan is a TPM certified professional photo organizer. She lives in Queens, New York, and works with her husband, videographer/photographer Chris George. Together they offer photo and video organizing services throughout New York City and beyond. At Past Present Pix their goal is to help busy families manage, organize, and preserve their photo and video collections so their valuable media is always at their fingertips and safely backed up.
Way more than a photo book—the ultimate gift for someone you love
These 3 photo book themes make it easy to show someone how much they are loved! Perfect for surprise birthday and graduation gifts—or just because.
A photo memory book doesn’t have to be comprehensive or long to make people feel all the feels—it simply needs to tell stories that matter.
For that to happen you need to do two things well:
Curate your photos. Choose not only the best in terms of image quality and spiffed-up subjects, but also the images that convey a message and together focus on one theme.
Add meaningful stories. By that I don’t mean cinema-worthy dramas or eloquently written tales—I DO MEAN stories that connect to your theme and evoke an emotional response.
“What theme?!” you may be asking, panic-stricken at the thought of Pinterest–board planning.
Stop worrying and go a classic and straightforward route! Choose one of the three universal themes below and you’ll surprise your loved one with a gift that oozes with love and lets them know just how special they truly are.
Each of these is fairly easy to put together yourself, but if you’d like to hand it off (and take all the credit on gift day!), then shoot me a note to see how I can help.
3 Ideas for photo book gifts that say “I love you” loud & clear
1 - Top 20 Reasons We Love You
Photo storybook theme:
Top 20 Reasons We Love You
Choose photos of:
In this case, choose your stories first—then select photos that illustrate or match up in some way with the stories you have told. There will almost certainly be occasions when you don’t have a picture of something you listed as a “reason you love” them—don’t worry about it and simply include a photo of them (or you, or your family, or your family pet, lol) that makes you smile. It’s all about bringing joy, after all!
Elaborate with stories about:
Exactly what the title says: Tell them why you love them. Be as specific and as silly or sincere as you want! A few samples to inspire your own thinking:
We love you for your generous spirit—and we don’t mean just paying for ice cream after every baseball game, but for offering to help any and every time we need it.
We love you because you are the epitome of a Southern dad—always handsomely dressed (those bow ties!), always a gentleman (you’d never walk out of an elevator before a female!), and always up for a good barbecue (wearing your striped apron at the grill).
We love you for your stupid nicknames (Stefanie is “Pickle,” Alexander is “Ali Baba,” and Marcus is “Delirious”) that somehow always seem to make it into family lore.
We love you because there is not a soul in this family you would not do anything to protect.
We love you for your courage in serving our country for all these years.
We love you for sneaking us mac-and-cheese (the kind from the blue box) for dinner whenever Mom’s out of town.
Every one of these declarations would be made better—and more powerful, more emotional—by elaborating with a quick remembrance or two. They don’t have to be in-depth stories, just quick memories that your loved one will recognize.
Ideal gift for:
a mom or dad on their birthday
your child or sibling as they go away for college for the first time
a grandparent any time at all (trust me, we never say “I love you” in these meaningful ways enough to our elders!)

2 - We’ll Always Remember…
Photo storybook theme:
We’ll Always Remember…
Choose photos of:
Curating images for this book is a fun family history endeavor! Pull out the oldest photos you have—you know, the ones in the old magnetic albums, in drawers and boxes…the ones you actually printed before our photos lived exclusively on our cameras! Try to select images from different periods of your subject’s life: a cute baby photo, a few childhood shots, awkward pictures from the teen years, and on and on. You get the idea: This photo book is a mini-retrospective of your subject’s life, highlighting milestones and favorite memories along the way.
Elaborate with stories about:
These stories should be reflective and fun: Get the whole family in on the act of remembering and sharing memories of your loved one. Consider the title: What will you always remember? Perhaps a sibling remembers skipping stones in the creek or learning to shred at the local skateboarding park. Perhaps a parent recalls moments that made them most proud, from their first steps learning to walk to the day of their bat mitzvah. Suggestion: Select about 30-50 photos you think you might want to include, then sit around the table together talking about the memories they invoke—I promise the best stories will make themselves known.
Ideal gift for:
a son or daughter who is engaged to be married and move on to the next chapter of their life
a loved one’s 50th (or 60th or 70th…) birthday
an anniversary of a longstanding friendship
a family who is selling their home filled with a lifetime of memories.
Any life transition is an opportune time to reflect in this way and honor someone with your collective memories.

3 - A Living Tribute for _________ (Just Because)
Photo storybook theme:
A Living Tribute for _________ (Just Because)
Choose photos of:
Select photos of the person you are honoring that show them at their best—not just physically, but in spirit. Show them laughing, participating in their favorite hobby, visiting beloved places. Most importantly: Try to include a photo of the subject WITH each of the people writing the tributes.
Elaborate with stories about:
Solicit tributes from friends, family members, and colleagues that describe what makes your gift recipient so special. Check out this post for specific ideas for writing meaningful tributes, and remember: Always be specific. It”s boring (and too easy) to say: “I have loved you forever, Charlie.” Instead, say, “I knew from the moment you cooked me a chocolate soufflé in your tiny Greenwich Village kitchen that I wanted you to be in my life forever.”
Ideal gift for:
absolutely anyone who you want to know is special and loved
The beauty in this book is that you are doing it for no occasion at all—you are simply honoring them because they are important to you, and telling them is a generous and loving thing to do. Not convinced? Imagine their awe—and joy!—upon receiving such a gift. Such moments are truly priceless.
Remember: The key to creating a most meaningful photo book gift is to go beyond pictures and add stories!
The ideas above should help you generate stories easily. If you speak from the heart and share memories that matter to you, trust me—they will matter to your loved one, too! Get ready for some happy tears…


Hey, memories! Come out of the closet, will you?
Your memories live in your head and heart, but family photos, heirlooms & mementos sure do call those memories forth—how to use them towards a life story book.

Sorting through your family archive for items for your life story book should be more strategic than organizing everything for posterity.
One of the first steps in any life story project is to begin to gather all the stuff in your family archive.
By that I mean photos, journals, letters, and mementos—the stuff of your life.
Finding and inventorying these items will help you in two ways:
as a tool for helping you prioritize and determine what is worth saving and what can be tossed—and how to plan for tackling the archive as a (separate) organization and preservation project.
as a resource for finding those items that will help tell your stories visually for your life story book project.
That second one is what we are focused on here!
How to organize your family archive as a resource for your life story book
Ready to get started? Using this free chart or a digital spreadsheet, make a list of everywhere your items live.
Remember: This is a guide to preparing your archive specifically as a resource for your life story book! That means yes, you should be focused on items that you want to include visually in your book, but also items that simply spark memories.
What is included in your family archive?
A Family Archive Checklist
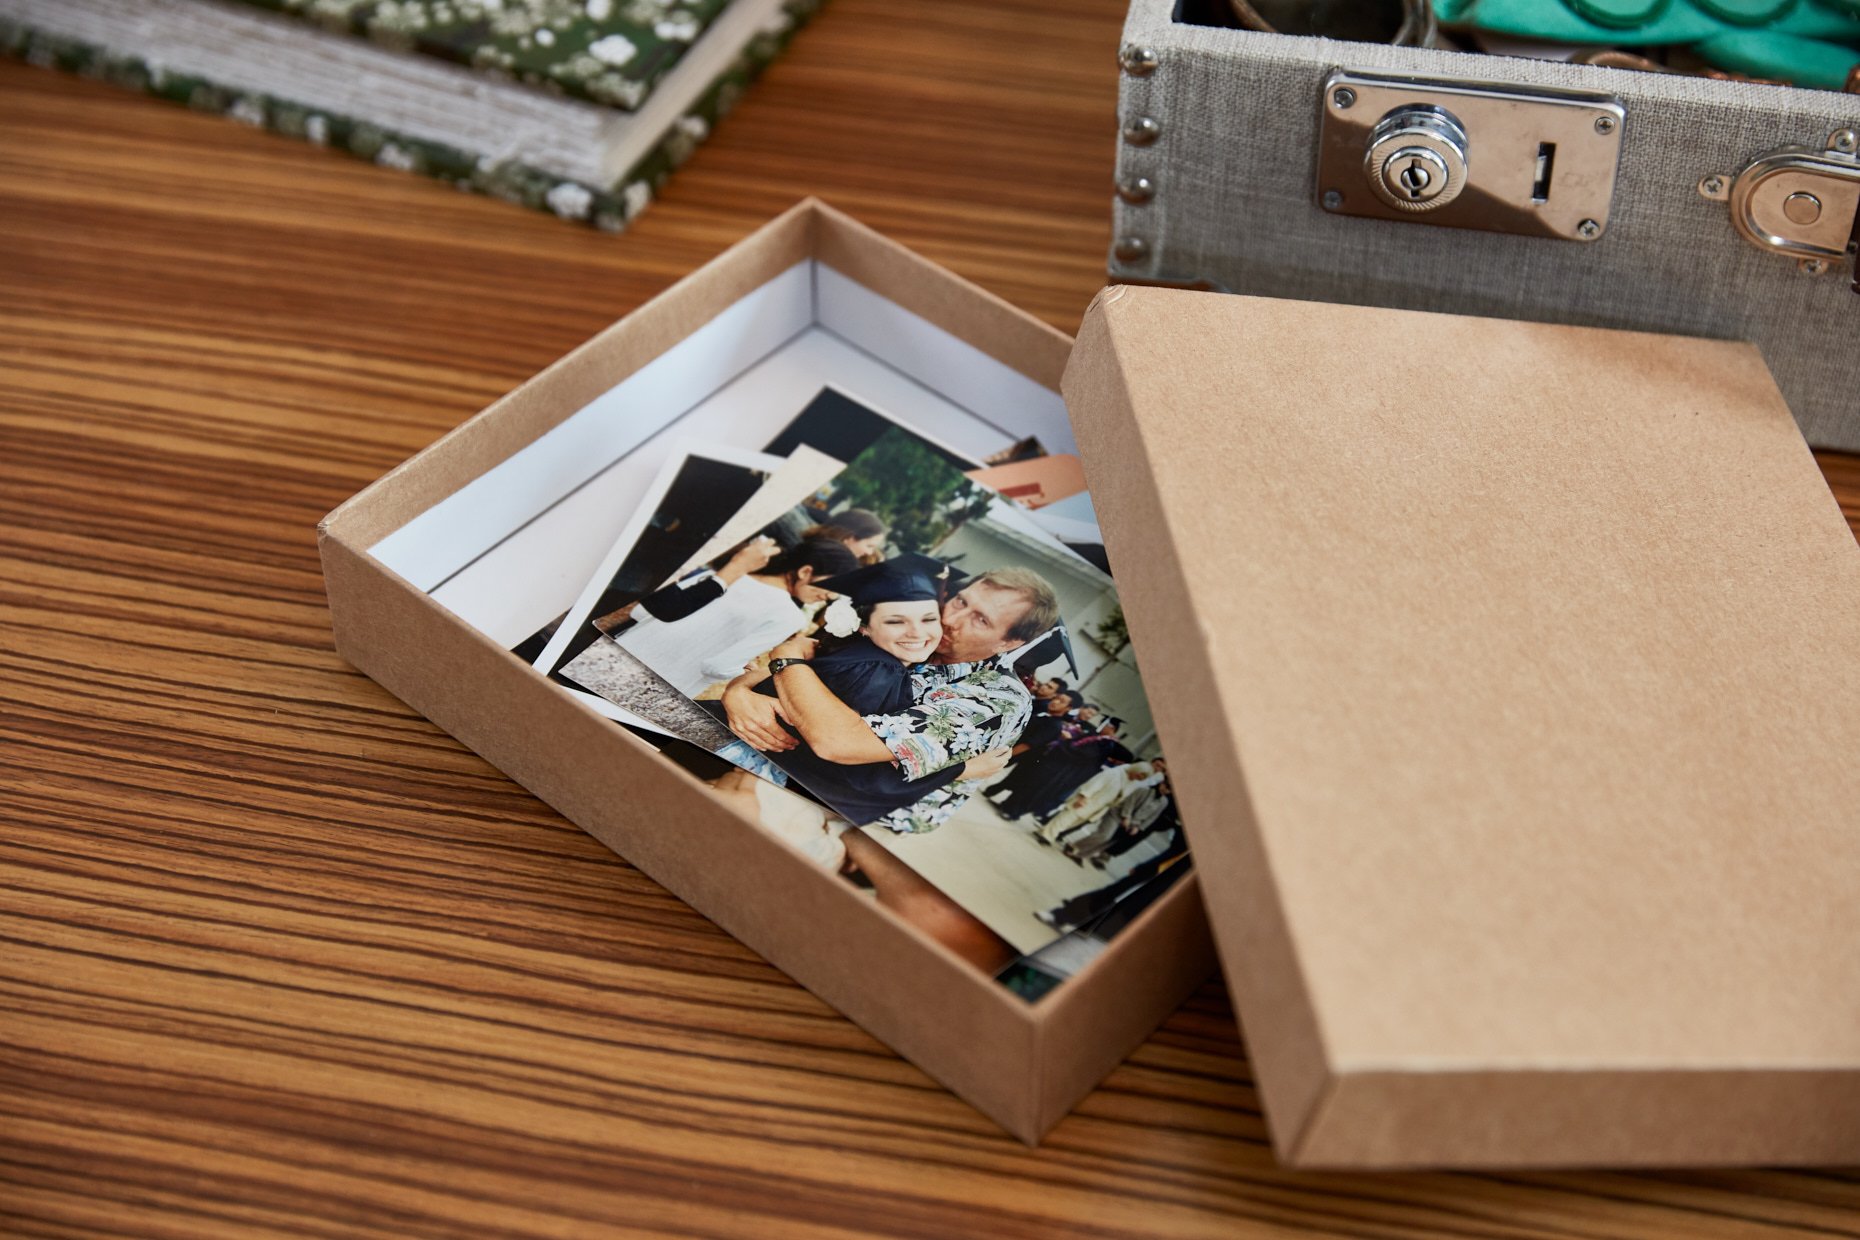
physical family photos in boxes, albums, and frames
digital family photos on phones, computers, old disks, social media accounts, and external hard drives
family papers, including genealogy documentation, birth and death certificates, etc.
letters, journals, and diaries
mementos such as ticket stubs, postcards, report cards, scrapbook ephemera
physical family heirlooms such as inherited china, heritage furniture, passed-down jewelry
Finding inspiration and raw material
Back to using your archive as a reference for your life story book: Consider all of the items in your family archive to be raw materials that you can both find inspiration in and use to help tell your stories. A few ways to mine your family archive for this project:
Resources for remembering
Use specific family photos to jog your memories about your childhood.
Use letters and journals to help you recall details and emotions of recorded experiences.
Pull out tickets stubs and other mementos that hold the most meaning and make you feel something strong—they’ll likely be fodder for compelling stories if they hold that much sway.
Consider your genealogical files to be fact-checking resources for names, dates, and relationships that may be fuzzy in your memory.
Materials to reproduce in your book
Photograph family heirlooms so they can be accompanied by their stories in your book, so years from now they won’t be some dusty relics but heirlooms with a storied pedigree.
Select key old photos to digitize for inclusion in your book: Pictures help bring your words to life, but they must be chosen wisely.
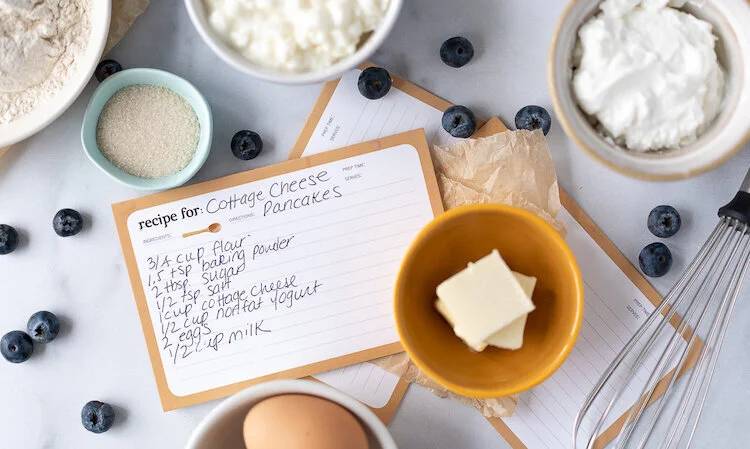
Perhaps your handwritten journals evoke your teen years or capture a particularly emotional period in your life: Consider reproducing a key page or paragraphs throughout your book if you think they will add texture and a visual touchstone.
At this point, you should be most concerned with identifying and locating those items that you feel will be most useful to you in your life story project. Make a separate list, and pull out those materials to have on hand. Consider this a separate collection specifically gathered to help you tell your life story.
“When you have finished your appraisal, you’ll be left with a collection of the best and most significant artifacts,” archivist Margot Note writes. “Because you’ll be focusing on the collections that have the most value, you’ll be able to concentrate your efforts on what is most meaningful to you.” Indeed.
Keeping your curated archive on hand
Now that you have a tighter collection of photos, journals, and mementos set aside specifically for your life story project, keep them on hand—as well as the bulk of your family archive that you designated in the beginning.
Just because you set aside a photo initially doesn’t mean it will be the best for spurring memories later on; you may end up going back to those boxes to find another shot, or flipping through a different journal to discover a later recollection.
Be gentle with yourself. There’s no “getting it right”—this is a journey of discovery! Try to be strategic and deliberate while sorting your family archive, and understand that it’s all too easy to get lost in memories and nostalgia while trying to organize. When you realize that’s happening, steer yourself back to the task at hand, and remember: All of this is to provide you with the opportunity to reflect purposefully later on.

Printable Inventory Form
Download our free printable to help you keep track of all your life story project’s visual assets, from family photos to ticket stubs and journals—it’s easy-peasy.
Related reading
I will link to parts two and three in this series when they are posted:
You might also be interested in:
Tackling your whole archive?
If you would like to tackle getting your archive under control, I highly recommend purchasing archivist Margot Note’s book Creating Family Archives: A Step-by-Step Guide to Saving Your Memories for Future Generations. She’ll walk you through how to handle your materials, the best supplies, to buy, and ways to display and share your personal archives. Keep in mind: This is usually a big (and sprawling) project that takes some time to complete, but it is well worth your effort (especially if you have children; as I have written about before, leaving them a mess of family mementos is usually more of a burden than a welcome gift).