
Memories Matter
Featured blog Posts

READ THE LATEST POSTS

One phone call at a time: Family history in disguise
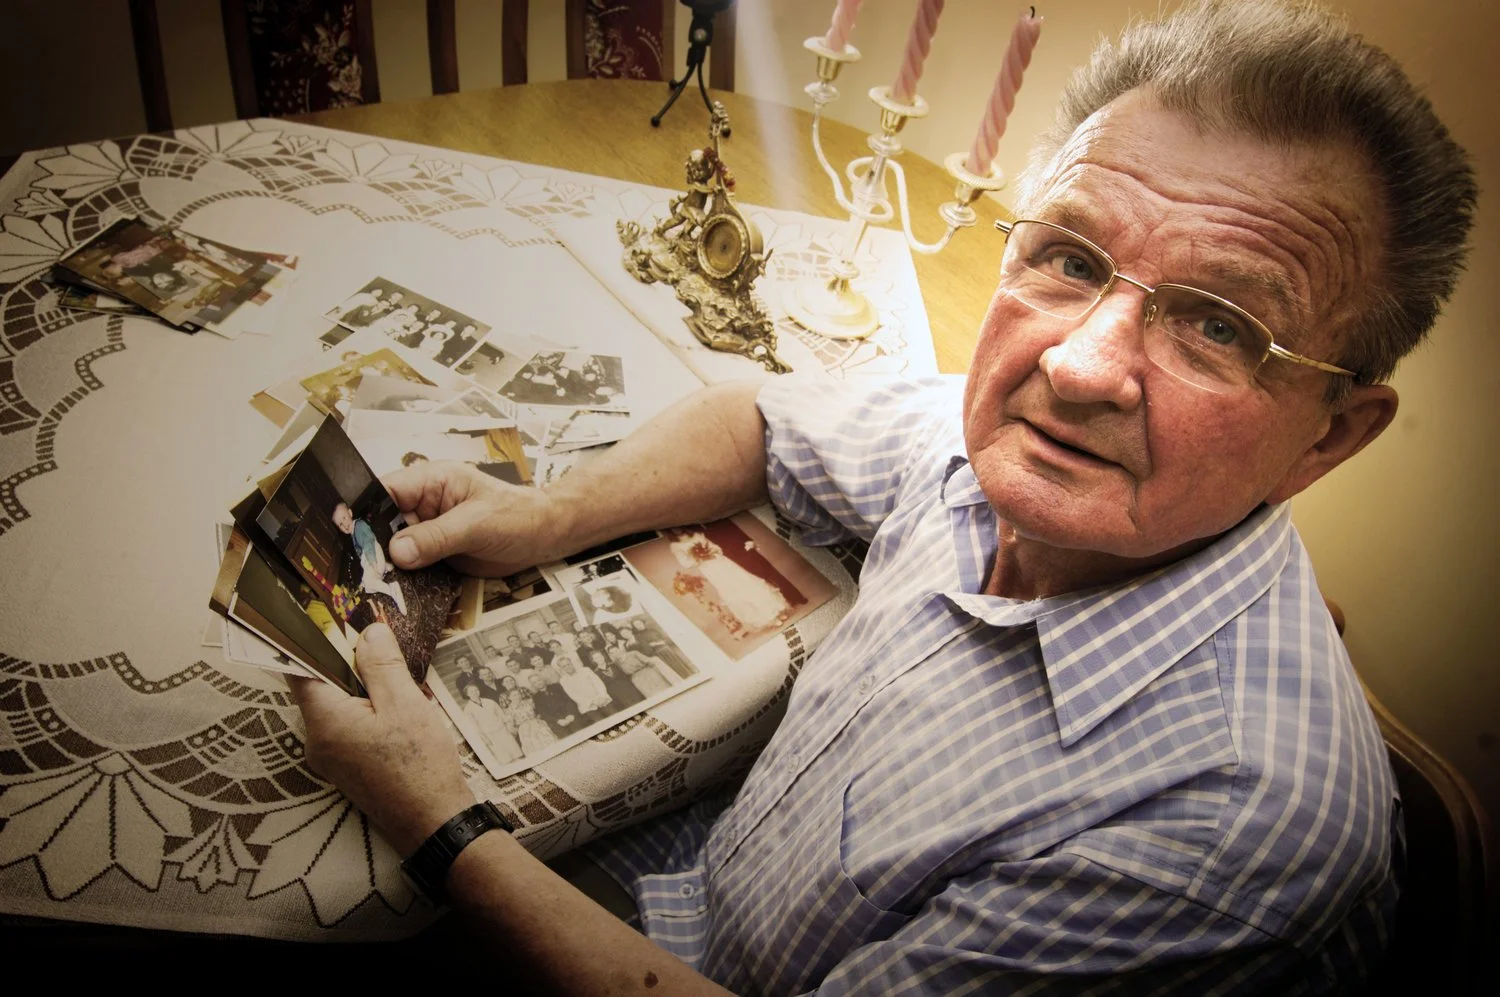
No interest in family history? What if I told you there would be no research involved, no libraries, no family trees—just spoken stories? From mom, from dad?
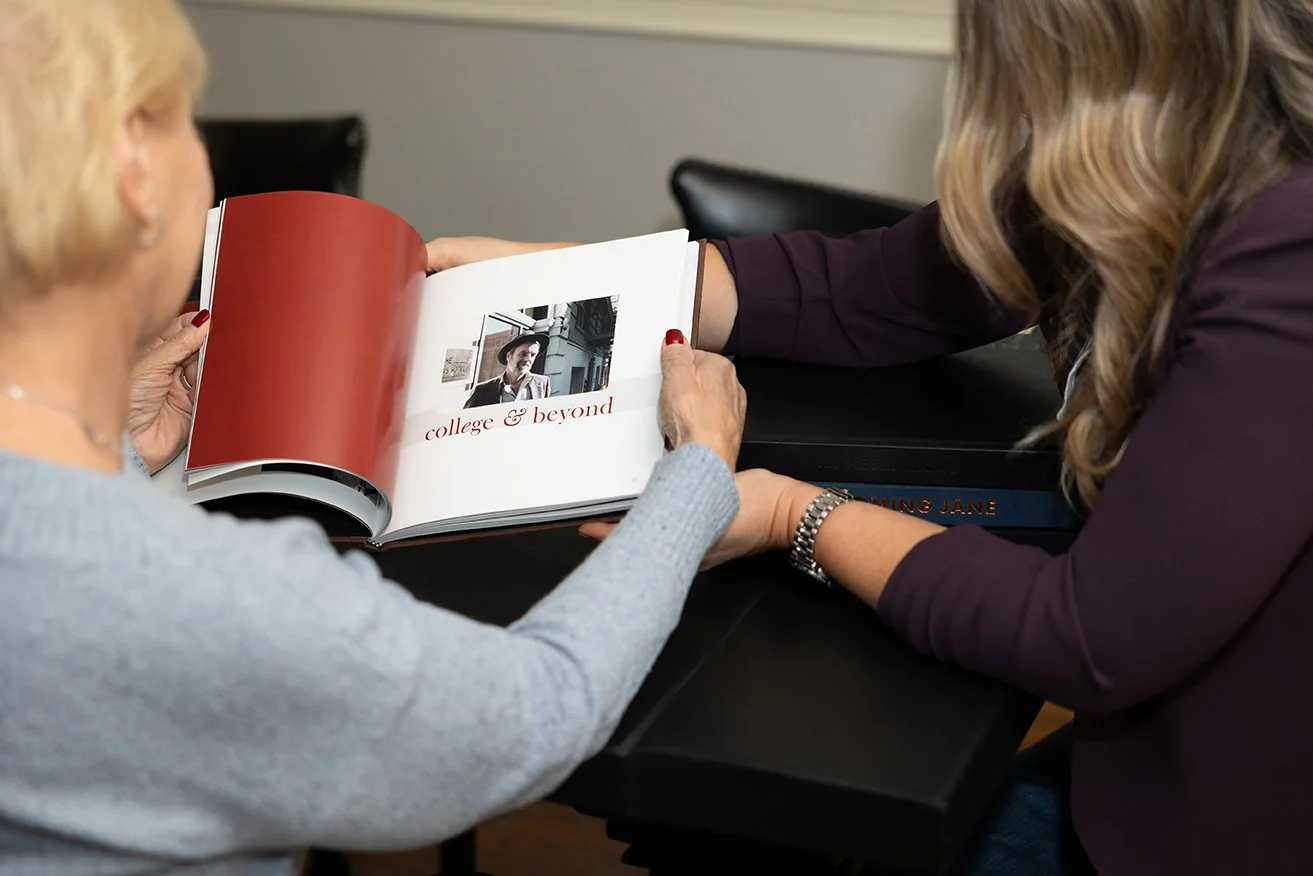
Having intentional phone conversations with a loved one is a fun and meaningful way to begin to document your family history.
There are people who love spending hours at a time buried deep in the archives of a town’s historical society, scrolling old microfiches at the library, and refining their web search terms relentlessly to uncover a single detail about an ancestor they’ve never met. And then there are people who, well, don’t.
If you fall in the ‘don’t love that’ camp, does that mean you’re a family history hater? No!! Decisively, the answer is “no!”
Do you laugh at stories your dad tells about his childhood? Do you get a funny, nostalgic feeling in your tummy when someone pulls out an old photo album overflowing with memories? Do you hope to one day be able to make your Nana’s lasagna as good as she does? Yes? Of course, you answered “yes!”
There are two big parts to a family’s history—the way-back history detailing your ancestors’ names, birth dates, and (hopefully) their stories, gotten through research (chances are you haven’t met most of these folks); and the current family history of you and your kin, gotten through first-person accounts (from living relatives). Looking back and reconnecting with our roots through research has great power, and I wholly advocate for recording your ancestry in this way (watch an episode of Finding Your Roots on PBS to see just how moving it can be!). But if you’re not into sleuthing, or you simply don’t have the time, you can still focus on recording your CURRENT family history.
Why? Well, for one thing, you’ll be handing a gift to your children and their children: the family history of their closest relatives for them to learn from, to be inspired by, and maybe, to build upon (who knows, that research-loving gene may have skipped a generation!). For another thing, you’ll be doing this for YOU: to take some time to intentionally reflect on the journey you have taken to becoming who you are; to better get to know your parents and grandparents so you can see them as individuals (with all the heartbreak, love, challenges, and joys that come with that); and to cement meaningful connections with your loved ones.
And guess what? It’s as easy as picking up the phone and talking. Sure, you can get together and chat over cups of tea, or talk about family stories in group settings, too, but purposefully devoting an entire hourlong phone call to sharing family history is better. It allows you to easily schedule these talks regularly and ensure you have enough time for story gathering. It allows two people—a questioner and a storyteller—to really tune in to one another, and to go deep. It allows for easy audio recording.
An unexpected bonus of having these family history talks on the phone? Sometimes it’s easier to be vulnerable and share of ourselves when we aren’t looking anyone in the eye. Have you ever heard that old advice to talk to your teen when you’re driving together in a car? It’s the same idea. Sitting side-by-side rather than across from someone (or, in this case, on opposite ends of a phone connection) feels nonthreatening—no facial expressions to hint at judgment or reaction of any kind. So, yup, even if you’re calling from a smart phone, skip the Face Time and simply hit the digits for an audio call.
How to conduct family history interviews over the phone
Think you might like to start having some family history conversations with a loved one? Here are a few simple steps to put you on the path to easily recording your legacy:
Decide whom you will interview first.
Mom? Dad? A grandparent or sibling? I recommend choosing someone who you know will be receptive, who you know has great foundational family stories, or who you are worried may have limited time left (they may be impacted by dementia, for instance, or simply be getting older).
Tell this person what you want to do.
“I’d like to have weekly/monthly/bimonthly phone conversations with you where I interview you about your memories.” Stress that there’s no pressure to ‘perform,’ and share your reasons for wanting to embark on this family history project.
Create a list of themes you’d like to discuss with your family member.
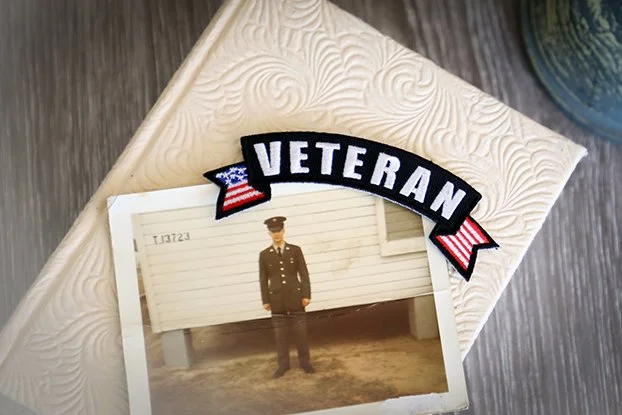
Ideally, each hourlong phone call will have a central theme—for instance, childhood, career, family recipes, traditions, military service, home, love stories, lessons learned, etc. Ask them in advance what things they’d most like to share, and tailor the early part of your list to what excites them. You may want to ask your subject to create a life timeline in advance of your first phone call.
Prepare, or don’t prepare.
You may want to use this list of family history questions to guide your conversations, or create a list of your own according to each talk’s theme. Definitely tell your subject what you’ll be talking about so they have time to let memories simmer, or even dig up relevant photos or letters before you talk. But don’t go crazy with preparation. Ask open-ended questions, listen generously, invite stories, and prompt more with insightful follow-up questions, and you’re guaranteed to gather stories worth saving!
Record your conversations (twice).
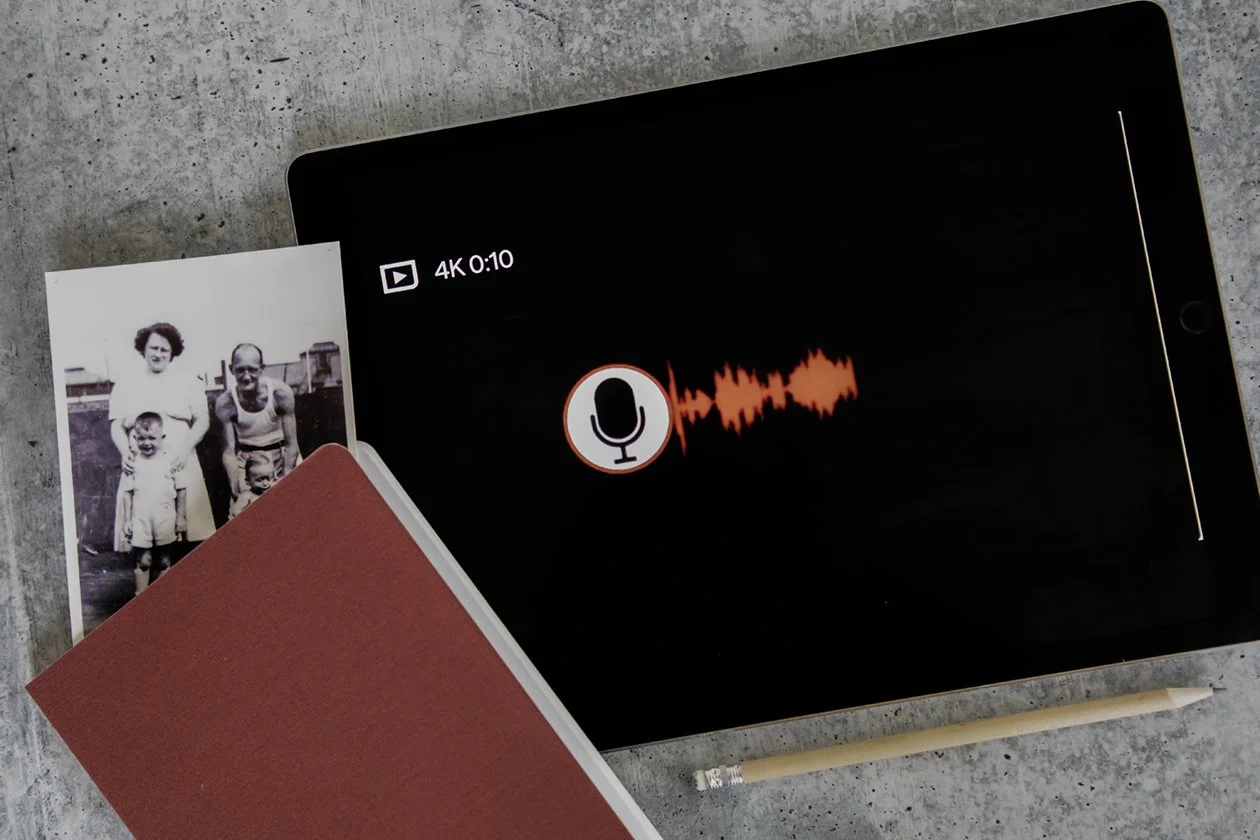
Use two methods to record the audio of your family history talks. You can use a paid service such as TapeACall (bonus: you get accurate transcriptions) to capture sound. Other ways to record audio: Use the phone call option in Google Meet or Zoom to host your call (they each have recording options); or simply put your phone on speaker and hit “record” on the recording app on two devices (your computer and an iPad, for example).
There are a host of things you can do with your family history once it’s recorded, but know this: The most important part is ensuring you capture it in the first place!
I am fairly certain that once you finish your family history calls with Mom, you’ll want to (a) keep talking to her on the regular (that bond is forever!) and (b) start up a new cycle of calls with Dad, Grandma, Grandpop…you get the idea.
More easy ways to gather family history stories from your living relatives:












Life Story Links: September 5, 2023
On the heels of the holiday weekend and waning days of summer, this week’s curated roundup is short but rich: Get your dose of personal history news and tips.
“Writing memoir is one way to explore how you became the person you are and the story of how you got from here to there. Believe me, it’s a good story.”
—Abigail Thomas
Vintage poster promoting literacy produced by the Work Projects Administration; image courtesy of the Library of Congress Prints and Photographs Division, Digital Collection. The posters were designed to publicize exhibits, community activities, theatrical productions, and health and educational programs in seventeen states and the District of Columbia between 1936 to 1943.
Legacies in film
MOVING PICTURES
After watching the British TV show After Life with Ricky Gervais, Montreal–based personal historian Iris Wagner reflected on the enduring impact of videos from departed loved ones.
KEEPER OF STORIES
Texas–based legacy filmmaker Clinton Haby says he approaches his work “with a mindset that it’s sacred, and that future generations are going to want to be consuming this so that they understand where they come from.” Listen in as he talks to podcast host Willie Downs about video storytelling and creating bridges across generations.:
HISTORICAL SELECTIVITY & NARRATIVE
How “two small but potent nonfiction forebears”—documentary films that probe the life and times of those who worked on the original atomic bomb—compare to the blockbuster film by Christopher Nolan, Oppenheimer.
Memories made permanent
HOME SWEET HOME
Did you ever go on a family vacation and plan to make a travel memory book…then never get to it? Last week I shared my top three tips for things to do when you return home to set you up for memory-keeping success later—even if ‘later’ takes a while to come!
LIGHTENING THE LOAD OF FAMILY HEIRLOOMS
“What if we skip the proverbial guilt trip we create by unloading our stuff on our family, intentionally or not, and instead make a plan that will allow everyone to enjoy a trip down memory lane instead?”
THE ACCIDENTAL MEMOIR
“My mother always told us to bring back stories from wherever we went, and the Bronx—what I call the ‘no B.S.’ borough—taught me not to be full of crap, nor full of myself,” says Peter Quinn, author of the memoir Cross Bronx: A Writing Life.
Short takes
How to create a vacation photo book or travel journal: Part 2
You've just returned from a family trip and know you want to make a travel memory book—just not right now! Follow these easy steps so you'll be ready later.
Organizing photos before you sit down to design your travel memory book will make life soooooo much easier!
Recently I shared Part One of this two-part blog about how to create a vacation photo book or travel journal, in which I shared tips for things you could do during your trip to make your memory-keeping project easier later. Here, in Part Two, I am sharing ways you can streamline your book creation after your trip.
Taking these steps will ensure that when you finally sit down to write and design your travel memory book, you’ll have everything you need conveniently at hand.
Do these things shortly after you return from your vacation to set you up for bookmaking success:
1 - Consolidate all your photos in one place.
Download all photos from smart phones and cameras and collect them in one digital space. I use a solid-state external hard drive that I back up regularly to the cloud for this purpose.
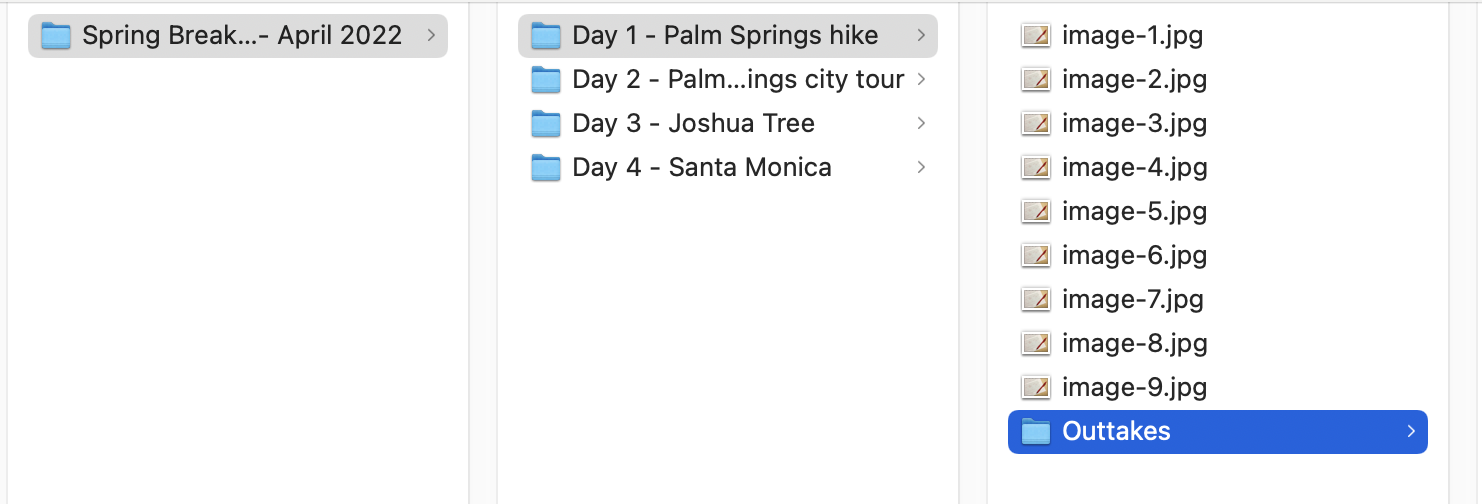
Here is a simple folder structure that works great for organizing vacation photos:
01 DAY 1 - Arrive in Rome
02 DAY 2 - Drive to Pienza + Easter dinner
03 DAY 3 - Winery tour + Tuscany exploration
04 DAY 4 - Vespas in Chianti
…etc.
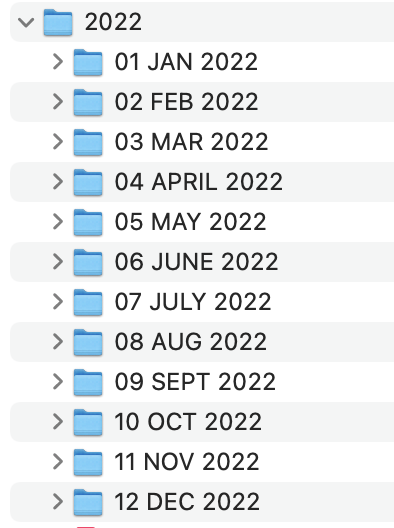
The two-digit introductory numbers at the start of each folder name ensure that the folders will stay in the correct order. I do something similar when organizing photos for my annual photo books:
01 JAN 2023
02 FEB 2023
03 MAR 2023
…etc.
Then, within each of these folders, you can organize your photos into subfolders by theme or subject.
You may also want to create separate folders for images you download from each family member’s phone—that way you can quickly scan for duplicates and know who took each shot. (I recommend gathering these images from everyone’s phone shortly after you return from your vacation—while you may save all those pictures indefinitely, other family members may be more keen to free up digital space, and you don’t want to risk losing their pictures!)
Seem like a lot of work? Trust me, using a smart digital filing system to organize your photos in advance of making your book is way easier than trying to find photos amidst the thousand you took WHILE you are creating that book (a nightmare!!).
2 - Select your favorite photos.
For this one, I generally suggest waiting at least two or three weeks before reviewing your photos with an eye for curation. This emotional and temporal distance will give you a better perspective and allow you to more easily cut photos from your book and select the ones that best tell the story you’d like to tell.
How you mark favorites will depend upon how you store your photos. You may be starring your faves in software such as Google Photos or Lightroom. If you are physically moving your selected digital photos into a folder on your computer, I recommend creating a folder within each thematic folder called OUTTAKES and moving photos you are NOT using there. That way your photo organization system is still in place. And it’s way easier to eliminate photos as you go than to know immediately which images qualify as must-haves!
Don’t stress about this step. Focus on:
choosing the best shot from the multiple you have taken of each part of your trip
giving yourself options for later—who knows, you may want that horizontal shot to be enlarged across a whole spread…but then again, the vertical version may be just right as a section opener!
finding a balance of personality-driven photos (your kids grimacing over a plate of vegetables at your preferred restaurant, say) with gorgeous scenery; of candid shots with stiff posed ones; of color with black-and-white
choosing photos that make you smile and that trigger your memories.
3 - Photograph or scan ephemera or souvenirs.
All those ticket stubs, maps, and random notes that you collected on your travels? Now’s the time to go through them with an eye for what will look good on the page and add visual interest to your photo book.
A ticket stub from a museum that has a Michelangelo sculpture printed on it is much more appealing than an unidentified stub with just text. A train ticket that shows your mileage traveled across Europe is far more compelling than one that simply lists a destination. A receipt that shows the ridiculously cheap price you paid a local villager in the Philippines for your sisal bag may be worthy of inclusion, but forget about most receipts in general.
I recommend scanning all of your paper souvenirs on a flatbed scanner (many home printers with a photocopying function can also scan nowadays, too). Set your parameters to scan full-color, 300dpi, at 100-percent size—this way, you’ll most likely avoid pesky moire patterns when scanning pre-printed materials, and when you place them in your design software, they will run at their actual size (if you create shadows beneath these images, the tickets or other ephemera will look like they are sitting atop your photo book pages, a very cool effect!).
If you don’t have access to a scanner, there are plenty of smart phone apps that can do the job of capturing these small items for print. Check out Google Photo Scan or Photomyne; these free apps enable you to use your phone’s camera to “scan” your souvenirs for use in your travel journal.
Yay! You’re ready to gather all those notes you took while on vacation (which we talked about in Part 1) and sit down to begin creating your travel book. Whether you choose to print photos to place in a good old photo album (my favorite smaller-size ones are from Project Memory, while great larger, archival photo albums are available from Kolo) or design and print a more full-fledged travel book (with written memories and reflections, of course!), you’ve now got everything you need to begin…and finish…your vacation memory book. Happy travels!!
If you prefer to hand over your keepsakes, photos, and travel journal to have a travel book professionally produced, please reach out to see how we could work together.






















Life Story Links: August 22, 2023
In this week's curated roundup for family historians and memory-keepers: pieces on the craft of life writing, new memoir reviews, and ancestors’ artifacts.
“It’s the human imperative, this piecing together of a life. And so, word by word, we lay down our tracks.”
—Dani Shapiro
Vintage poster with original artwork by Earl Kerkam produced some time between 1941-1943 by the Work Projects Administration; image courtesy of the Library of Congress Prints and Photographs Division, Digital Collection. The posters were designed to publicize exhibits, community activities, theatrical productions, and health and educational programs in seventeen states and the District of Columbia between 1936 to 1943.
Narrative framing
WRITING PAST PAIN
How do you share your story without hurting others? Megan February, a trauma-informed book coach, offers up eight important things to consider when writing about your life.
‘RE-STORYING INTERVENTION’
“The way that people tell their life story shapes how meaningful their lives feel.” New research finds that there are psychological benefits to reframing your life as a Hero’s Journey.
GREETINGS FROM…
Last week I shared the first in a two-part series about making memory books from family vacations—starting with the top three things to do during your travels to set you up for travelogue success later.
Things that last
ANCESTORS’ ARTIFACTS
“People don’t give native cultures much credit for their oral processes. When science goes in and verifies something we’ve been talking about for thousands of years, they’re shocked we’ve held onto that history.”
NOTE DISCOVERED IN WALL
“Her letter, a whisper from the past, became a symphony that harmonized generations, reminding us all that our words, even from the tender hands of a 14-year-old, can ripple across time to touch hearts we’ve never known.”
THINGS WE KEEP
“Sharing out loud with others keeps the memories alive, passes on the history, and enables people from all walks of life to build connections and consider their own part in our collective human story.” Meet Martie McNabb, the founder of Show & Tales story-sharing gatherings.
LOVE IN THE TIME OF ALZHEIMER’S
“I’m someone that has come here to help you remember who Augusto Góngora was,” Paulina Urrutia tells her husband in the Chilean documentery The Eternal Memory, called “loving, lyrical,” and “intimate” by reviewers. Read an interview with the film’s director here, and see a trailer below:
DIGITAL GHOSTS
“Estate lawyers have long encouraged clients to account for their digital property, but no one has come up with an emotional road map for the burden of inheriting these things.”
ANALOG TO DIGITAL
“Converting [family slides] into accessible digital media launched me on a journey back to my own childhood and the pasts of my parents, grandparents, and great-grandparents. That, in turn, is giving me a better understanding of how I became me.”
Writing…and reading…our lives
ON FIRST-PERSON WRITING
“And we all change. Stories need nothing else. All you have to add is paper.” For a droll take on the idea of writing about oneself, read this short piece by Rhik Samadder subtitled “What I learned teaching life-writing lessons.”
WRITING FROM AND INTO MEMORIES
“I would save almost everything, the Swedish death cleaners be damned, because these boxes were my inheritance, the stuff out of which my novels are made: old photographs and letters, unanswered questions, ticket stubs, report cards, the unremarkable detritus of ordinary human lives.”
‘A MEMOIR IN EIGHT ARGUMENTS’
“Although I’ve tried to own the fault entirely...I don’t think that take tells the whole story either.” In this excerpt from his new memoir, Chinese Prodigal, David Shih reflects on missing his father’s death.
‘FIRST AUTHORITATIVE BIOGRAPHY’ OF AUGUST WILSON
“If you were interviewing him, you would walk away thinking, ‘I’m the best interviewer in the world!’ Because all he did was talk and tell you these fabulous stories, with these great punchlines and lessons.”
REWRITING HER NARRATIVE
Listen in as successful ghostwriter Lara Love Hardin, author of the new memoir The Many Lives of Mama Love, talks about “her downward spiral from soccer mom to opioid addict to jailhouse shot-caller and her unlikely comeback”:
Short takes
How to create a vacation photo book or travel journal: Part 1
Want to make creating a travel book easy when you return from your family vacation? Follow these steps for easier—and elevated—post-trip memory-keeping.
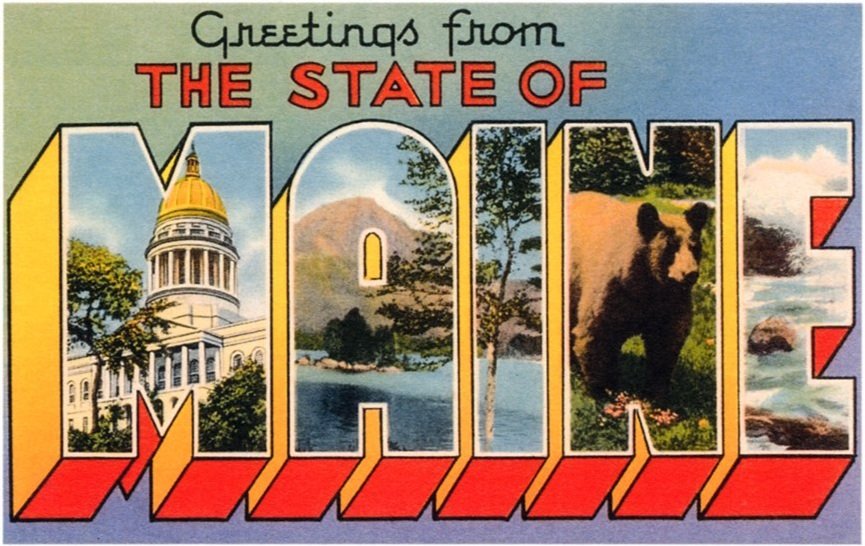
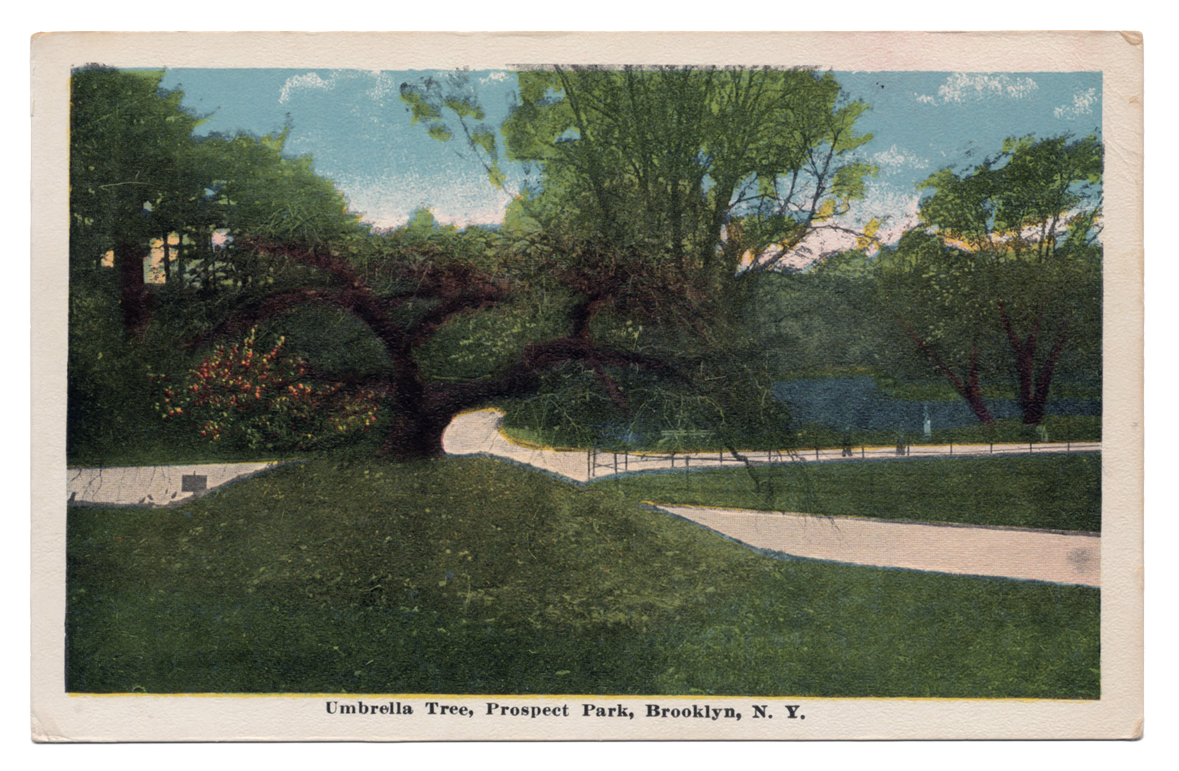
Postcards are waning in popularity, but you may still find some cool vintage or artistic designs on your travels that would make great additions to your travelogue.
Do you have the best of memory-keeping intentions when you travel, only to find your photos stranded on social media and your collected souvenirs stuffed away in a box? No—don’t let that happen to you! Follow these simple steps to help you gather all the right elements during your trip so you can easily put together a photo book or travel journal when you get back home. A little planning goes a long way.
Do these things during your trip to make creating your travel memory book a cinch later:
1 - Take notes over the course of your travels.
By ‘notes’ I mean anything that will help you tell the story of your trip (in the moment you can’t imagine ever forgetting a single detail, but I promise you will!). A few possible notes include:
reference photos—as you head into a venue or city, snap a reference picture of a sign that will orient you as to your location later
handwritten jottings—of everything from tour guide names to the restaurant your family fell in love with
printed ephemera—anything from the article you tore out of the in-flight magazine to a hotel brochure or museum ticket; you won’t necessarily keep all of these, but you will use them to fill in details when writing about your trip later.
a thorough travelogue—not everyone will want to do this (I admit I often have good intentions and then never get to it, especially since I became a mother), but writing about your trip in a journal as it happens can be not only a wonderful way to reflect on your time in a place but also to preserve memories to revisit later.

If I hadn’t snapped a photo of a nearby street sign before I took this shot of dramatic light on a picturesque church, I would never have known what Tuscany town this was from!
2 - Collect some items to add local texture to your book later.

Travel passes, museum ticket stubs, and other ephemera from your trip can be fun additions to your memory book when used in moderation.
There’s no need to buy a hundred postcards or tchotchkes, but selecting a few items that you can scan or photograph when you get home will add great visual interest to your travel book. Some favorite items I have collected on various family trips include:
matchbooks (especially from favorite restaurants or hotels)
stickers (especially these days, sticker designs are often way cooler than postcards!)
simple vendor bags (sometimes a shopping bag or even a small paper bag a vendor slips your gum into may have interesting graphics, like one I got in Florence with a fleur-de-lis pattern)
vintage postcards (I try to buy one of those “Greetings from…” postcards in every city I visit, but they’re getting harder and harder to find; I do seek out illustrated postcards, though, as they often have an artistic or nostalgic vibe I like)
local maps (I’m talking both the kitschy maps marking destinations of interest to tourists as well as beautifully rendered ones often sold in shops)
3 - Take unexpected photographs, too.
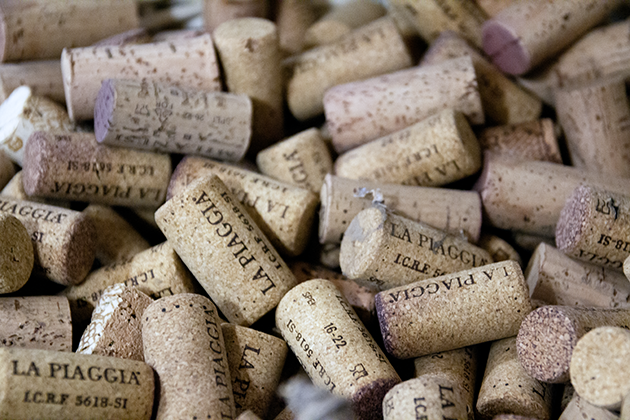
Yes, of course snap the famous landmarks and get some group shots of your family posing in beautiful locales, but remember to also take pictures of less expected details, such as:

Detail photographs can add wonderful personality to the pages of your travel book. This bin of corks caught my attention on a winery tour not only because they have great texture, but because they say the name of the winery. And these cacti in bronzed shoes in Montepulciano—well, they’re just fun!
candid photos of your traveling party
fun selfies when the mood strikes
photo booth strips—admittedly, I am a sucker for these nostalgic gems which invite goofy faces and extreme togetherness (ever tried to squeeze more than four people into one of those booths?!)
details, details, details—on my recent Italy trip, for instance, I aimed my camera at wonderfully whimsical street art in both Florence and Rome; ancient bricks and walkways (ah, what texture!!); wrought-iron filigree designs; and even a few t-shirt slogans that resonated.
In Part Two I share next steps: what to do with all your photos, ticket stubs, and travel notes upon your return to make book creation a cinch!
If you’d rather hand over all your travel goodies to have your travel memory book professionally produced, please reach out to see how we can work together.

Life Story Links: August 7, 2023
This week: interesting takes on how we interpret our memories, capturing the stories of our family heirlooms, and challenges of writing memoir and biography.
“Telling our stories to someone who is really listening offers us the experience of being seen, of being felt—as in, I feel you. I feel your heart. Can you feel mine? Can you feel the warmth of my caring?”
—Anne Lamott
Vintage poster produced in 1936 or 1937 by the Work Projects Administration; image courtesy of the Library of Congress Prints and Photographs Division, Digital Collection. The posters were designed to publicize exhibits, community activities, theatrical productions, and health and educational programs in seventeen states and the District of Columbia between 1936 to 1943.
More stories of our stuff
GIVE VOICE TO YOUR HEIRLOOMS
Last week I wrote about how to capture and preserve the stories behind your family heirlooms, whether you’ve got just a few sentimental items or a house full of passed-down jewelry and valuable antiques.
12,795 POSSESSIONS!
“Now that there is the book, everything can catch fire and at least I will have this reminder that it existed, that it was there.” Meet the woman who photographed every single thing she owns.
Memoirists & biographers speak
ON WRITING, DISCOVERY & DREAMS
“Write to expand your understanding of, and connection to, the world we live in; write to expand your understanding of, and connection to, yourself.” A short but lovely interview with memoirist and memoir teacher Beth Kephart.
ONE BIOGRAPHER’S QUEST
On a recent episode of the podcast A Life in Biography, host Carl Rollyson (author of Biography: A User’s Guide) talks to fellow biographer Marsha Gordon about researching, writing, and publishing her new book. Listen here:
Memories and memoir
THE PAST THROUGH THE LENS OF THE PRESENT
“Memoir should not be subject to rigorous, journalistic lie-detecting. The stories may be true but rarely are they factual.” Darcey Gohring on telling the emotional truth in our life writing.
TIME AND MEMORY
“What we remember tends to be distinctive, emotionally loaded, and deemed worthy of processing and reflecting upon.... Our memories are centered on our life stories and what affected us personally the most.” What about pandemic memories?
EDITING FOR CLARITY & LONGEVITY
Three things every family historian should do during the editing process to ensure that their research and family stories are understood and appreciated by their readers—even 20 years from now.
LIFELONG GIFTS
Want to create a new family heirloom or tradition? The folks at Fatherly recommend checking out a Reddit thread of sentimental gifts to help level-up your gift-giving.
Historical riches
10 MILLION NAMES PROJECT
“All Americans, Black Americans and white Americans, have parts of the puzzle in their pockets or in their homes or in their attics or their closets. Bring those forth, whether they’re old letters or diaries or plantation ledgers.”
DUTCH HOLOCAUST AUTHOR DIES AT 103
“In many interviews [Marga Minco] gave over the years, she always said the reason that she wrote about her family was that she wanted them to be remembered for longer than they lived.”
Short takes
How to edit your family history so it will make sense 20 years from now
Ready to edit your family history or life story book? Follow these three tips from a personal historian to ensure everything is clear for your descendants.
You’ve written your family history in narrative form (congratulations, that was a major undertaking that took great commitment and effort!!!), and now you’re on to next steps: giving your work a final edit and determining how you will preserve it for the next generation. I’m here to share three things you should do during the editing process to ensure that all your hard work is understood and appreciated by your readers.
1 - Be explicit with family members’ surnames and ages.
Your mom’s sister who was named Margaret but only ever went by Aunt Peggy to you and your siblings was actually called Maggie when she was a little girl. There may be a great story in there (and if, so, try to find it through interviews!), but I’m sharing this example to illustrate how important it is to be explicit when introducing family members (a.k.a., your characters).
On first reference, give a person’s full name, as well as some type of relational status (e.g., “my aunt” or “mom’s brother”). How you approach adding in the relationships will depend on the voice you are using to tell your stories. So, if you have written the majority of your family history in first person, then all of the relationships should be in relation to you—“my paternal great-grandmother,” “my father’s step-sister,” etc. If you have chosen to write in a more neutral third-person voice, then determine who the main character is of the particular story you are editing, and designate all people in relation to them—so, if Mary Smith is your story’s protagonist, you’ll introduce people as “John Joseph Smith, Mary’s older brother” and “Desirae Kensington Smith, Mary’s mother.”
You’ll also want to mention any nicknames that you are aware of—and do so in the most clear way possible. Because imagine you simply say “Aunt Peggy decided to move to Texas…” and a relative who has only ever known her as Maggie is reading this; you run the risk of your character going unrecognized or being confused for someone else. I guarantee the chances of this happening increase exponentially the further your reader gets on your family tree. Your grandchild will have no idea who these people are beyond the picture you create on the page.
I think it is so helpful to include an age—even an approximate age—when orienting a reader at the beginning of a particular family story. Was Aunt Peggy approaching 40 when she had her first child? Was your father just a teenager when his own father died? Again, adding ages in this way is to make it easy for your readers to follow what’s happening. You are abundantly familiar with your characters—they are your family, after all, and you’ve likely been spending a lot of time with them via your research; your readers, however, are not quite so familiar. So seamlessly give them the info they need without having to flip back to see who the heck Mike Jessup is again!
2 - Orient your reader with explanatory help throughout your family history.
Just as your reader two generations on will need help with names and relationships, they, too, will need help with other details you may take for granted. Try to do a read of your material as if you are someone who has no familiarity with your family or their history. What questions arise? Where might you add context to help bring your story to life?
A few examples of details you may want to include or elaborate on:
Beyond a city name, can you characterize where they lived: Was that place in that time a wealthy enclave, a haven for transplants from the big city, a blue-collar town where neighbors watched out for one another’ kids?
Beyond a year, might you add some details that reveal how history may have impacted them? “The year was 1865, and while the Civil War had ended, that reality hadn’t quite sunk in for many who lived in my great-grandparents’ home state of Louisiana.” This could be a great opportunity to take advantage of new developments in artificial intelligence and ask ChatGPT or Google Bard for help describing what a time period or region was like—just be sure to include a directive in your chatbot inquiry to “use only factual information” when generating your answer!
What other parts of your story might be vague or confusing for a new reader? If you don’t think you can identify such problem areas, perhaps ask a friend or colleague to give your family history story a read and mark their questions in the margins. I bet you’ll be surprised by some of their queries!
3 - Provide graphic “cheat sheets” to make things easy for your readers.
Reading an account of genealogical research can seem like an exercise in…well, putting someone to sleep—but sharing stories, not just facts, and providing elucidating information (as described above) are great ways to engage your readers. Another is to include visuals that aid in your storytelling.
Family photos go a long way in drawing readers into a story, of course, but there are other graphics you may want to add. Consider creating:
Family tree charts: This can be as simple as a family chart that is generated through your Ancestry or FamilySearch account. Note that I used the plural here—while, yes, you may include a large family tree showcasing all the ancestors whose names you know, I recommend creating a few smaller charts that are relevant to a specific chapter or story. So if you’re telling stories about your second-great-grandfather Will Shannon, make Will the root of your tree and show just his parents and his siblings; then, in a subsequent chapter when you have an account of Will’s son, your great-grandfather, Marcus, create another family chart with Marcus at the root. Do you see why? That way your reader can easily glance at the chart to orient themselves within the family without really taking themselves out of the story.
Maps: If you’re a die-hard genealogy buff, then perhaps you have insurance maps and land ownership maps in your files—include those if they are clear and they help illustrate some aspect of your family history. Then consider including more straightforward maps—an outline of your country of origin with relevant cities marked, say, or a map of the world with your ancestors’ immigration journeys marked with arrows. There are plenty of resources online to buy inexpensive digital maps, including Creative Market or Fiverr (for custom creations); and you can explore public domain maps from David Rumsey and also around the web.











How to preserve the stories behind your family heirlooms
Whether your family heirloom collection consists of generations’ worth of antiques or a handful of sentimental items, catalog them for the next generation.
Photographing your family heirlooms is a first step in preserving their legacy. You can go as basic as snapping a few simple pictures with your phone’s camera or taking the time to style and properly light your heirlooms like I did with this image of my mother’s rosary beads.
So often a family history book has its genesis when a family decides to downsize. The kids are grown and have homes of their own—and they've yet to collect all the things that have been saved in boxes labeled MEMORIES. Going through those things inevitably sparks some pangs: What are we going to do with all this stuff? How can we part with ANY of this? Will the kids even remember what it all means?
The “stuff” holds stories, and it's often those stories we aim to uncover and preserve through personal history interviews—again, usually before donating or tossing much of the stuff…
Sometimes, though, the stuff matters as much as the stories. Just because you plan to hold onto the physical objects (fingers crossed subsequent generations will want to do the same) doesn't mean you shouldn't still capture their stories!
First step: Make an inventory of all the things you consider heirlooms. Next: Prioritize which ones hold the most meaning and begin to capture their history.
Just a few heirlooms?
>> Capture their stories, one heirloom at a time.
Whether you are writing a full-fledged family history or compiling just a few of your favorite personal stories, consider photographing the heirlooms that mean the most to you and writing about them.
Include each object's provenance:
Who owned it first, and who was it passed down to? Write the list in reverse-chronological order, and include years and locations (where the owner lived) whenever possible—these details are gold for any future family historians.
Where was it made/purchased?
Why does it hold meaning?
Do you personally have any special associations with the item (favorite memories, or stories you remember recounted by a grandparent, for instance)?
Lastly, even though you are including a photograph of the heirloom, write a brief description of the object: material (such as an oak cabinet), model (such as of a vintage pistol or a watch), size, etc. This is especially important if you are getting rid of the item or if it becomes separated from this history you are preparing.
Consider recording all of these details in a binder (one sheet per heirloom, stored in clear archival sleeves) or in a recipe box (one index card per heirloom, with a photo and name on the front and details on the back). Other options: Purchase an heirloom journal to capture all the history (I love this one from Hannah Bergen, who also has an heirloom provenance kit), or hire a personal historian to help you put it all in an heirloom book (reach out if interested!).
Loads and loads of artifacts?
>> Create a family heirloom catalog.
Maybe you are cataloguing generations' worth of heirlooms, or maybe you've got a treasure trove of vintage cabinet cards and other photographic heirlooms to make sense of. If you've got more than 20 heirlooms, consider creating a custom index of all of them.
In some ways, this type of project is as straightforward as the previous recommendation: You'll begin by photographing each heirloom (or digitizing your print photos, if you’re dealing with a family photo collection) and recording its provenance in writing. The subsequent steps, though, will elevate this catalog into a family history tool that will be an heirloom unto itself.
First, take your inventory and create categories for your heirlooms to fit into. These will be used to organize the structure of your catalog and to create a useful index for finding heirlooms in various ways, so be as intuitive and descriptive as possible (and know that some heirlooms may fit into multiple categories). Consider creating tags in various categories, such as:
Time period: Civil War Era, 19th Century, 18th Century, 1960s, etc.
Object type: Furniture, Jewelry, Household Object, Photograph, etc.
Owner(s): [names of specific family members who may have at one time had possession of this object]
Value: Sentimental, Financial, Historical
Second, assign tags from each category to every item in your collection. It may be helpful to use a spreadsheet to record all of this data (this is an especially relevant step when dealing with a large number of heirlooms, as you will be able to sort columns by categories or alphabetically—and therefore more easily generate an index).
Third, decide on the broadest categories to create your book architecture—these will be used as de facto chapter headings and will be reflected in your catalog's table of contents. You may want to present your heirlooms based on branches of your family tree, for example (so you may have broad headings of MATERNAL LINE and PATERNAL LINE, then family surnames used to designate chapters within each of those; or instead organize by type of heirlooms, so your chapter titles would derive from those subcategories (Photographs, Furniture, Jewelry, etc.). Choose what makes the most sense for your distinct collection.
Sound like a big undertaking? It is, but if you set parameters early and tackle a few heirlooms per week, it's a project you can complete in a year for even the largest family heirloom collections!
No heirlooms?
>> (I doubt it. Let’s see…)
It's a rare individual who hasn't held onto something of meaning from their childhood or ancestors. Chances are you just wouldn't think of calling those things ‘heirlooms.’
If you hear the word heirloom and think of a dignified mahogany clock or a great-grandmother's passed-down wedding ring, you're right on—that's an heirloom, and Merriam Webster would agree:
1 : a piece of property that descends to the heir as an inseparable part of an inheritance of real property.
But what about the second dictionary definition?
2 : something of special value handed down from one generation to another.
…and who's to say what holds value? You say, that's who. An heirloom in no way needs to be worth a lot of money! Consider these items that I certainly consider heirlooms:
the grease-stained recipe cards my mom saved (including a few of the ones with recipes clipped from old Better Homes & Gardens magazines)
my mom’s wooden spoon, which I use almost daily
my grandfather’s playing cards
my son’s tattered stuffed lion that holds more love and stories than almost any other item from his childhood.
What sentimental items come to mind for you? Once you've gone a nostalgic journey remembering the stories associated with those, consider recording their stories…and calling them heirlooms.


Dawn Roode’s curated roundup for the week of Sept. 23, 2026, is overflowing with recent reads on memoir, life story writing, and family history preservation.